 Loading asset information.
Documentation: 1412_Manual_021122
Blades are 115-116 inch:
This band saw is for cutting wood and wood-based materials. Do not cut plastics, Delrin, metal, laminates with plastics or metals.
DO NOT ATTEMPT TO ADJUST THIS BANDSAW: if it needs adjustment please mark it as down: /asset AMT399 down needs adjustment
Why Do I Need Certification?
Band saws are unlike any other tool in important ways. Experienced bandsaw saw users should be able to:
- configure it for resawing wood
- check that the guide blocks are in the proper position
- check that the tension and tracking are reasonable
- demonstrate basic safety
It’s not a test, but a chance to confirm that you can use the saw safely and to fill in any gaps in your knowledge. The goal is to keep you safe and keep the tool from being damaged.
What It Cuts
This saw is primarily for resawing wood. That is, cutting a long piece into two thinner pieces.
Wood and wood composite materials only. NO METAL or PLASTICS. There are bandsaws in Metal for that.
It is not to be used for non-wood composites or metal at any time. This will destroy the filter and blades very quickly. We have a variety of other tools for that in the Metal area.
About plastics: Some plastics can be cut on a band saw, but AMT is not set up for it and doing so is not okay on the wood bandsaw. The wrong combination will ruin the blades and the wheels and make a nasty mess of the guides. This has happened. Please use the saws in the metal area to cut plastics.
Please investigate FIRST — determine ”if” your material can be cut and ”how”. In any case, you must provide your own blade to cut anything other than wood and wood-based materials. If cutting other materials is shown to be a priority, we can purchase blades.
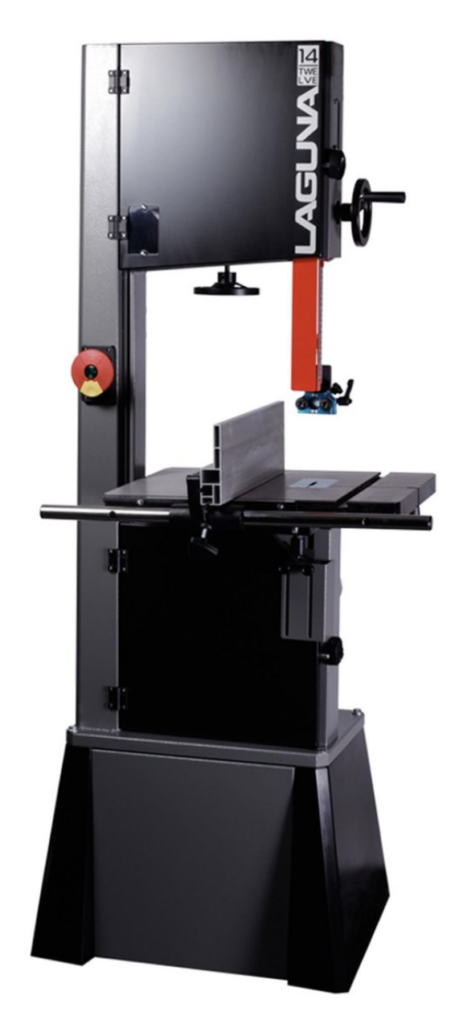
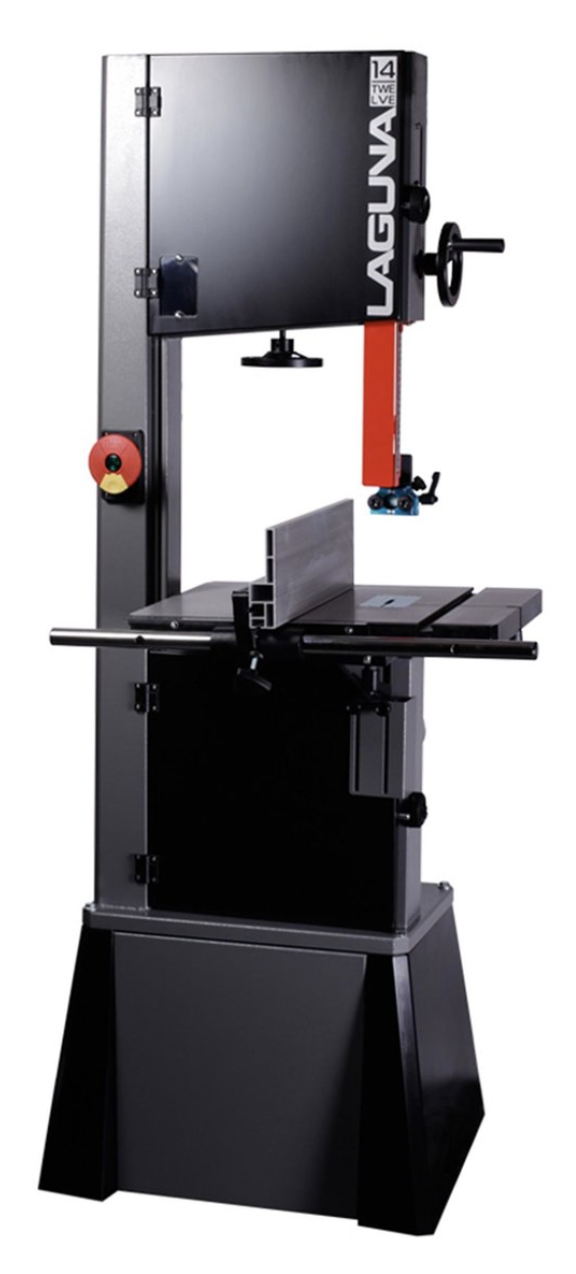
Band Saw Setup
While it is okay to pull the bandsaw out from its current position make sure to put it back in the default position shown below when you are done. Be careful when wheeling it around because it is very top-heavy and can easily tip over.
Members are not allowed to change the blade or adjust tracking or tension or guide block positions.
Instead, if there are any problems with this tool, or if adjustments are needed, mark it either up or down depending on their severity via an asset command in the #workshop channel. For example:
/asset AMT399 Down Tracking is off and blade is not aligned in the guide blocks.
Check the Bandsaw Before Using It
- Unplug the bandsaw
- Inspect the blade
- Check that the blade is there and not broken, kinked
- Make sure the blade moves smoothly up and down and doesn’t crunch or grind when moving
- Make sure that the teeth point down toward the table
- Inspect tracking
- Open top door
- Look through window on side of top and check position of blade on wheel – should be in the middle of the tire
- Rotate the top wheel three complete revolutions and make sure the blade doesn’t wander
- Inspect guide blocks, above the table and below the table
- Teeth should be entirely outside of blocks
- No gap between blocks and blade
- Back stop should be just behind the blade
- The blade should move up and down easily but not side-to-side at all
- Don’t forget to check the guide blocks below the table!
- Inspect table and fence
- Table is clean and clear of debris
- Throat plate is in place
- Table is secured (not loose, the screw handles are underneath the table)
- Fence is clean and undamaged
Risks When Using the Bandsaw
There are lots of things that can go wrong when using the bandsaw for resawing. This is a partial list only:
- The blade can break
- The work can shift can cause an accident
- You could unintentionally put your fingers where the blade is moving
- A long piece of wood could become difficult to control throughout the entire cut
- The wood could become increasingly trapped between the blade and fence, or be pulled away from the fence, because the tracking is incorrect
- A circuit breaker could trip
To minimize these risks:
- Follow ACE safety and use recommendations and policies
- Wear eye protection
- No loose clothing, jewelry, watches, rings, etc.
- Long hair tied back
- No gloves
- Position the cutting guard so the upper guide blocks are within 1/2″ of your stock
- Operate it from the infeed or side of the bandsaw, not the outfeed side
- Keep your eyes on the blade if your hands are over the table
- Do not use this bandsaw unless you have taken the Ace bandsaw certification class and are certified
- Exclusively watch the blade cut the wood while your hands are over the table while the saw is on
- There must be a mostly flat edge to slide along the table – no logs/odd shapes without a sled
- Do not open the doors while the saw is plugged in
- Do not adjust any part of the bandsaw unless you have received training about this specific bandsaw from Ace (not the normal bandsaw certification)
- Use roller stands for wood longer than 1.5 x the length of the table
- Use the fence – do not freehand resaw wood unless it is essentially square in cross section and is at least 3/4″ thick. However, you will always get better resaw results with a fence.
- Band saws are not so loud that you must use hearing protection, but other tools in the shop are, so it is good to have them handy even if you choose not to use them while you are using this bandsaw.
Tension the Blade Before Use
NEW! You must tension/de-tension the blade before/after use.
There is a huge lever on the back of the bandsaw with a rubber handle on the end. When this is pointing up the blade is tensioned and you can see how much tension is on it by looking through the small window in the lower left corner of the top door. When tensioned with a 5/8″ blade (for resawing) the tension should be set to the line between 1/2″ and 3/4″. When the lever is down the tension is removed. If the tension indicator is not in the correct position when the blade is tensioned, you can detension it, rotate the adjusting wheel a little bit (e.g. 1/4 turn) and retension it to see the new tension level. Don’t forget to rotate the blade and check the tracking after the tension is applied. You cannot assess the tracking or blade guides when the blade is detensioned.
IMPORTANT!
—> Before using the bandsaw you must engage the tension by raising the blade tension lever.
—> When you are done using the bandsaw you must disengage the tension by lowering the blade tension lever.
Set-up for Resawing
This bandsaw is configured for resawing wood. Use the other bandsaw for cutting curves.
- Wood
- There must be a mostly flat side on your wood to slide along the table, but the part sliding against the fence can be any shape
- If there isn’t a flat side, such as on a log, you will need to make and use a sled to safely resaw the wood, or cut a flat side onto the wood
- The flat side is intended to keep the wood from shifting position, it doesn’t have to be a completely straight line/reference quality edge
- A sled must slide smoothly along the table and prevent the wood from shifting in any direction. It is OK to screw your wood to the sled well-outside the cut line.
- Fence
- Set the gap between the fence to the width of the piece you want to keep – cut the waste off the other side of the blade from the fence
- Secure the fence
- Cut a scrap of wood and measure the result
- If it is the thickness you want, proceed to the next step (Resawing). If it is the wrong size, adjust the fence and return to step 2
- Cutting Guard
- With the bandsaw off and unplugged, raise or lower the cutting guard by loosening its locking knob.
- Raise or lower the cutting guard and with it the guide blocks so that the stock fits between the guide blocks and the table with about a 1/2″ gap between them
- Lock the the cutting guard with the locking knob
- If your stock varies in height be sure to set the riser to about 1/2″ higher than the highest part of the stock
- If one part sticks out a lot (such as a knot or burl) you could cut that off before proceeding so your stock has a more consistent height and the cutting guard can be lower
- Position the bandsaw where you have enough room in front and behind it for the length of the stock you will use.
- It needs to be a bit more than 1/2 the length of the stock on the front and back side. So, if you have 6′ stock you need a few inches more than 3′ in front of and behind the bandsaw.
- Be mindful of how people move through the shop. Never allow both sides of the workbench to be blocked. Never block the doors.
- Never use a shopvac instead of the cyclone, so that limits where the bandsaw can be placed so it can be reached by a cyclone hose fitting
- Resawing

- Ensure the fence is in the right position and locked in place, as described above
- Turn on the bandsaw by pulling out the big red switch housing.
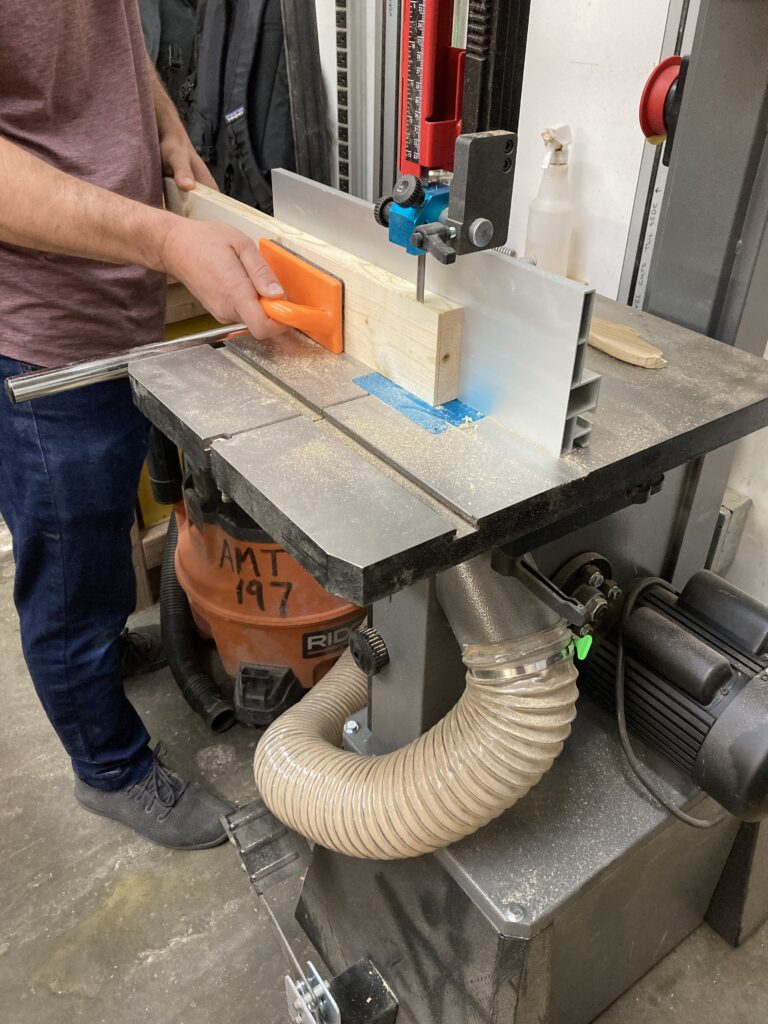
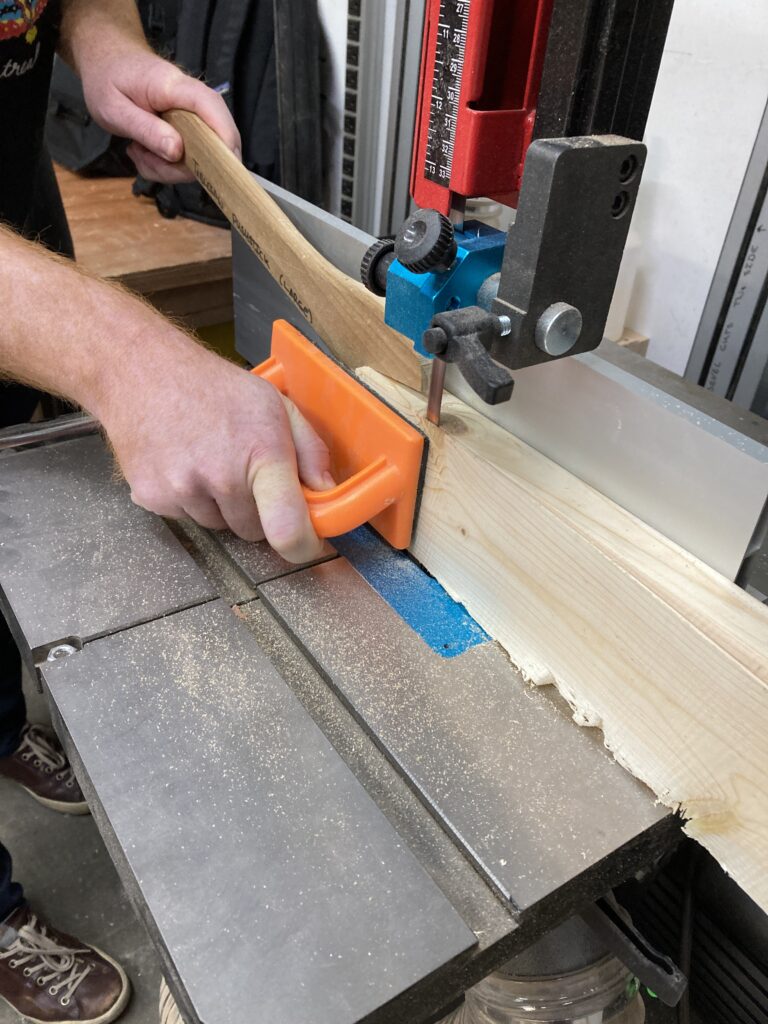
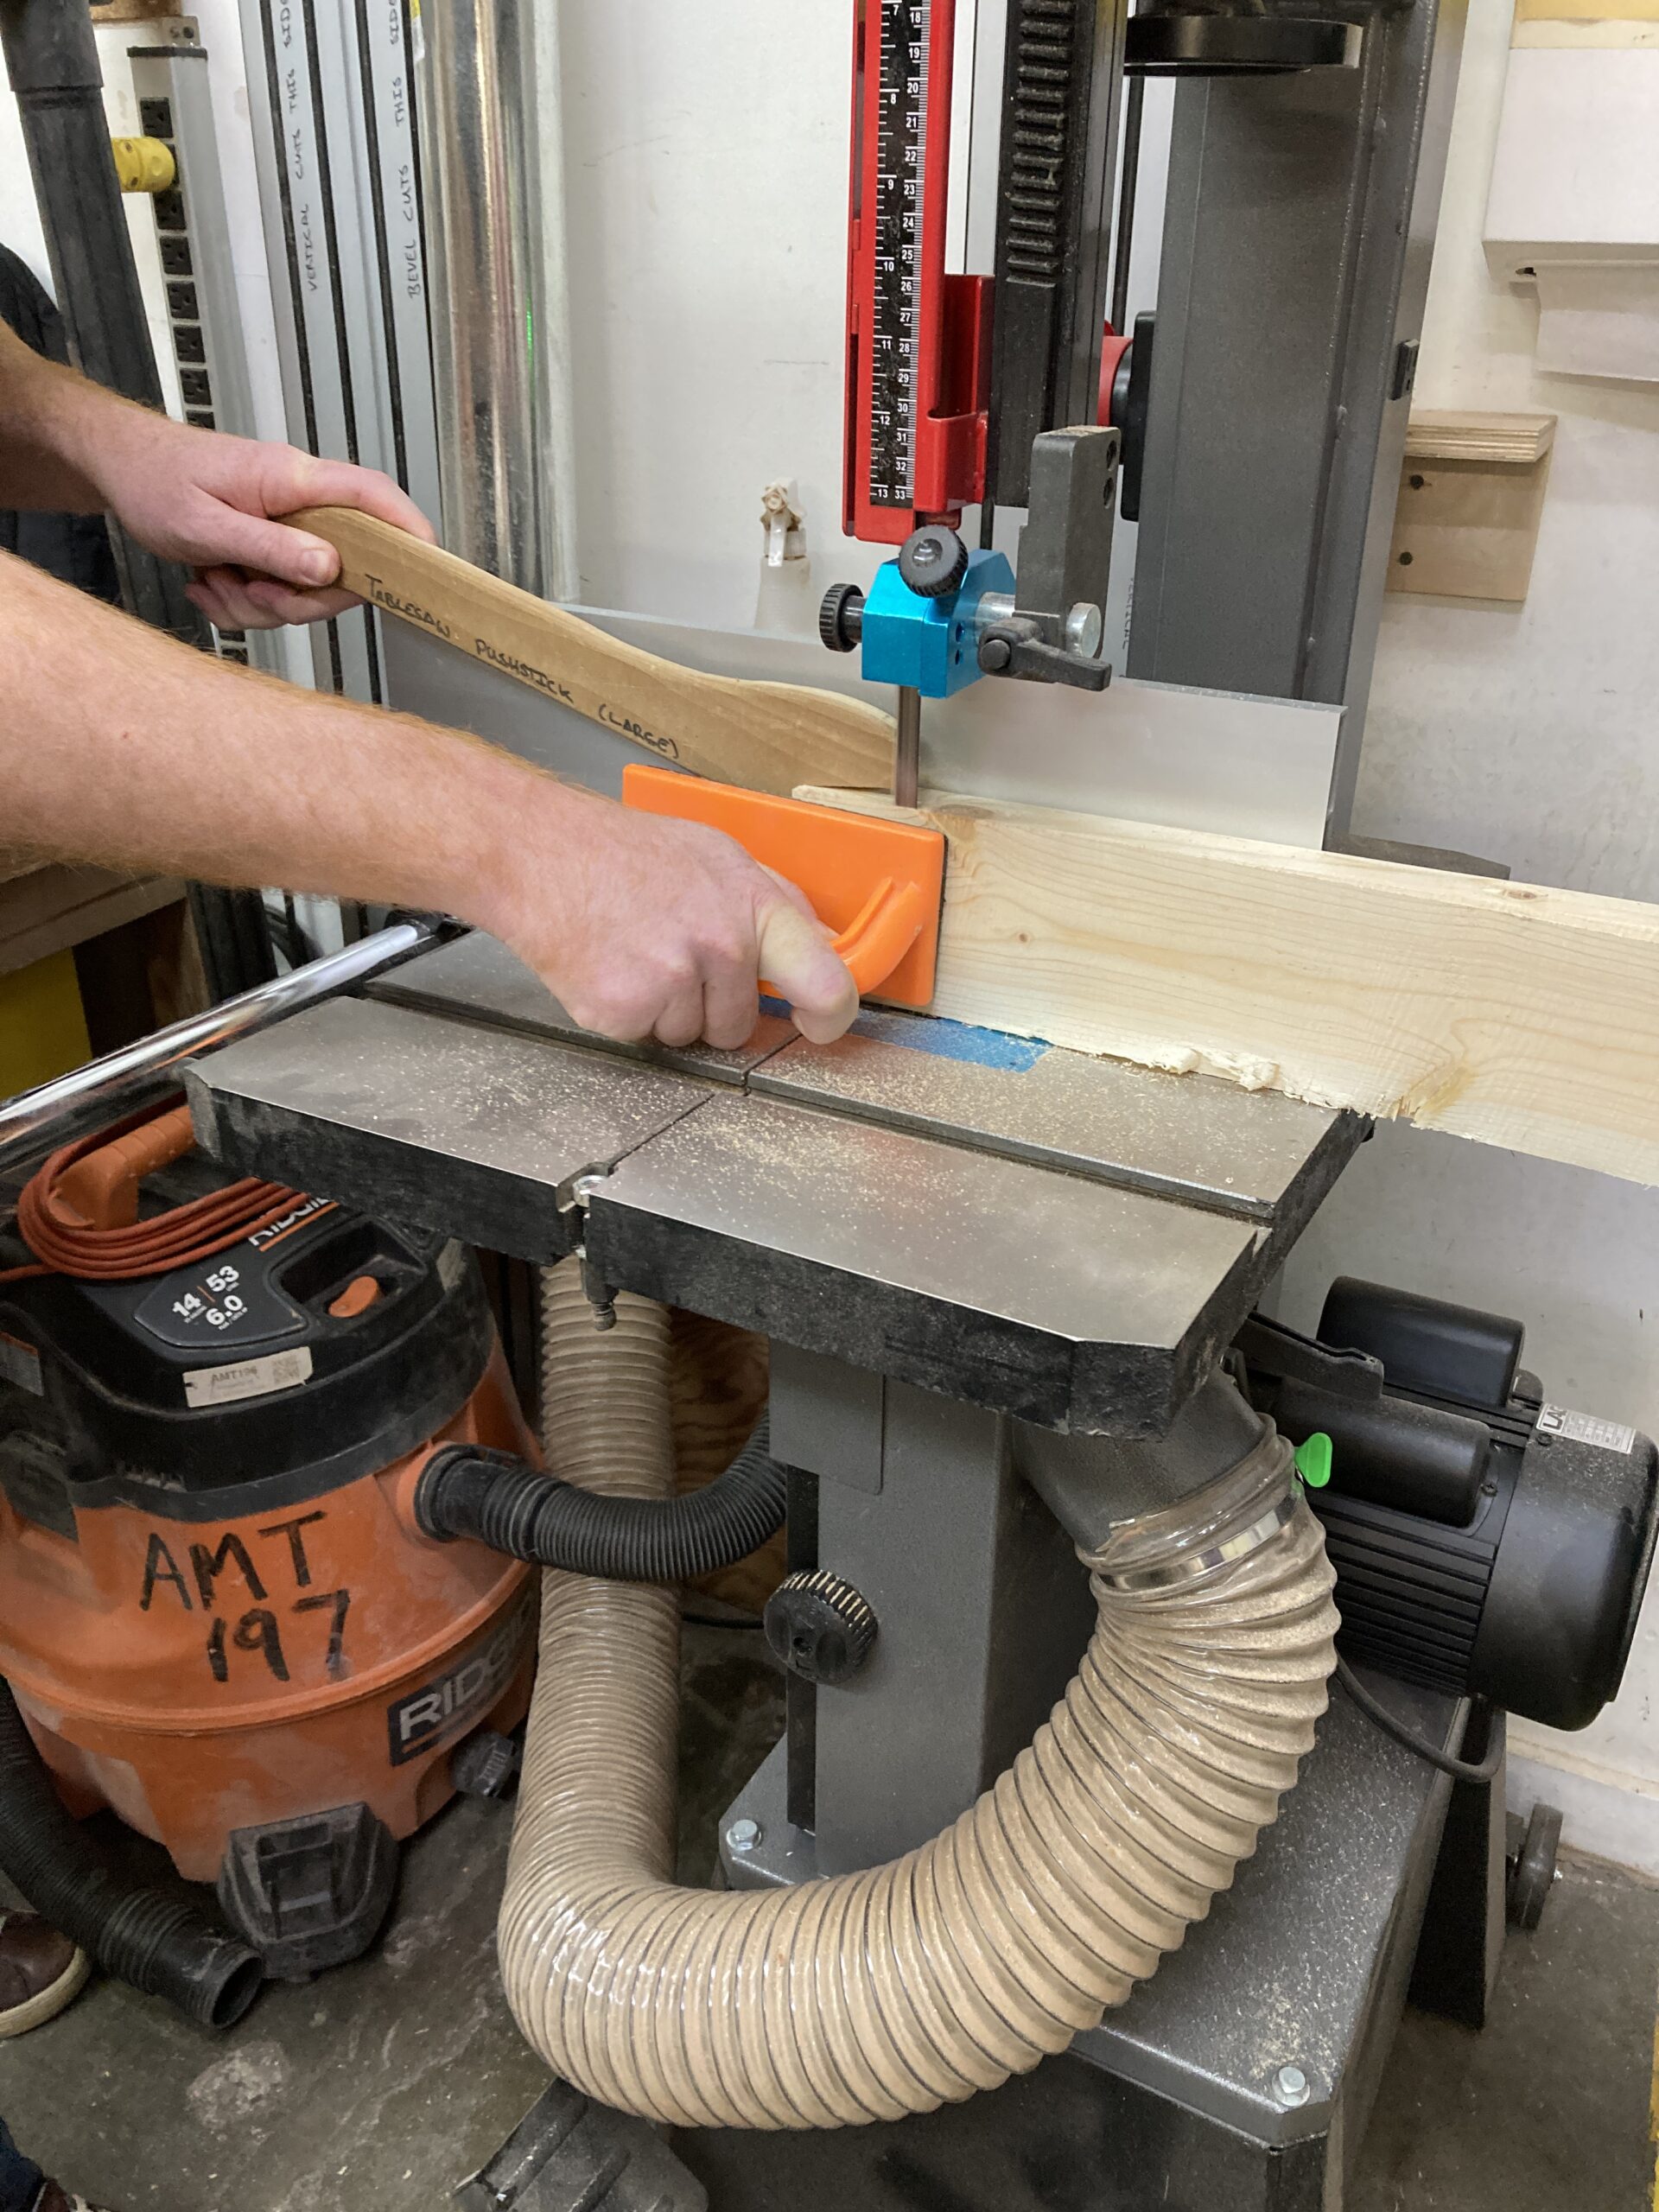
- Grab a scrap of wood to use as a sacrificial push block. It should be big enough to keep your hands at least 4″ from the blade (for example, a 6″ 2×4).
- If the stock is longer than 1.5 x the length of the table you will need rolling stands (found by the cyclone)
- Place the top of the rollers at the same height as the table
- Place the roller stands a bit less than 1/2 the length of the stock away from the table. E.g. 6′ stock should be an inch or two less than 3′ from the table.
- Place a roller stand in front and behind the table lined up so the stock rolls across the tops and is stable
- If you are using a long sled the bottom of the sled should slide on the rolling stands
- Stand in front of the saw and press the stock or sled into the fence while slowly advancing the wood toward the blade
- Watch the blade cutting the wood and make sure the wood never veers away from the fence
- Advance the wood slowly and maintain pressure against the fence, but only ever in front of the blade – never press the stock or sled against the fence behind the blade
- When the end is within 6″ of the blade, use the sacrificial push block to push the wood the rest of the way through the blade. Angle the push block so it also holds the wood against the fence too. Keep the push block on the table at all times it is in use: do not use it like a push stick on a tablesaw!
- When the cut is finished the stock should be stable and not fall either because most of it fits on the table or because of the outfeed roller stand you positioned.
- Turn off the bandsaw buy pushing the big red button.


Accessories
Fence
The fence is secured using a locking knob. Please do not over-tighten the locking knob. No more pressure than you can apply when twisting your own finger. You must use the fence for resawing in most cases. For best results, always use a fence.
Consumables
This saw uses 115″ bands up to ¾” wide, though ½” is sufficient for resawing most lumber.
Dust collection
The dust collection tube should be attached underneath the table. Check the cyclone (AMT255) before using to ensure there is no existing sawdust in the can. What to do if a previous user left dust behind. There is a special port built into the band saw to mate with the dust collection tube. There is a slider in the tube to open and close it that should be pulled out during operation to suck in the dust. The dust collector should be turned on if it is not on already. When you’re done working, empty the cyclone of all sawdust and take it home.
After Using
- Unplug the tool.
- Remove your stock and all offcuts or waste
- Remove and any remaining sawdust with a shopvac.
- Put the rolling stands back if you used them.
- While it is okay to pull the bandsaw out from its current position make sure to put it back in the default position when you are done.
- Remove your dust from the cyclone (AMT255) can after using. What to do if a previous user left dust behind. When you’re done working, empty the cyclone of all sawdust and take it home.
Protecting the Band Saw
Only cut wood on the band saw — never metal or plastic. Periodically unplug the tool and open the doors. Remove any accumulated sawdust.
Maintenance
I have not evaluated the items below yet. I think it needs some research first. – hoco
Monthly
If there is any problem with any part of the band saw that is not resolved through the maintenance steps below, you should report the problem(s) using the /asset command in the workshop channel.
- Unplug the band saw.
- Use orange tension tester and adjust position of magnetic tension scale if needed
- Loosen all guide blocks and move them out of the way of the blade
- Adjust tracking if needed
- Inspect the condition of the tires
- Reposition all guide blocks
- Ensure table is square to blade
- Ensure fence is square to blade and table
- Clean blade of all accumulated glue and pitch with wire brush wheel spinning on a drill, ensuring the rotation moves from the back of the blade toward the front (to avoid damaging the teeth). Rotate the blade slowly after cleaning a small portion – do not turn the saw on!!!
- Check the blade for cracks and damaged teeth
- Deep vacuum the top and bottom wheel areas and all accessible parts outside where dust accumulates
- Wax the tabletop
- Check that the cord and its end are not damaged
- Check that the table throat plate (insert) is not above the tabletop and has no burrs
- If the bandsaw is ready for use, plug it in and test it by resawing a piece of wood
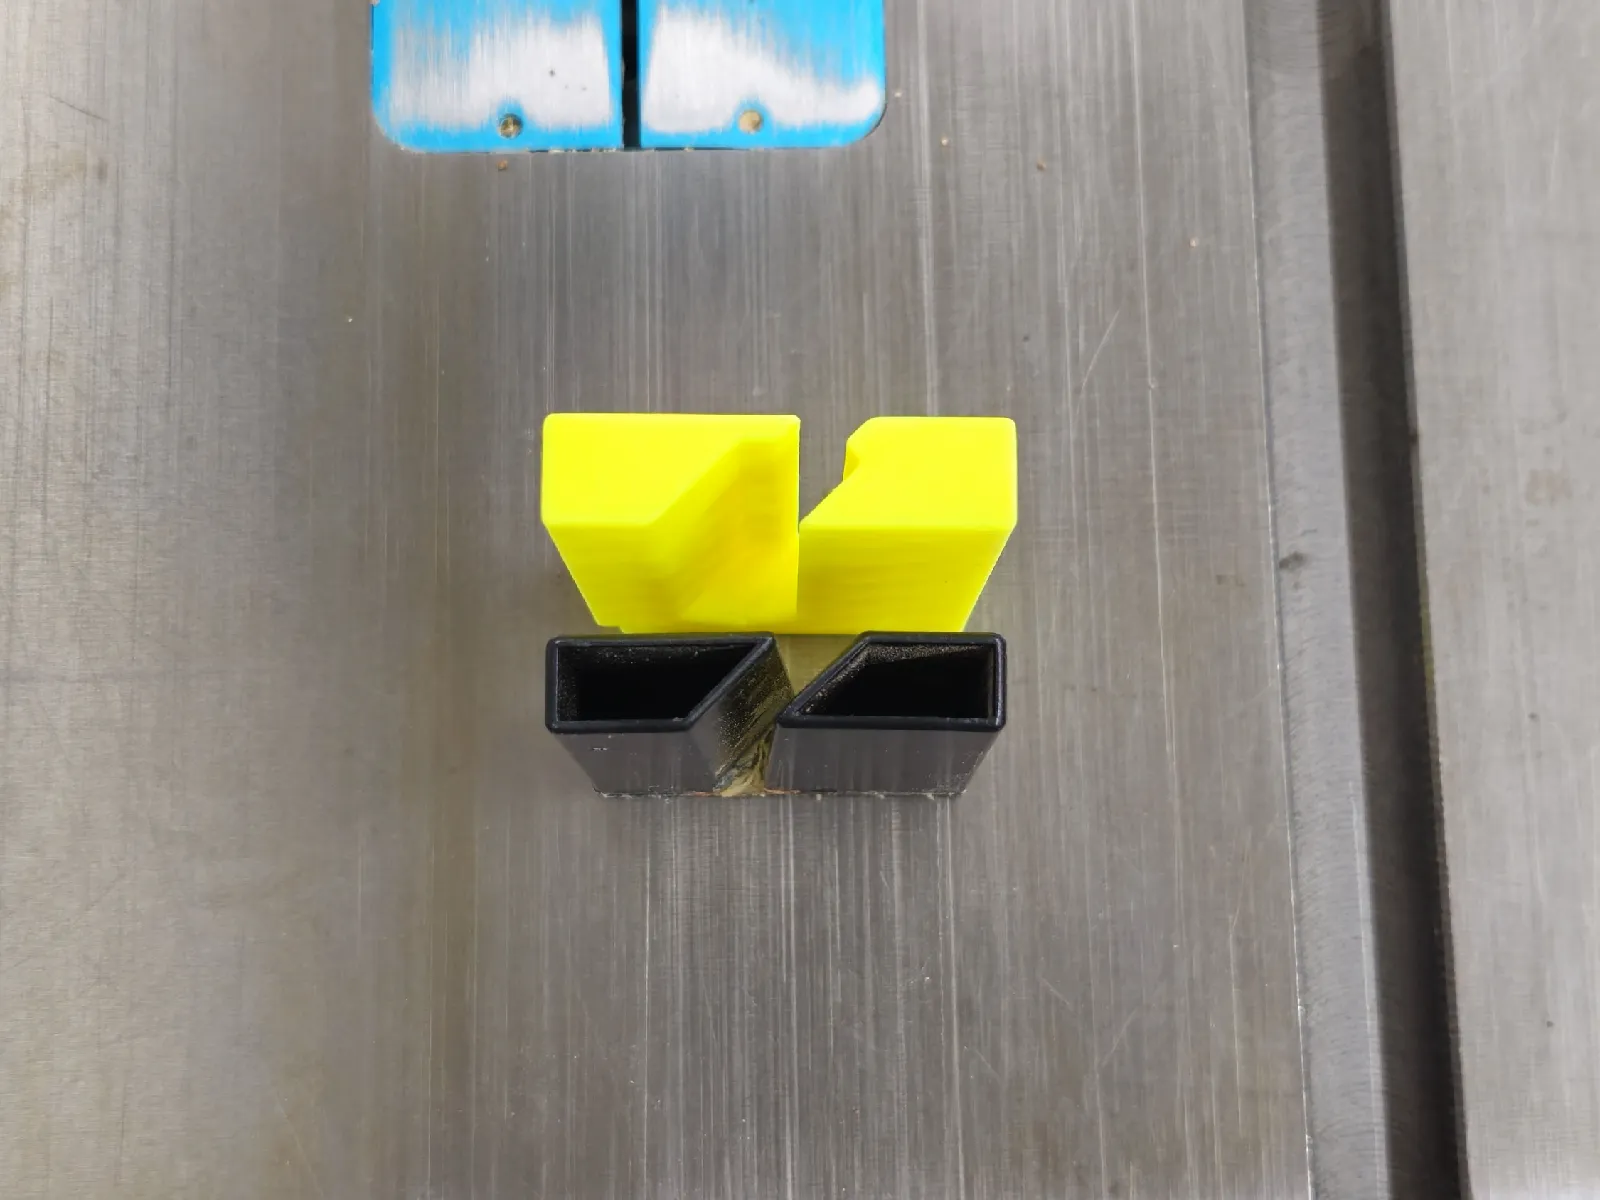
The Dust Deflector Insert
A plastic insert straddles the blade below the table to help deflect sawdust away from the bottom wheel and toward the dust collection port. It is important that this piece always be in place. You can find a link to it on the 3D Printed Workshop Supplies page.
Logs
Loading asset logs.