 Loading asset information.
Documentation:
AMT255 is a CV1950 by Clear Vue Cyclones.
Manual: CV17001950AssemblyGuide
Requirements
- Exactly 4 dust collection gates must be open at all times and prior to turning on
- Check the cyclone can before you begin and notify @team-workshop if a previous user left dust in the bin. Any left over sawdust becomes your responsibility unless you bag it and set it aside before you start.
- Check the dust collection can and HEPA filter prior to starting and intermittently if you are using it for long periods after you have finished
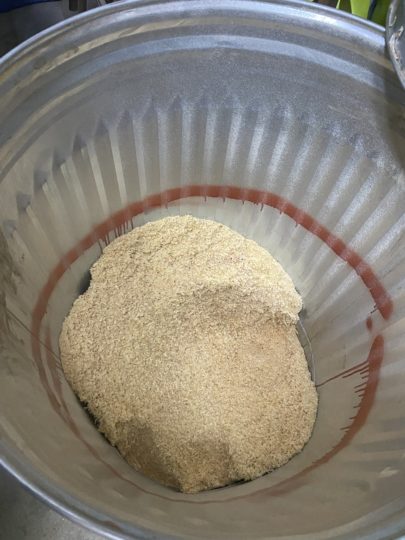
- Dust in the collection bin cannot be above or touching the red painted line (FULL equals 1/3 of the bin)
- Sawdust cannot be placed in the dumpster and must be taken home with you for disposal
- Never put a bag inside the collection bin
How to use
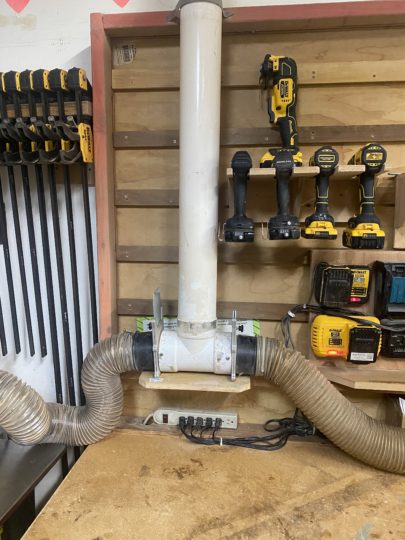
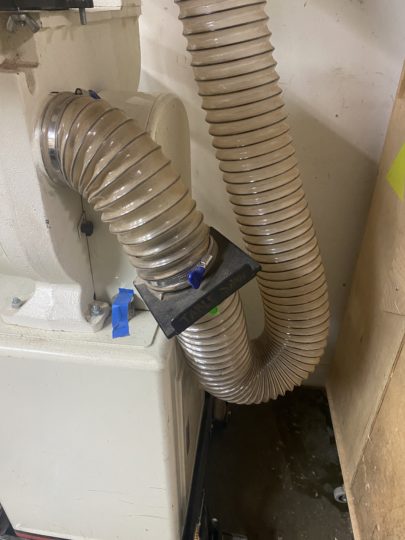
- Check to make sure the dust collection gates is open for the tool you intend to use
- These are located in multiple places and can be found on the collection hose close to each of the larger tools (Planer, Jointer, Table Saw, Band Saw, Panel saw)
- Some examples from in the shop
- Prior to powering on, check the collection bin and make sure it is empty, especially not full.
- Not full means that there is no dust seen at the level of or touching the painted red line inside of the can.
- A full can means there is dust seen at the level of, touching, or concealing the painted red line
- Verify that the lid to the collection can is closed
- Check the clear area at the bottom of the HEPA Filter. If there is anything material there, remove the cap and use a shop vac to clean it out. (https://youtu.be/OiLskS9Wm0c?t=29)
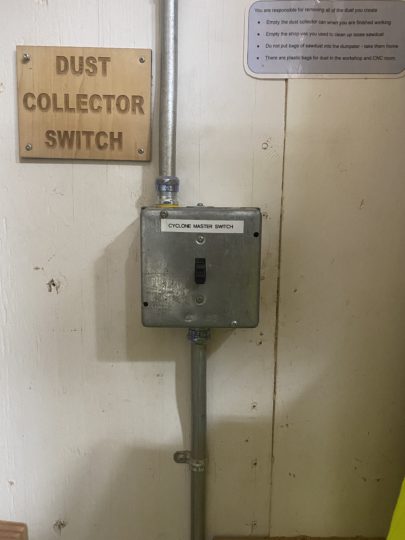
- Locate the power switch on the wall to the left of the cyclone and turn it on
- Do not be concerned when the collection can compresses slightly
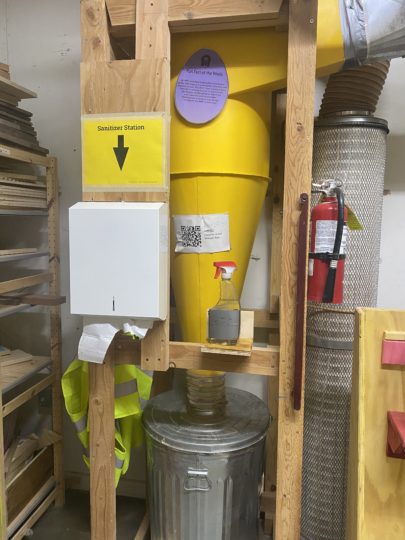
Where is the power switch
The power switch is located on the wall to the left of the big yellow cyclone with a placard identifying it
Collection can
This is full
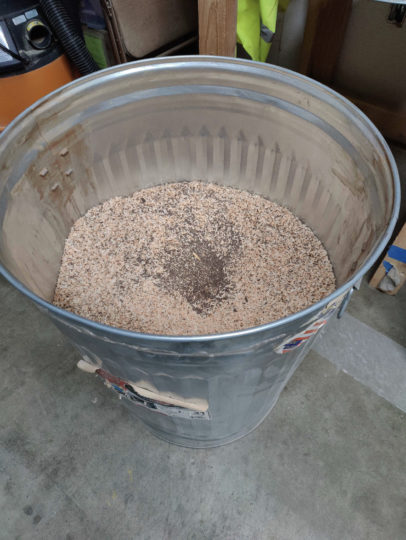
This is not full
When to check if it is full
- Prior to turning on the cyclone. What to do if someone else left dust behind.
- If you are using for a long period of time or generating large amounts of dust then power off and check intermittently
How to check if it is full
- Make sure the cyclone is not powered on
- If it is then turn off the switch. Never attempt to open the can while it is powered on
- Open the lid of the trash can
- Look to see if any collected dust is touching or covering the painted red line. If so then empty the bin
When to empty
- Before starting work if someone else didn’t empty the can and is no longer in the space. (See what to do if someone else left dust behind)
- When you leave after completing your work.
- If the collected dust is at or exceeding the level of the red line. If it is touching the line then it needs to be emptied.
How to empty
- Take a contractors garbage bag from the shelf near the main entrance to the Workshop (with the safety glasses, etc)
- Use the red hamper to hold the contractor’s garbage bag (this is either found next to the cyclone or in the front room of the workshop)
- This is not required but is much easier than trying to hold the bag and empty the can into it by yourself
- Empty the collected dust into the contractor’s bag
- Locate the shop vac and use it to clean up any dust which is now on the floor
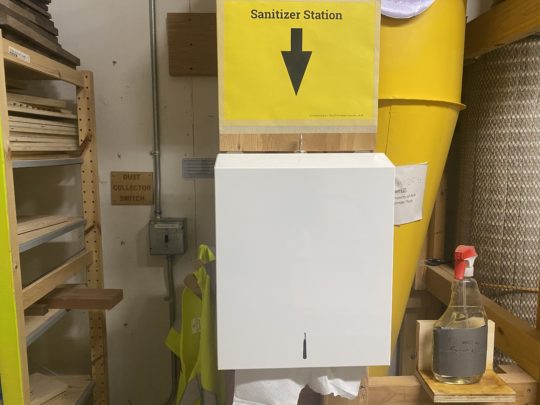
- If it’s. your dust, take the bag with you when you leave the shop. If it was there when you arrived, leave it near the hand sanitizer station and notify @team-workshop.
- This bag cannot be disposed of inside of the dumpster because the building owner/landlord can/will be fined by the trash company as this is not something they accept
- Never place a bag inside of the collection can. Keep it empty and place the lid on it
Collection gate examples
Panel saw
On the right side of the panel saw
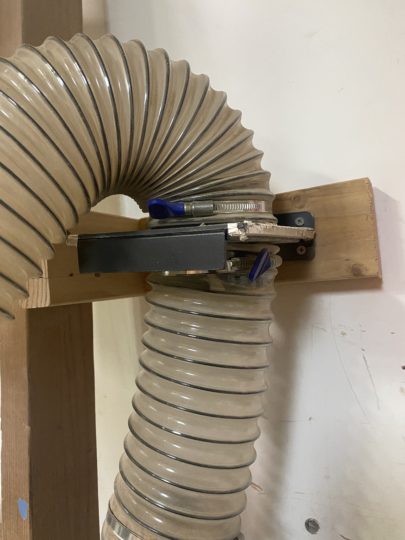
Table saw
Behind the right side of the saw extension table
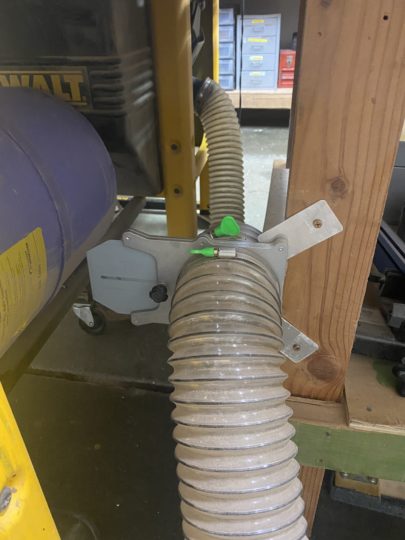
Jointer & planer
Next to the planer above the bench
Band saw
Just below the work surface on the right side
What to do if the collection can was not emptied
- Take a picture of the inside of the can
- Empty the can into a contractors bag so you can do your making
- Post the photo in the #workshop slack channel indicating that it was overfilled and, if you choose to, whoever used it last needs to dispose of the bag. Tag @team-workshop.
- Place the bag on the floor in the front room next to the sanitizing station and indicate this in your post
Maintenance
Cleaning the air filter column
The two cylindrical filters in the filter column are responsible for stopping all the fine particles in the dust stream out so only the air returns to the room. The filters must get clogged over time if they are doing their job because there is no place for the dust to go – it is trapped inside.
With four gates open, the manometer should read at least 12 when the filters are about as unclogged as they can be made using the technique below. If the manometer reads below 9 the filter needs maintenance soon. If it reads 8 or below it needs to be cleaned ASAP and it should be marked down if it reaches 7 or below. At that point the system will begin to fill up with sawdust because the airflow is too low.
Cleaning the air filters requires back-flushing them with high-speed air over the entire surface of the filters, while simultaneously sucking out all the dust through the port at the bottom of the filter column. This process takes about half an hour, and you’ll have to stop at least twice to clean the filter in the shop-vac.
Tools and Materials
You’ll need the following:
- Cordless blower with fresh battery (in the steward shelves, it’s yellow)
- Two large shop-vacs with flexible hoses
- High-pressure 90º nozzle for end of shop vac hose
- A large garbage bag
- A NiOSH mask for each person doing the work
Set Up
- Put on your NiOSH masks. Do not do this procedure without wearing one.
- Turn on the overhead air scrubbers to High and set for four hours.
- Empty both shop vacs into the garbage bag.
- Remove one of the shop-vac filters and put it inside the bag. Close the top of the bag with your hand and shake and flex the filter to free as much of the accumulated sawdust as possible. Open the bag to inspect it and continue until it looks blue again.
- Repeat for the other shop vac filter.
- Bring the two shop vacs into the back room of the shop and close the door.
- Plug the shop vacs into different outlets and position them near the filter stack
- Connect one shop vac’s hose to its output so it blows air through the hose instead of sucking air through it.
- Attach the 3D-printed high-pressure 90º nozzle end to the end of the blowing hose by pushing them together hard enough so it doesn’t blow off the end.
- Open the cover at the bottom of the filter stack and use the shop vac to vacuum any sawdust in the bottom area.
- Plug the shaker into an outlet to turn it on – it doesn’t have a switch.
Filter Backflush
- Turn the vacuuming shopvac on and insert the the tube in the bottom port.
- Use either the handheld blower or the blowing shopvac with its 90º blower end to blow air into the filter. There is a lot of surface area to cover and you can’t go too fast or it won’t have time to work. Move as if you are painting the outside of the filter. Some areas are too tight to use the cordless blower – the 90º fitting is intended to make it possible to access these area.
- Work from the top down.
- When you are 1/3 of the way down, stop. Turn off the blowing shopvac if it is on.
- Use the sucking shopvac to remove all the fine dust from the bottom of the filter stack. Use your hand to scoop it out so it can be vacuumed up. This will clog the filter.
- Turn off the sucking shopvac and empty its contents carefully into the garbage bag.
- Repeat the shopvac filer cleaning process from above in the set-up section. This isn’t needed for the other shopvac.
- Reassemble the sucking shopvac, turn it on and put the hose back in the bottom.
- Turn the blowing shopvac back on do the next 1/3 of the filter stack, working from where you left off to about 1/3 above the bottom. Go back to step 4 to clean out the sucking shopvac and its filter again.
- When you’ve finished the final third of the filter stack, emoty the sucking shopvac again and clean its filter as before.
- Vacuum up the floor.
- Tie off the garbage bag of dangerously small particle dust so it doesn’t accidentally spill. Use a zip-tie if you can’t tie a tight enough knot.
- Put the shop vacs back in their usual locations
- Take the bag of sawdust out of the shop and dispose of it.
Spot Cleaning – Use the method from this experiment
https://wiki.acemakerspace.org/bi-monthly-cyclone-filter-cleaning/
Inspecting the gates and ductwork
- Visually inspect the ducting for any visual clogs or build-up
- Shut all gates and check them one at a time for low pressure
- If you find low pressure at a gate then inspect the ducting more closely to that tool for any clogs or damage
Loading asset logs.