Draft – See Team Shop
 Loading asset information.
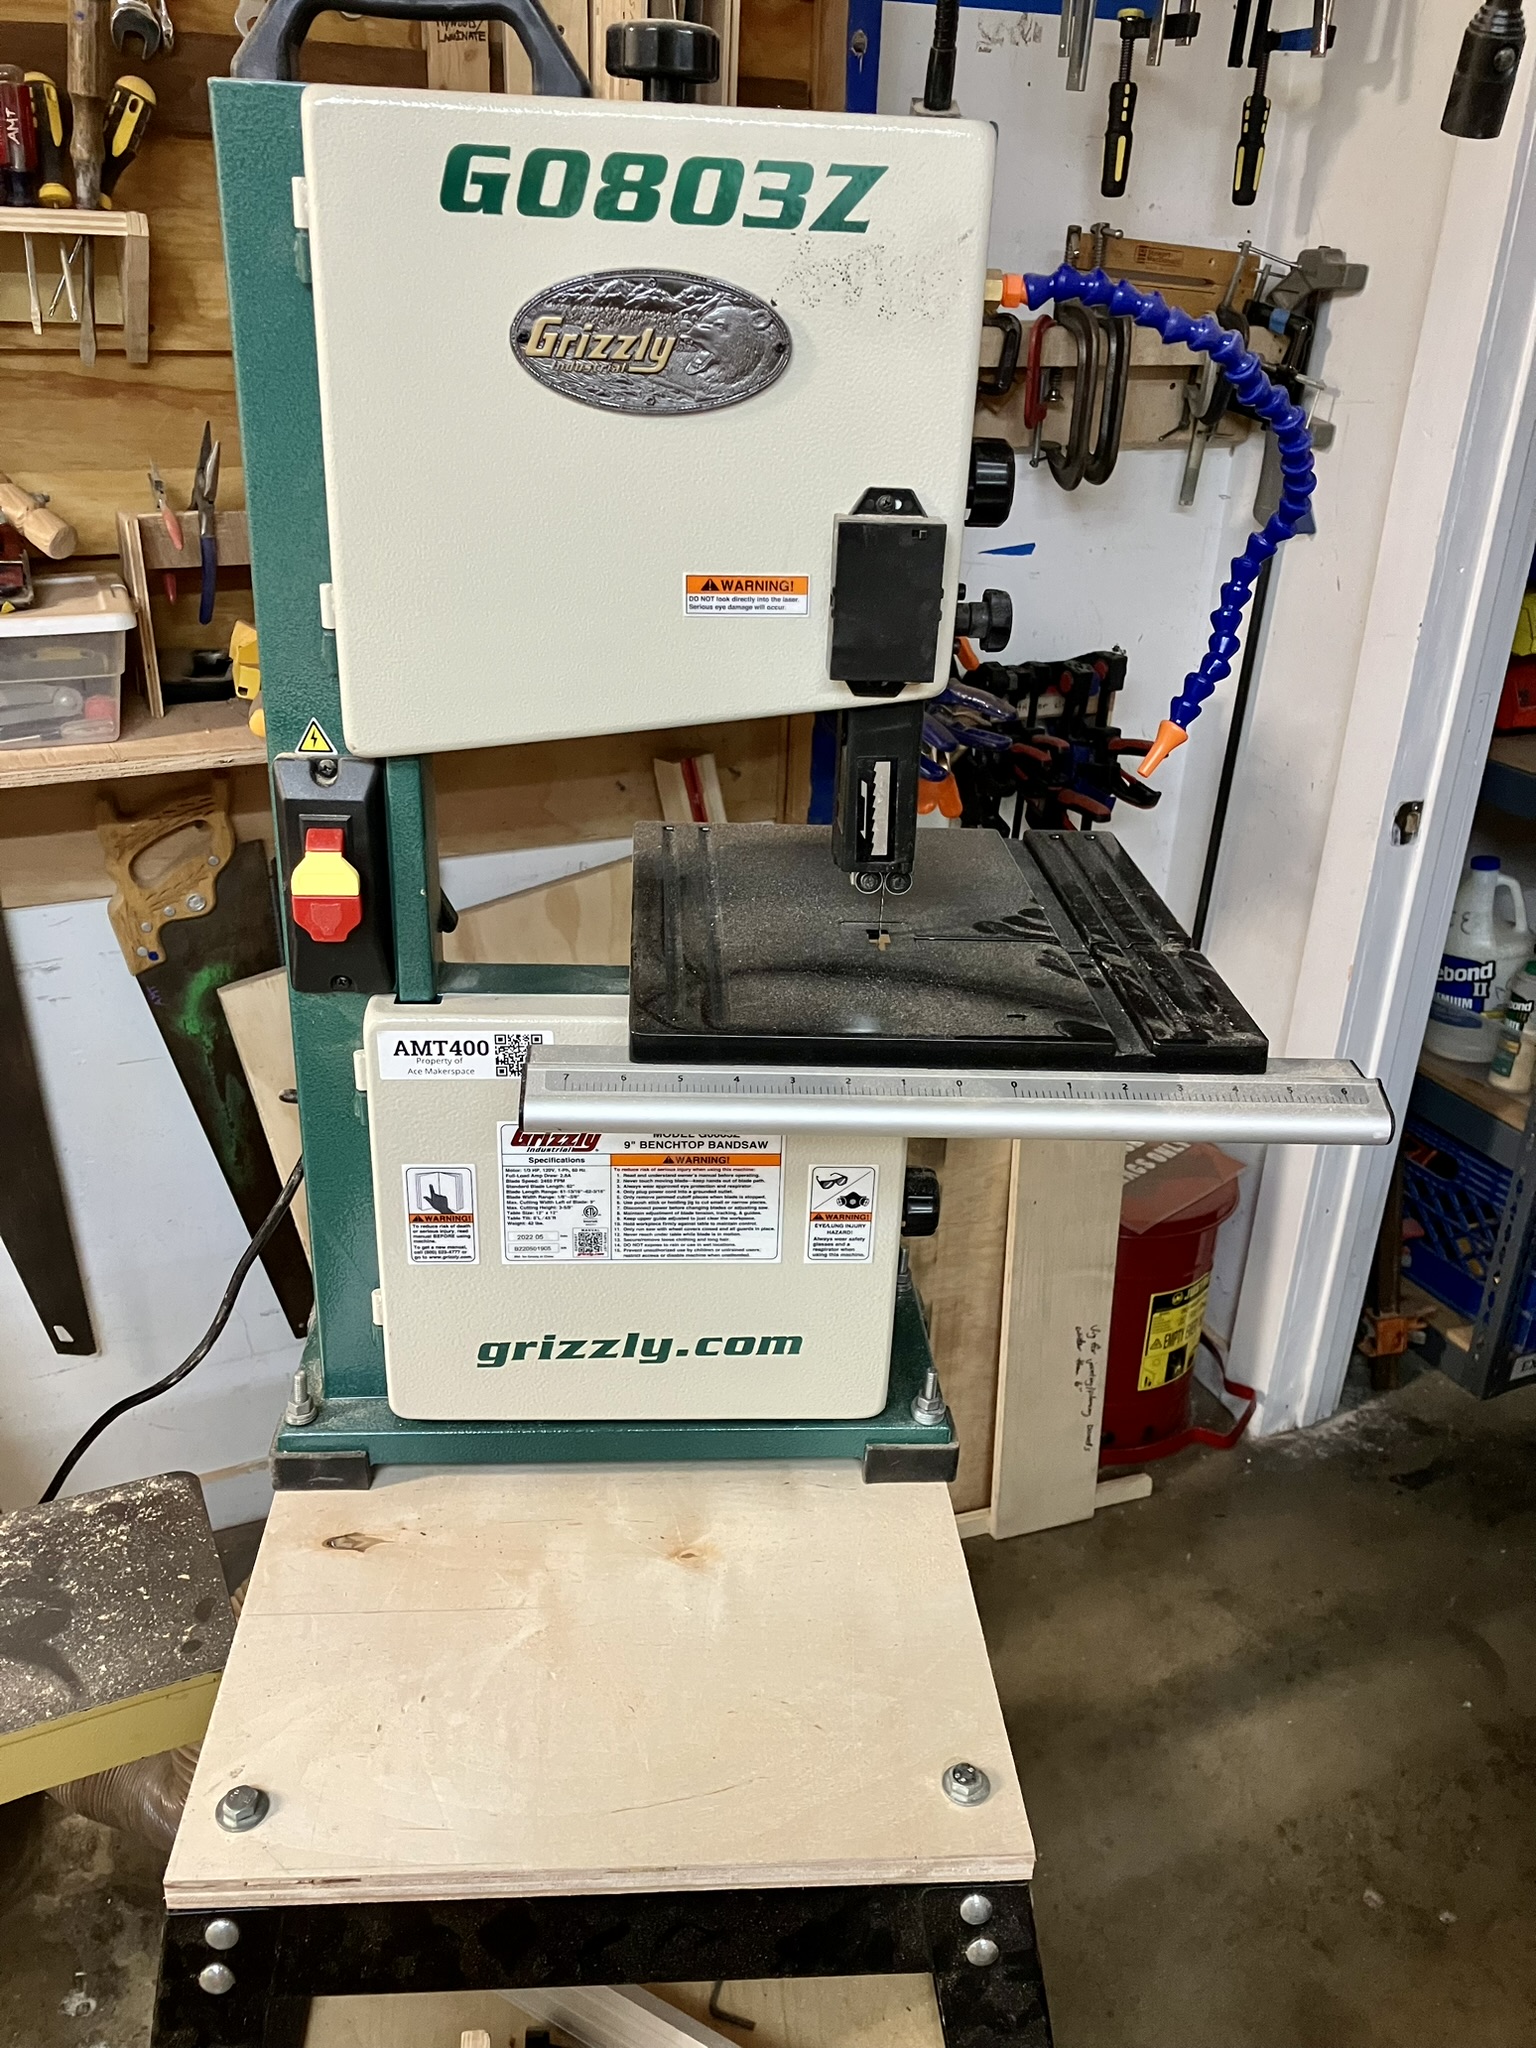
Make/Model: G0803Z
Documentation: Benchtop Bandsaw Manual
Blades: 61-13/16″–62-3/16″ (1/8″–3/8″ wide)
This bandsaw is only for cutting curves and general use and not for resawing wood. For resawing, use the Laguna bandsaw.
SPECIFICATIONS:
- Motor: 1/3 HP, 120V, single-phase, 2.8A
- Max. cutting width left of blade: 9″
- Max. cutting height (resaw capacity): 3-5/8″
- Blade guides: Ball-bearing upper and lower
- Table size: 12″ x 12″
- Table tilt: 0–45°
- Blade size: 61-13/16″–62-3/16″ (1/8″–3/8″ wide)
- Blade speed: 2460 FPM
- Footprint: 6-1/2″ x 15-1/2″
- Overall dimensions: 20-3/4″ W x 17″ D x 29-1/2″ H
- Approximate shipping weight: 49 lbs.
FEATURES:
- Laser sight
- Adjustable wheels for alignment
- Fence adjustable for blade lead
- Rack-and-pinion table tilt
- Ball-bearing blade guides
- Quick-release blade tension levers
- Extruded aluminum rip fence
- Lower wheel brush
- Chip blower
- Work light
Features Videos
Why Do I Need Certification?
Band saws are unlike other saws in several important ways. if not adjusted correctly the bandsaw will damage itself. Experienced bandsaw users must be able to determine if the saw is properly configured and not use it if it is not adjusted correctly. You must report it if it isn’t adjusted correctly. Example: /asset AMT400 down needs adjustment
What It Cuts
Wood and wood composite materials only. NO METAL or PLASTICS. There are bandsaws in Metal for that.
It is not to be used for non-wood composites or metal at any time. This will destroy the filter and blades very quickly. We have a variety of other tools for that in the Metal area.
A note about plastics: Some plastics can be cut on a band saw, but the Ace Workshop is not set up for it and doing so is not okay on the wood bandsaws. The wrong combination will ruin the blades and the wheels and make a nasty mess of the guides. This has happened. Please use the saws in the metal area to cut plastics.
Please investigate FIRST — determine ”if” your material can be cut and ”how”. In any case, you must provide your own blade to cut anything other than wood and wood-based materials. If cutting other materials is shown to be a priority, we can purchase blades.
Do not attempt to adjust the guides on the bandsaw or its tension unless you are certified as a tool maintainer and have been trained specifically on adjusting this bandsaw.
Protecting the Band Saw
Only cut wood on the band saw — never metal or plastic. Periodically unplug the tool and open the doors. Remove any accumulated sawdust. Adjust the upper and lower cool blocks to leave a hair’s space between them and the blade. Adjust the upper and lower bearings so they barely touch the blade you are using. They should not be significantly entrained by the blade to spin when the saw is running until wood is pushed against the blade.
Accessories
Fence
The fence is adjusted using one knob in the front.
Consumables
This saw currently uses 61-13/16″–62-3/16″ bands up to 3/8″ wide. It is generally equipped with a 1/4″ blade with set so it is perfect for cutting curves.
Basic Use
There are two types of use on this bandsaw. Basic and advanced use. When you get a certification it is for basic use. See help to do things listed under advanced use.
Basic Use
Draft area needs list of what basic users do
Advanced Use
Draft area needs lis of what advanced users do
Dust collection
Do not use the bandsaw without dust collection.
The dust collection tube should be attached underneath the table. Check the cyclone (AMT255) before using to ensure there is no existing sawdust in the can. What to do if a previous user left dust behind. There is a special port built into the band saw to mate with the dust collection tube. There is a slider in the tube to open and close it that should be pulled out during operation to suck in the dust. The dust collector should be turned on if it is not on already. When you’re done working, empty the cyclone of all sawdust and take it home.
DRAFT – Need to show photos (video?) of how dust collection comes off the jointer or drum sander and gets used on this bandsaw.
Band Saw Safety
More people are hurt on bandsaws nationwide than on tablesaws. You can avoid most injuries by keeping your eye on the blade all the time you are using the bandsaw. Watch the blade cut the wood and nothing else and you will easily avoid pushing your fingers into the blade. It is when you take your eye off the blade that you risk serious injury. While the bandsaw produces no kickback like other tools, you must use special precautions when cutting anything that doesn’t have a flat bottom that rests solidly on the tabletop. Any round or oddly shaped stock must be held in a sled when cutting on the bandsaw. Do not freehand cut any dowels or curved wood without a sled.
Freehand use of the band saw is normal. Fences do not work well for cutting a straight line. You will have better luck drawing a straight line and carefully following it.
Band saws are not so loud that you must use hearing protection, but other tools in the shop are, so it is good to have them handy even if you choose not to use them while you are using the band saw.
In any case, you must always wear eye protection when you use a band saw. If the wood or the blade breaks, it could send pieces flying toward you or your eyes.
The main risk is that you might push your hand into the moving blade. During cutting, most of the blade will not be visible — it will be inside the wood — so you must remain aware of where the blade is and use failsafe hand positioning to avoid injury.
The blade is mostly covered, except for the part that encounters your work. The exposed portion of the blade can be adjusted to accommodate different thicknesses of wood.
Failsafe Hand Positioning
- Failsafe hand positioning is where you put your hands so they are not injured should the unexpected occur.
- Never have any part of your hands pushing directly toward the blade — always push from the sides, or use a push stick if you must push in line with the blade.
- One common injury that happens to people who push toward the blade is to cut themselves on the blade when it emerges from the stock at the very end of the cut.
Failsafe Stock Handling
Never try to cut too sharp a curve. If you see smoke, press the work into the blade with less force and go slower. You can stop cutting and leave the work where it is and the blade will not cut more, but it might leave a small mark where you stopped. Never work used materials unless you have checked them thoroughly for metal (nails, screws, tacks, etc.). Go slow — speed reduces cut quality and safety.
Unlike most other major woodworking tools, you can work freehand on a bandsaw. If you incline the table, be sure to use a fence on the downhill side to keep the stock from sliding if it is a straight cut.
After Using
Unplug the tool. Close the dust collector inlet. Your work should be removed and any remaining sawdust should also be removed.
While it is okay to pull the bandsaw out from its current position make sure to put it back in the default position shown below when you are done.
Maintenance
Annual
- Check that the guide column aligned so blade is not deflected when column raised/lowered
- Tension adjusting shaft threads not stripped
- Wheels coplanar
- Wheel bearings OK — wheels turn smoothly without belt
- Motor runs well without belt
- Belt tension, alignment and condition correct
- Pulleys aligned, tight, undamaged
- Cords intact
- Fence aligned perpendicular to miter slot
- Test cuts clean and true, no bowing or burning, saw tracks straight
Monthly
- No swarf from cutting metal, circuit board, etc.
- on/around saw
- inside/embedded in tires
- Table insert is not proud of table, no burrs
- Table alignment pin present
- Table square to blade, 90° table stop set and tight
- Inspect guide bearings. Adjust if needed.
- Tension and tracking ok
- Thrust bearings turn smoothly but not free-spinning
- Check blades
- Teeth sharp, clean
- No kinks
- No plastic or other crud on blade
- Clean any sawdust, resin etc. off guides, table, etc.
- Inspect and clean tires
- Check condition of cord and belt
- Check thrust bearing condition: should not be free-spinning, which means no grease, but should rotate very smoothly with just a little resistance. All surfaces should be free of grooves, rust, crud)
- Count, inspect and clean blades
- Dust collection connects properly; gates not impacted
- Wax table, fence
- Dry lube
- Guide post
- Thrust bearing/guide block mounts
- Tension and tracking mechanisms
Tools needed for maintenance
- TBD – next person who does maintenance please list the tools you needed to do the job
Logs
Loading asset logs.