RETIRED!
 Loading asset information.
Documentation: Manual PDF
Blades:
- General Purpose: 1/4″ 10 TPI
- Resaw: Option 1 (6 TPI), Option 2 (3 TPI)
This band saw is for cutting wood and wood-based materials. Do not cut plastics, Delrin, metal, laminates with plastics or metals.
Why Do I Need Certification?
Band saws are unlike table saws in several important ways. Experienced based saw users should be able to:
- select, change, and adjusting the blades
- configure the guide blocks and thrust bearings
- demonstrate basic safety.
It’s not a test, but a chance to confirm that you can use the saw safely and to fill in any gaps in your knowledge. The goal is to keep you safe and keep the tool from being damaged.
What It Cuts
Wood and wood composite materials only. NO METAL or PLASTICS. There are bandsaws in Metal for that.
It is not to be used for non-wood composites or metal at any time. This will destroy the filter and blades very quickly. We have a variety of other tools for that in the Metal area.
a note about plastics: Some plastics can be cut on a band saw, but AMT is not set up for it and doing so is not okay on the wood bandsaw. The wrong combination will ruin the blades and the wheels and make a nasty mess of the guides. This has happened. Please use the saws in the metal area to cut plastics.
Please investigate FIRST — determine ”if” your material can be cut and ”how”. In any case, you must provide your own blade to cut anything other than wood and wood-based materials. If cutting other materials is shown to be a priority, we can purchase blades.
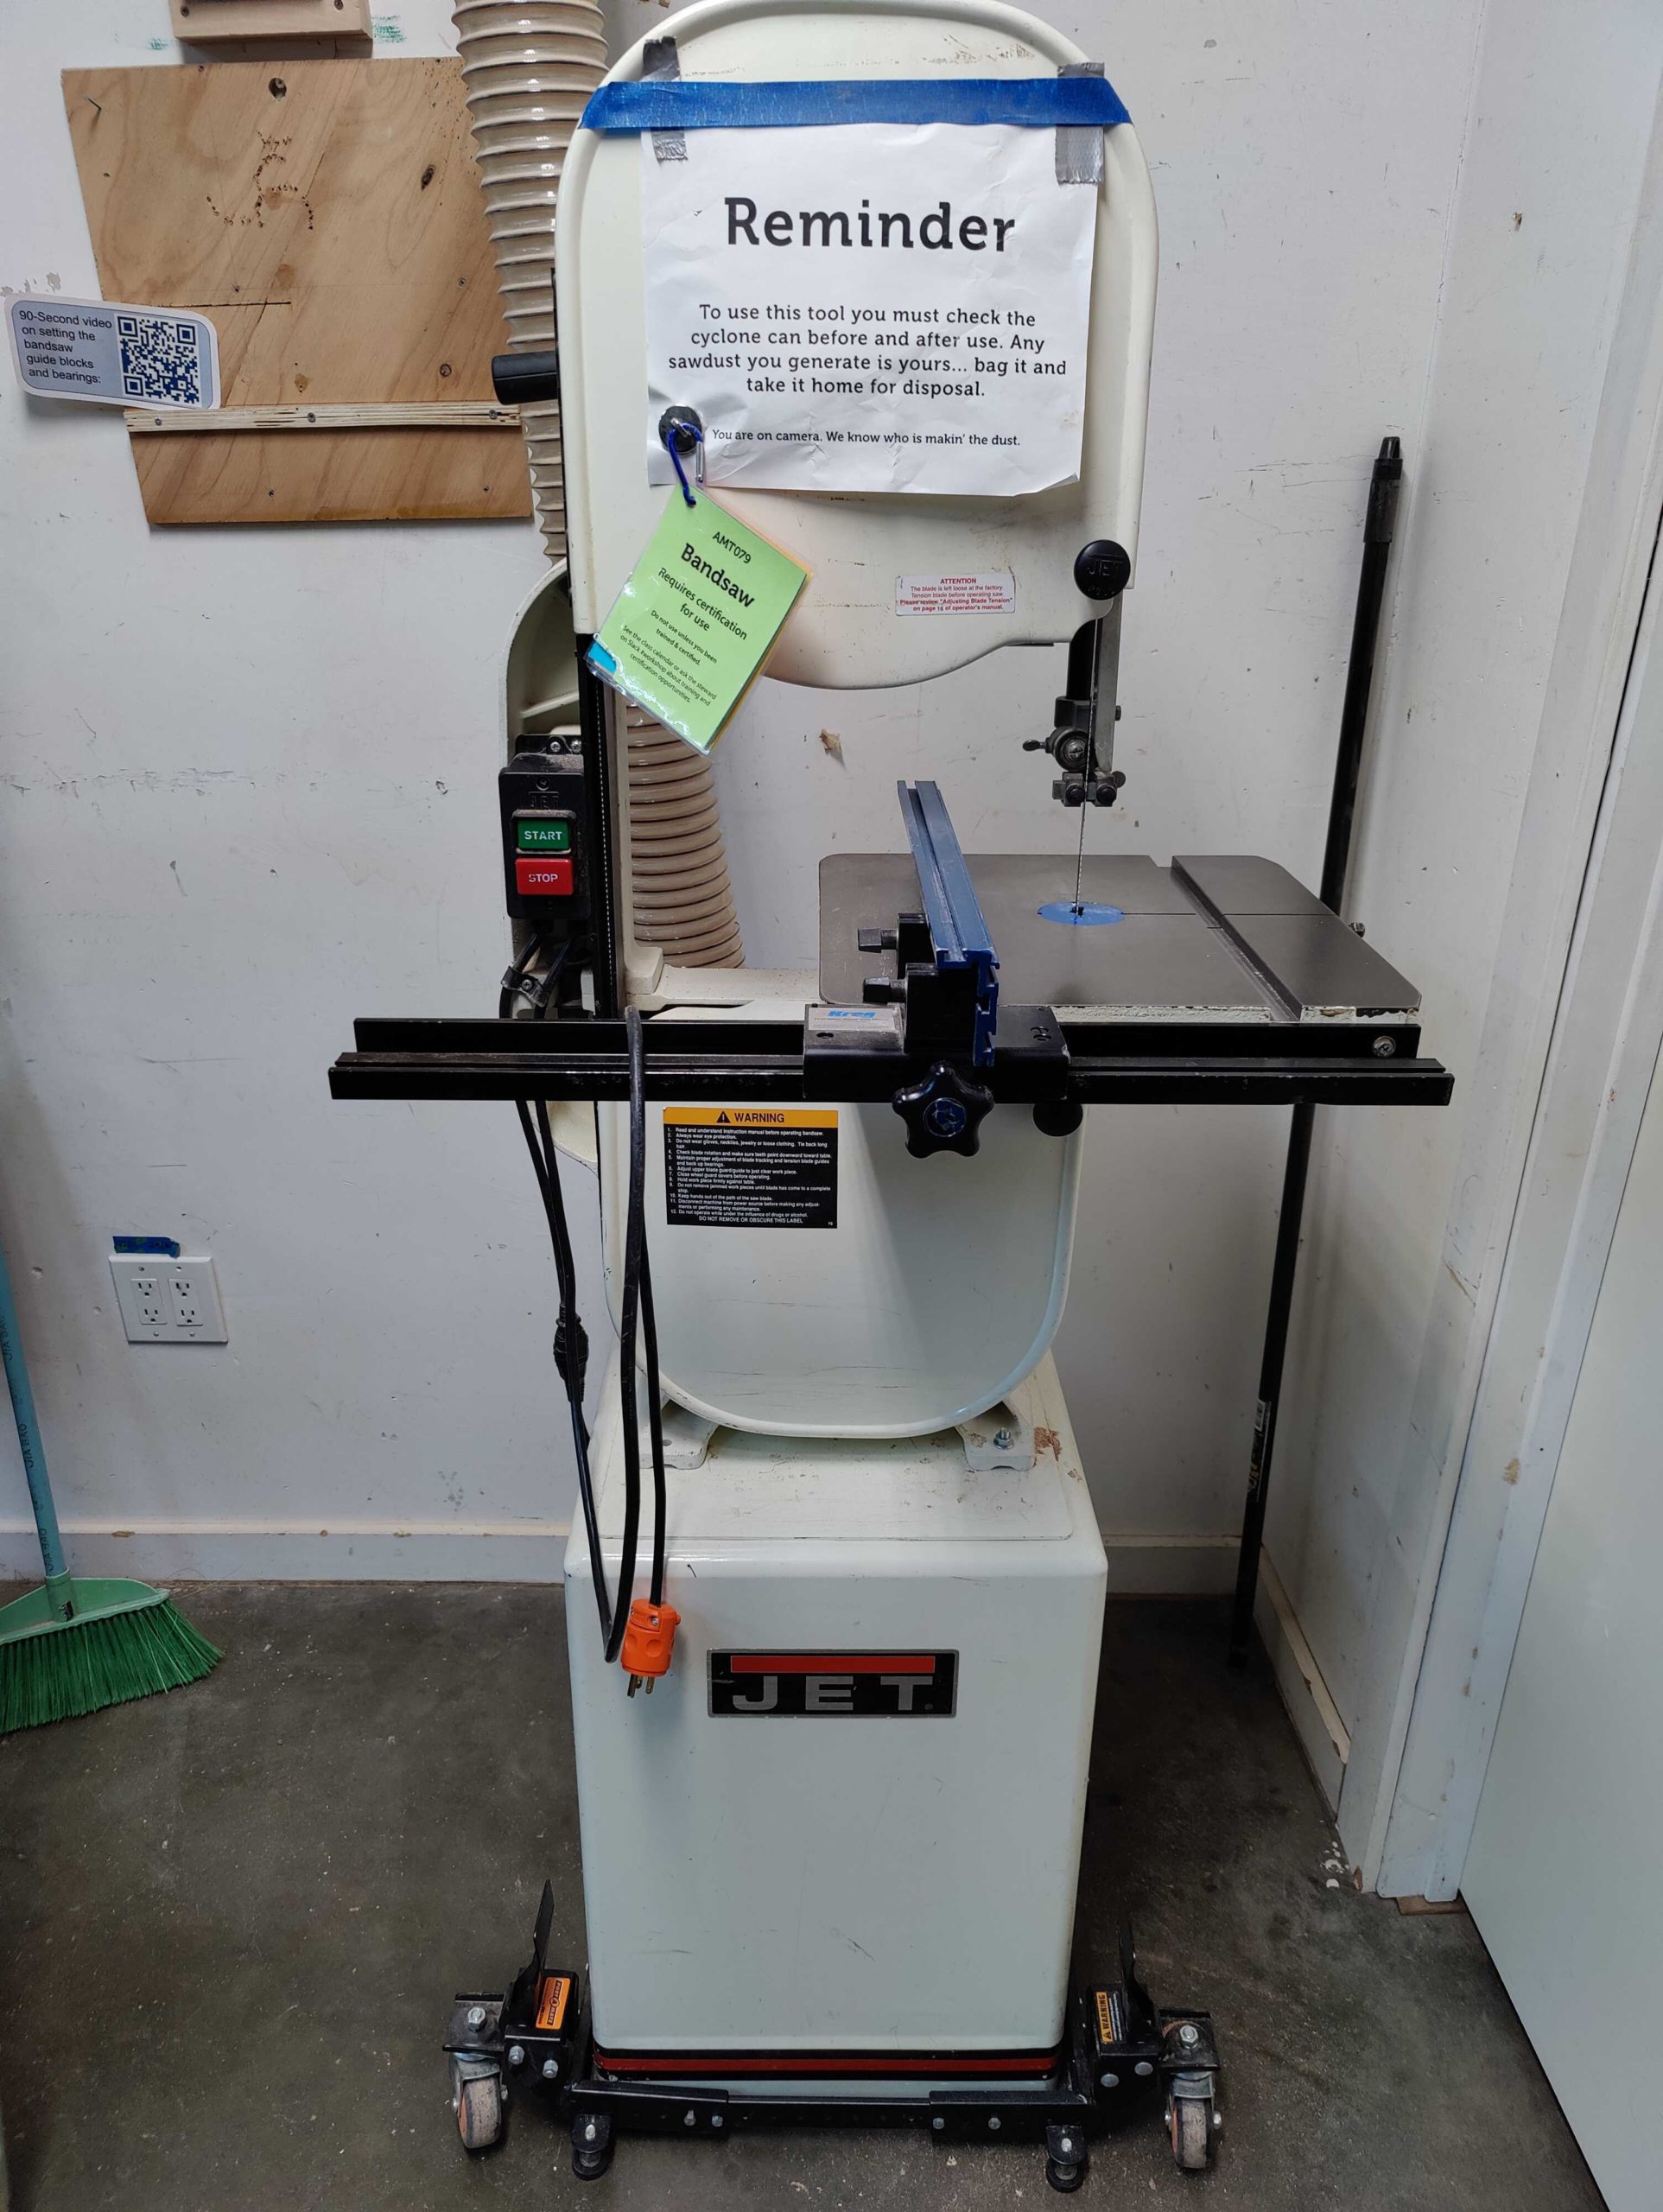
Band Saw Setup
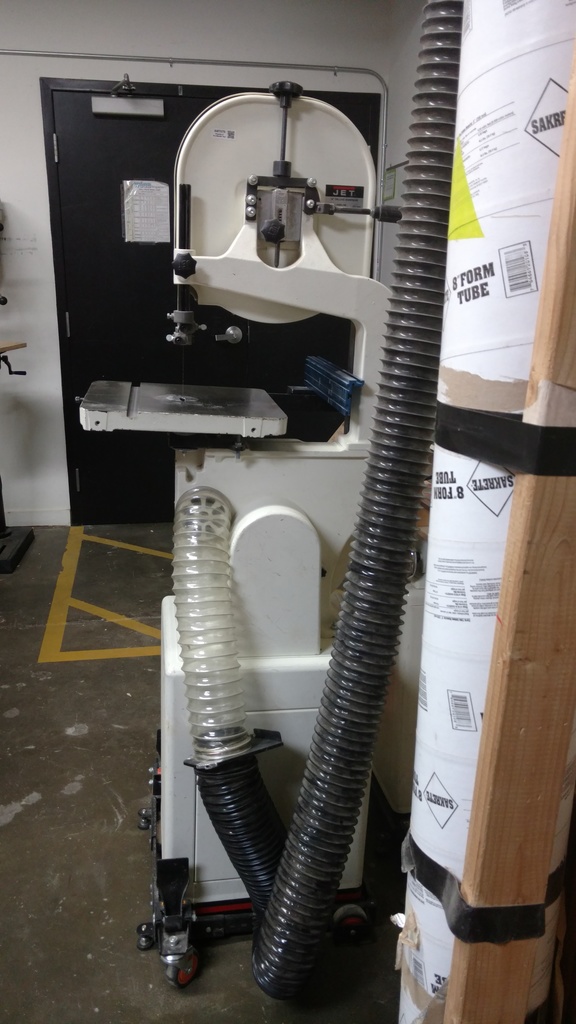
While it is okay to pull the bandsaw out from its current position make sure to put it back in the default position shown below when you are done.
Setup video
Watch Band Saw Clinic with Alex Snodgrass on YouTube. Covers how to set up saw in detail.
Blade
ALWAYS USE THE RIGHT BLADE – Bandsaw_Minimum_Cut_Radius_for_Blade_Width
- Verify the blade is appropriate width, type, and tooth pattern for the material you plan to cut, the size of the piece, and the shape of the cut. In general, thicker material requires fewer teeth per inch. The larger spaces between teeth (“gullets”) allow more shavings or chips to be carried from the cut without binding. Binding causes poor cut quality and risks blade breakage. Follow this Materials Cutting Chart from Artisan’s Asylum, a makerspace in Massachusetts, to determine what materials can be cut on the band saw (and other tools in the woodshop).
- Use the widest blade that will handle the curves you plan to cut. This will give you a smoother, straighter cut.
- Never attempt to cut too tight a curve for the width of the blade.
INSPECT AND ADJUST BLADE Check that the blade is there and not broken, kinked, etc. Lightly wind the belt onto the top and bottom wheels. The wheels have a slightly convex shape for the blade to run on the topmost edge of the wheel, therefore self-aligning to the center of each wheel. You may need to adjust the blade tension by turning the top wheel position screw clockwise. As you adjust the tension on the blade, verify that nothing is blocking it; the blade should only be touching the two wheels. Adjust tension until the blade is taut, but do not over-tighten (blade should be monkey-tight, not gorilla-tight).
NOTE: If you notice that the blade slows down during cutting, make sure you are not pushing the material too fast. Slow down the rate at which you feed the material, and if it still significantly slows the blade down, then you may tighten the top wheel position screw until the blade is taut.
Blade Guides
Check BOTH blade guides (there is a top and bottom guide). The top guide is above the work surface; the bottom guide is below the work surface. They keep the blade from moving around during use.
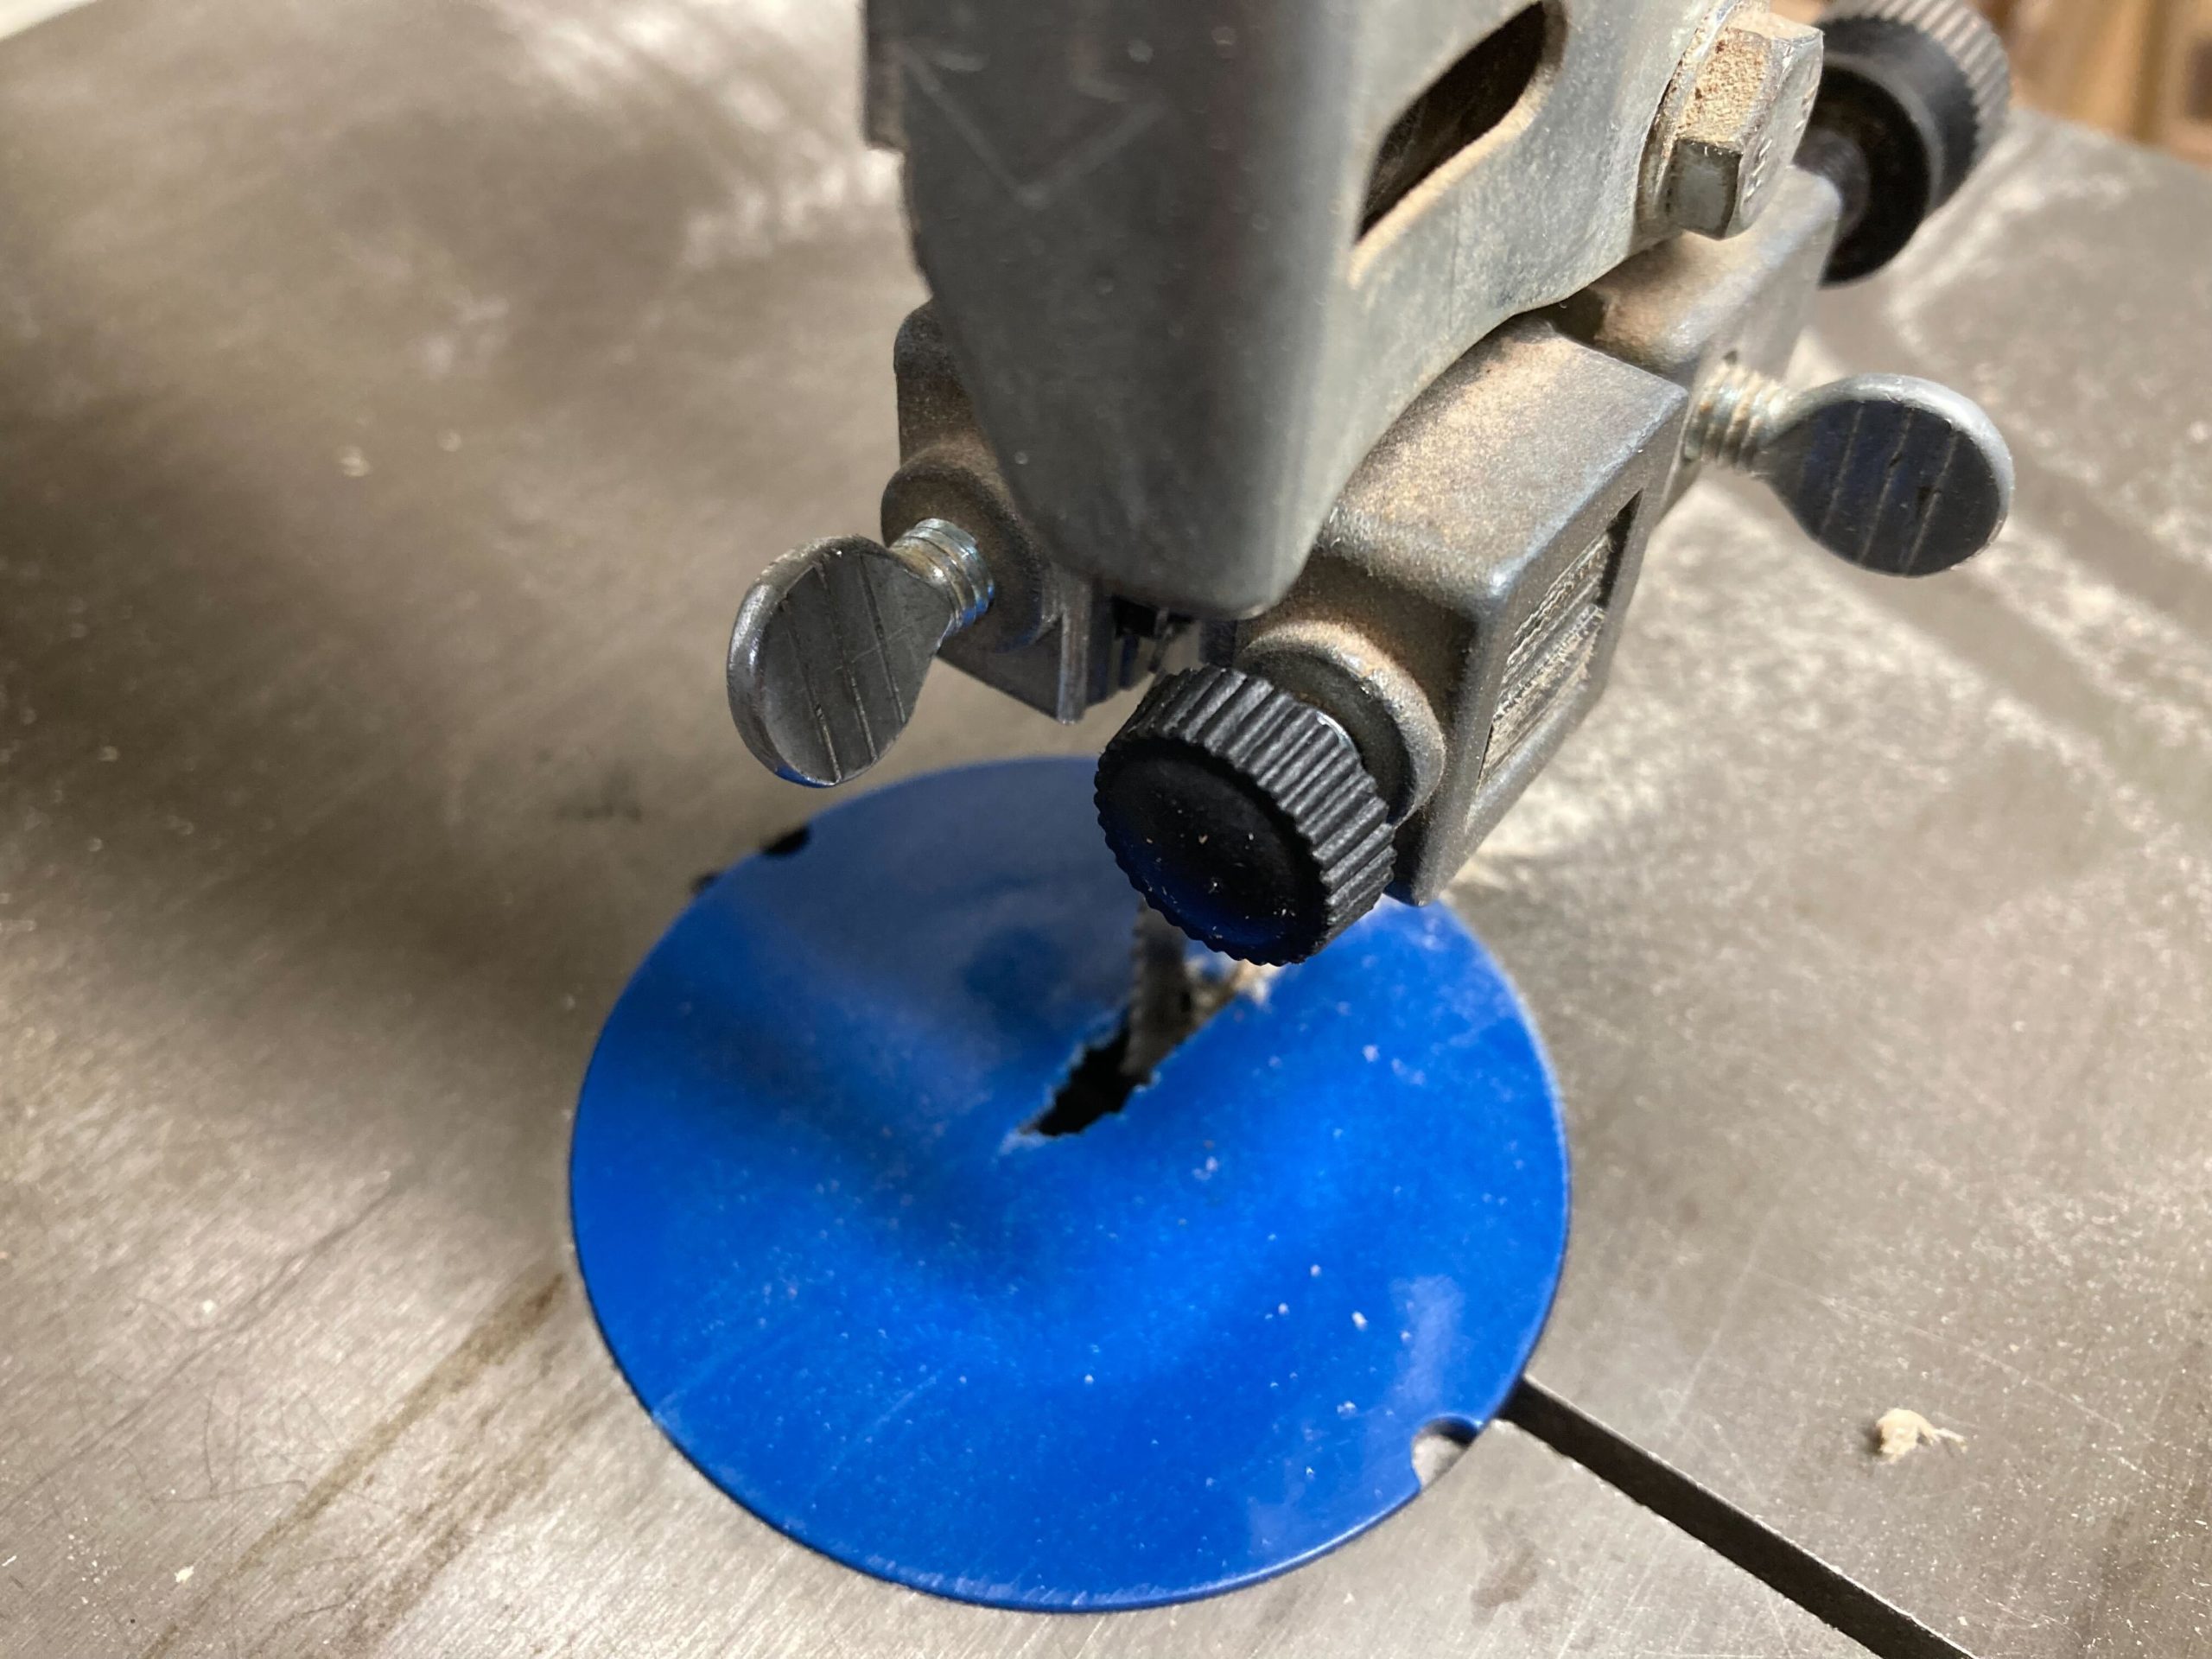
Top blade guide adjustment:
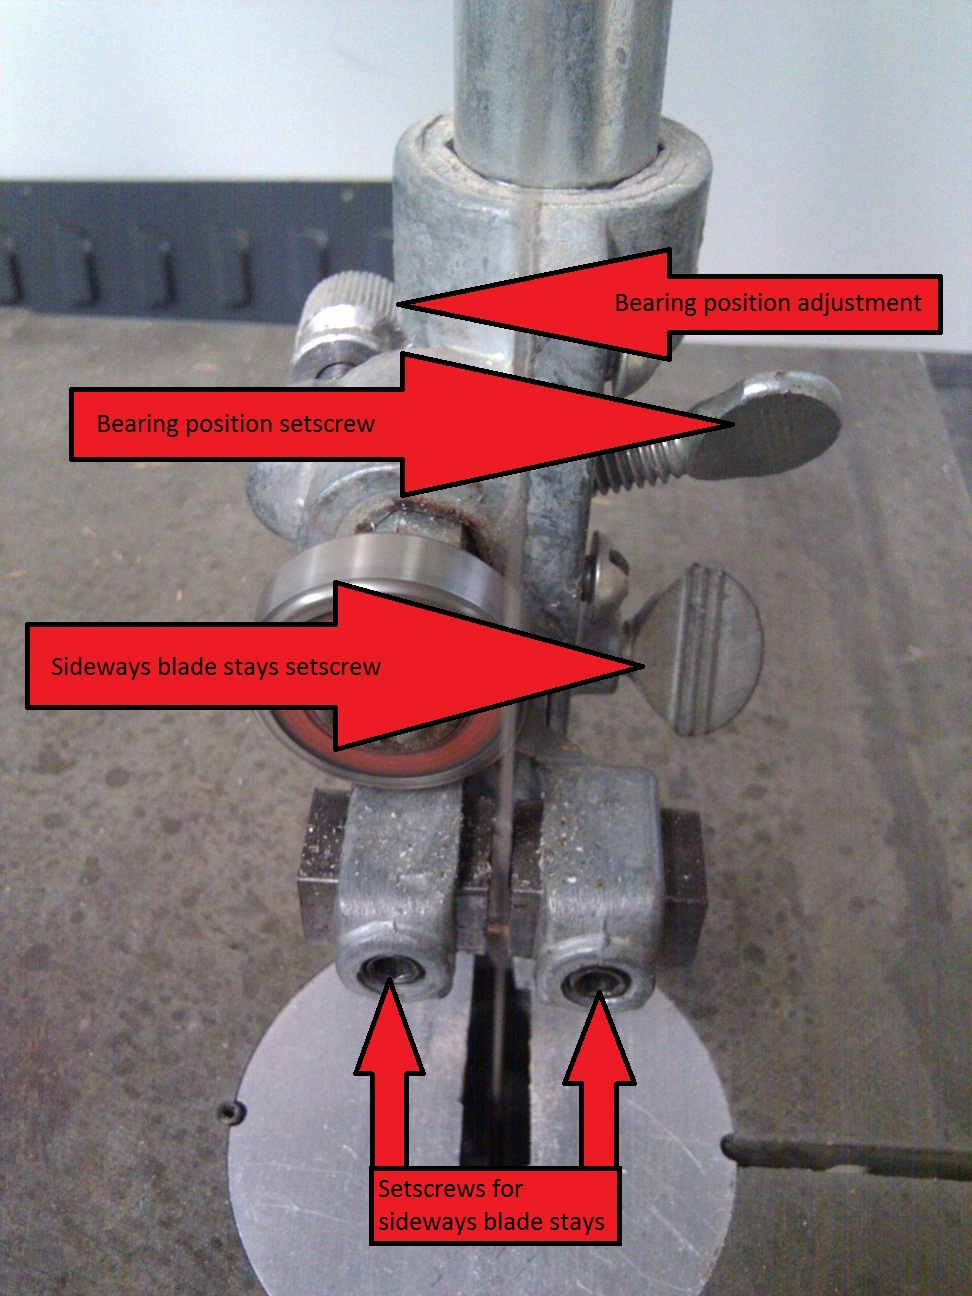

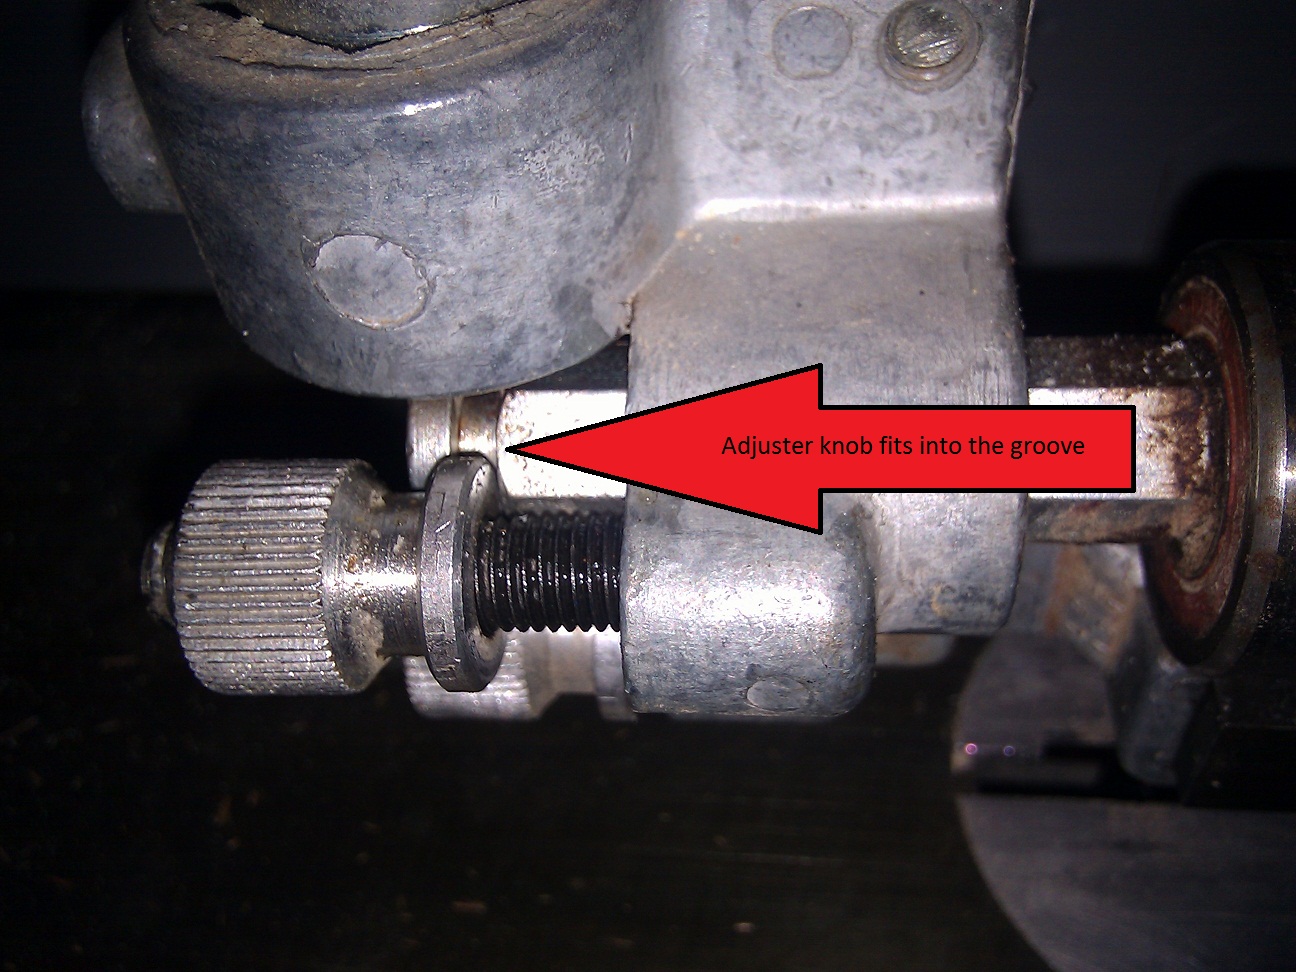
Take a close look at the picture to the left. Your setup should be identical to what you see here. The cool blocks should not touch the blade, but be 1-2mm away from it. The bearing should BARELY touch the back of the blade while the blade is in its operating position.
Bottom blade guide adjustment:
Same as top blade guide adjustment.
IMPORTANT: The blade guides consist of three parts that confine blade movement. On the left and right-hand side of the blade, there are two cool blocks, secured with set screws. Behind the blade, there is a bearing that prevents backward blade movement, also secured with a set screw. The top and bottom guides have basically the same parts. If the blade moves too far back during operation, it will likely jump off the top or bottom wheel. If this happens, stop the machine immediately.
Accessories
Fence
The fence is adjusted using the two main knobs in the front: the larger one locks the fence in place, and the smaller can be used for fine adjustments. The smaller knob is a pinion gear, and is disengaged when pulled out — this makes large movements faster.
Adjusting for Drift
Zero-Clearance Throat Plate Insert
A couple of acrylic zero-clearance inserts have been made, and they are in the manual pouch attached to the back of the machine. These are designed for fine work, to reduce chip-out. Be careful using these as they are not as durable. WARNING: Rough sawing motions may cause the insert to shatter, possibly exposing the operator to serious injury from the insert or blade! Please replace the insert with the original aluminum insert when finished for the day, so as to not surprise an unsuspecting user.
Spares are kept in the Blade Bin in the supply closet.
Consumables
This saw currently uses 93-½” bands up to ¾” wide, though ½” is a recommended maximum as it gets hard to tension with wider bands.
The thrust bearings were replaced in November 2016. It takes 6200-2rs. Do not buy OEM bearings, they are 6200ZZ, shielded vs sealed, and are quickly destroyed by sawdust.
The guide blocks are 14″ import-sized cool blocks by Olson. Do NOT buy OEM, they are crappy plastic things that say they have graphite but just melt like crazy. They suck. Metal blocks are a bad idea here; users set them wrong and shear the teeth off. The cool blocks can be set in contact, unlike metal, and quickly pay for themselves in saved blades.
Dust collection
The dust collection tube should be attached underneath the table. Check the cyclone (AMT255) before using to ensure there is no existing sawdust in the can. What to do if a previous user left dust behind. There is a special port built into the band saw to mate with the dust collection tube. There is a slider in the tube to open and close it that should be pulled out during operation to suck in the dust. The dust collector should be turned on if it is not on already. When you’re done working, empty the cyclone of all sawdust and take it home.
Band Saw Safety
All power tools have the potential for harm when misused. While the band saw is no exception, it is an intrinsically safer tool than other power saws, jointers, and planers because there is literally no chance of kickback. Even a jigsaw with its reciprocating blade is subject to kickback, but not a band saw. The lack of kickback potential is a game-changer that allows freehand use without any significant risk.
Freehand use of the band saw is normal.
The reason there is no chance of kickback is that the blade is moving in only one direction: downward through the metal table of the band saw. The blade is a long loop and it moves upward inside the machine where you cannot see or touch it. The blade pulls the work onto the table without imparting any significant force toward or away from the blade that would move the stock on the table.
If your stock is stable on the band saw table, you can take your hands off your stock while the saw is running and nothing bad will happen.
It is something you can do if you need to, but it shouldn’t be a part of your normal cutting routine.
Band saws are not so loud that you must use hearing protection, but other tools in the shop are, so it is good to have them handy even if you choose not to use them while you are using the band saw.
In any case, you must always wear eye protection when you use a band saw. If the wood or the blade breaks, it could send pieces flying toward you or your eyes.
The main risk is that you might push your hand into the moving blade. During cutting, most of the blade will not be visible — it will be inside the wood — so you must remain aware of where the blade is and use failsafe hand positioning to avoid injury.
The blade is mostly enclosed, except for the part that encounters your work. The work table can be adjusted to accommodate different thicknesses of wood. The part of the blade above the cutting area is encased by a metal guard to protect you. The bearings and blocks in the upper and lower blade guides keep the blade from sliding backward or buckling during use. The blade disappears down into the table, imparting no net force on the wood in any direction away from the blade, so there is no risk of kickback as there is with a table saw.
Failsafe Hand Positioning
- Failsafe hand positioning is where you put your hands so they are not injured should the unexpected occur.
- Never have any part of your hands pushing directly toward the blade — always push from the sides, or use a push stick if you must push in line with the blade.
- One common injury that happens to people who push toward the blade is to cut themselves on the blade when it emerges from the stock at the very end of the cut.
Failsafe Stock Handling
Never try to cut too sharp a curve. If you see smoke, press the work into the blade with less force and go slower. You can stop cutting and leave the work where it is and the blade will not cut more, but it might leave a small mark where you stopped. Never work used materials unless you have checked them thoroughly for metal (nails, screws, tacks, etc.). Go slow — speed reduces cut quality and safety.
Unlike most other major woodworking tools, you can work freehand on a bandsaw. A fence makes it easier to cut a straight line (usually). A fence on the lower side of the table should always be used on a straight bevel cut to improve results and safety.
After Using
Unplug the tool. Close the dust collector inlet. Your work should be removed and any remaining sawdust should also be removed. The miter gauge can rest on the lower body of the band saw, out of the way but easily accessible.
While it is okay to pull the bandsaw out from its current position make sure to put it back in the default position shown below when you are done.
Remove your dust from the cyclone (AMT255) can after using. What to do if a previous user left dust behind. When you’re done working, empty the cyclone of all sawdust and take it home.
Protecting the Band Saw
Only cut wood on the band saw — never metal or plastic. Periodically unplug the tool and open the doors. Remove any accumulated sawdust. Adjust the upper and lower cool blocks to leave a hair’s space between them and the blade. Adjust the upper and lower bearings so they barely touch the blade you are using. They should not be significantly entrained by the blade to spin when the saw is running until wood is pushed against the blade.
Maintenance
Annual
- Guide column aligned so blade is not deflected when column raised/lowered
- Tension adjusting shaft threads not stripped
- Wheels coplanar
- Wheel bearings OK — wheels turn smoothly without belt
- Motor runs well without belt
- Belt tension, alignment and condition correct
- Pulleys aligned, tight, undamaged
- Cords intact
- Fence aligned perpendicular to miter slot
- Test cuts clean and true, no bowing or burning, saw tracks straight
Monthly
- No swarf from cutting metal, circuit board, etc.
- on/around saw
- inside/embedded in tires
- Table insert is not proud of table, no burrs
- Table alignment pin present
- Table square to blade, 90° table stop set and tight
- Remove and inspect guide blocks. True faces if damaged
- Tension and tracking ok
- Thrust bearings turn smoothly but not free-spinning
- Check blades
- Teeth sharp, clean
- No kinks
- No plastic or other crud on blade
- Clean any sawdust, resin etc. off guides, table, etc.
- Inspect and clean tires
- Check condition of cord and belt
- Check thrust bearing condition: should not be free-spinning, which means no grease, but should rotate very smoothly with just a little resistance. All surfaces should be free of grooves, rust, crud)
- Count, inspect and clean blades
- Dust collection connects properly; gates not impacted
- Wax table, fence
- Dry lube
- Guide post
- Thrust bearing/guide block mounts
- Tension and tracking mechanisms
Tools needed for maintenance
- 3/32″ Allen wrench
- 3/16″ Allen wrench
- 5/32″(4 mm) Allen wrench
- 1/2″ wrench
- 10 mm. wrench
- 3/4″ (19 mm) wrench
- 13 mm wrench
- Phillips screwdriver
Random Info
These thumbscrews are M6
Logs
Loading asset logs.