- NOT READY FOR PRIME TIME.
- The Kit
-
Instructions
- Step 1: Get the DXF file
- Step 2: Start-Up the laser – Follow all the startup instructions
- Step 3: Set up LaserSoft and Import the File
- Step 4: Set up the material and focus
- Step 5: Run the Job
- Step 7: Optional – Cut inlays for the hour markers
- Step 8: Clean up and clockwork installation
- Step 9: Shut down – See the Shutdown checklist
- Step 7: Finish up
NOT READY FOR PRIME TIME.
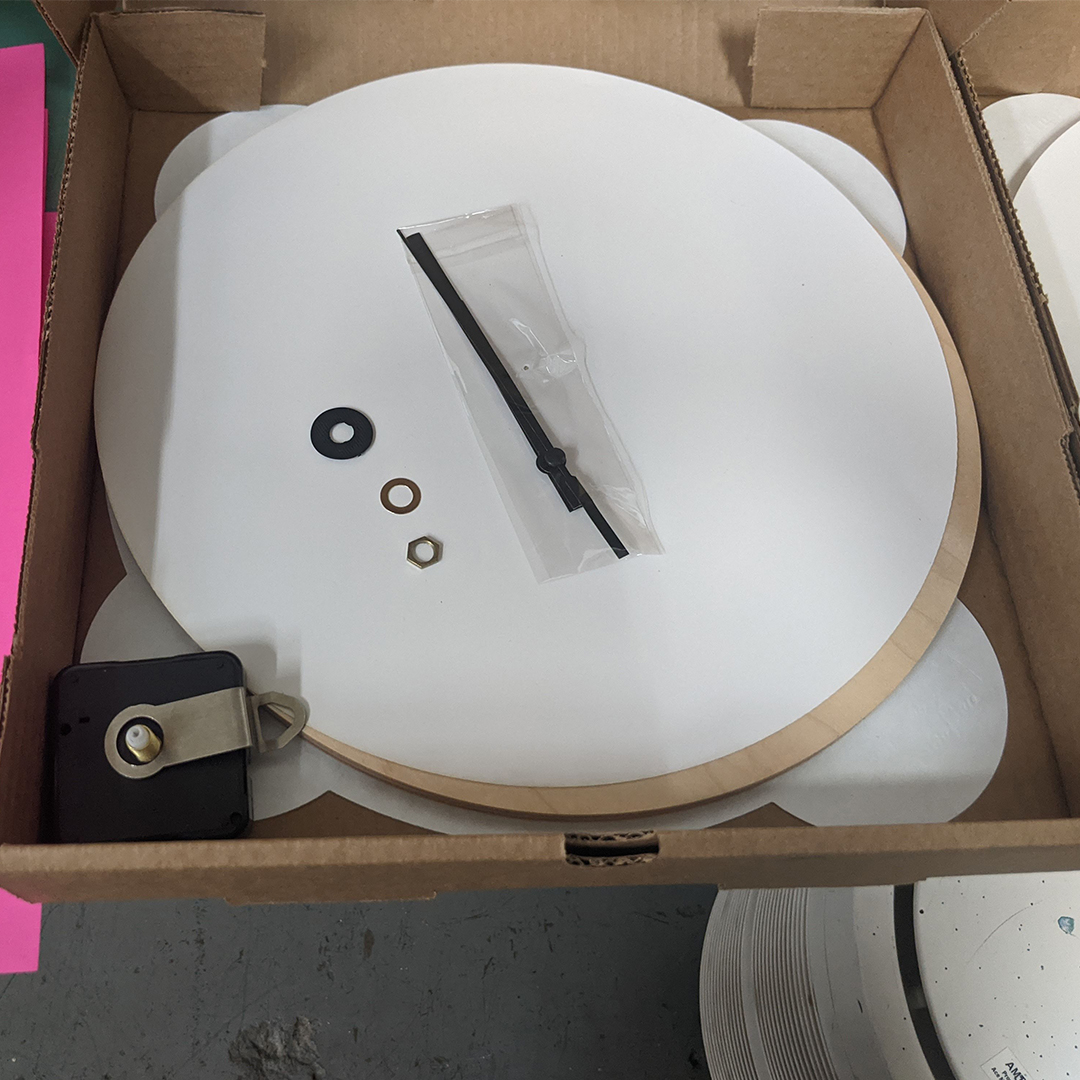
The Kit
- 1, 11.75″ round prefinished maple blank
- 1 Paper Placement Template
- Basic Clockworks
- DXF Files
- Illustrator Design Files
- SVG Files (note that layers will not be honored on import into LaserSoft)
Instructions
Step 1: Get the DXF file
You can download the files, including the DXF, from the link above OR pull from the server at Member Files>Guilde Projects>Cork Coasters. There are 3 layers in the DXF Files:
- Cut center (cut mode): (Green)
- Faux etched (cut mode): (Black)
- Etch (etch mode): Pink
[screen shot in LaserSoft of the Laser Art.]
Step 2: Start-Up the laser – Follow all the startup instructions
- Check the Filter type is right for your material type (Wood). Change if needed. This project needs a Green Organics filter. (instructions)
- Turn on the Main Switch (on the back wall)
- Do a draw test. Change the filter if needed. (See wiki for instructions)
- Turn on the green and red switches on the right side of laser (they light up)
- Fob in at with your RFID fob on the laser box
- Check that the air compressor (behind the laser) and water chiller (left side) and blower are on.
- Report what works or issues on Slack
Step 3: Set up LaserSoft and Import the File
- Open LaserSoft
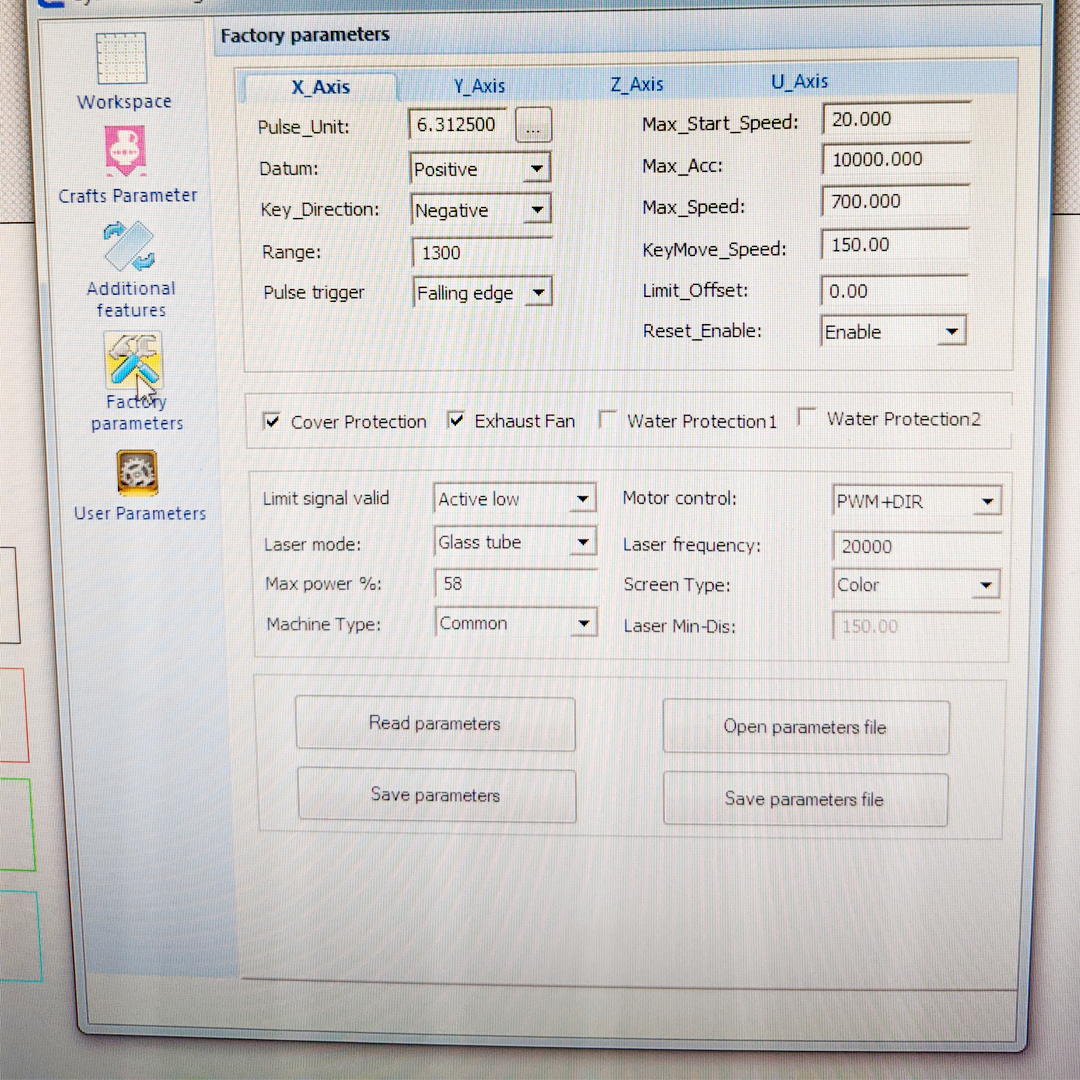
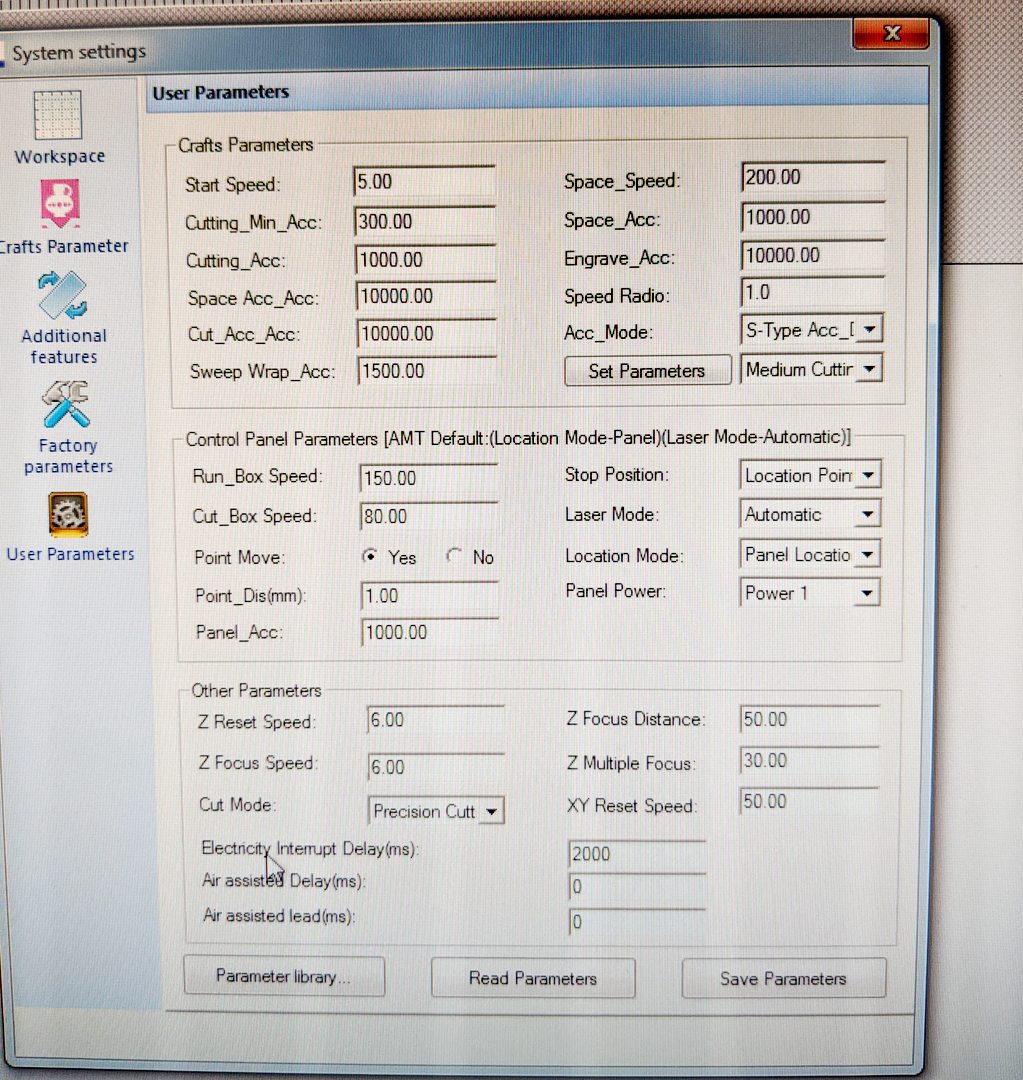
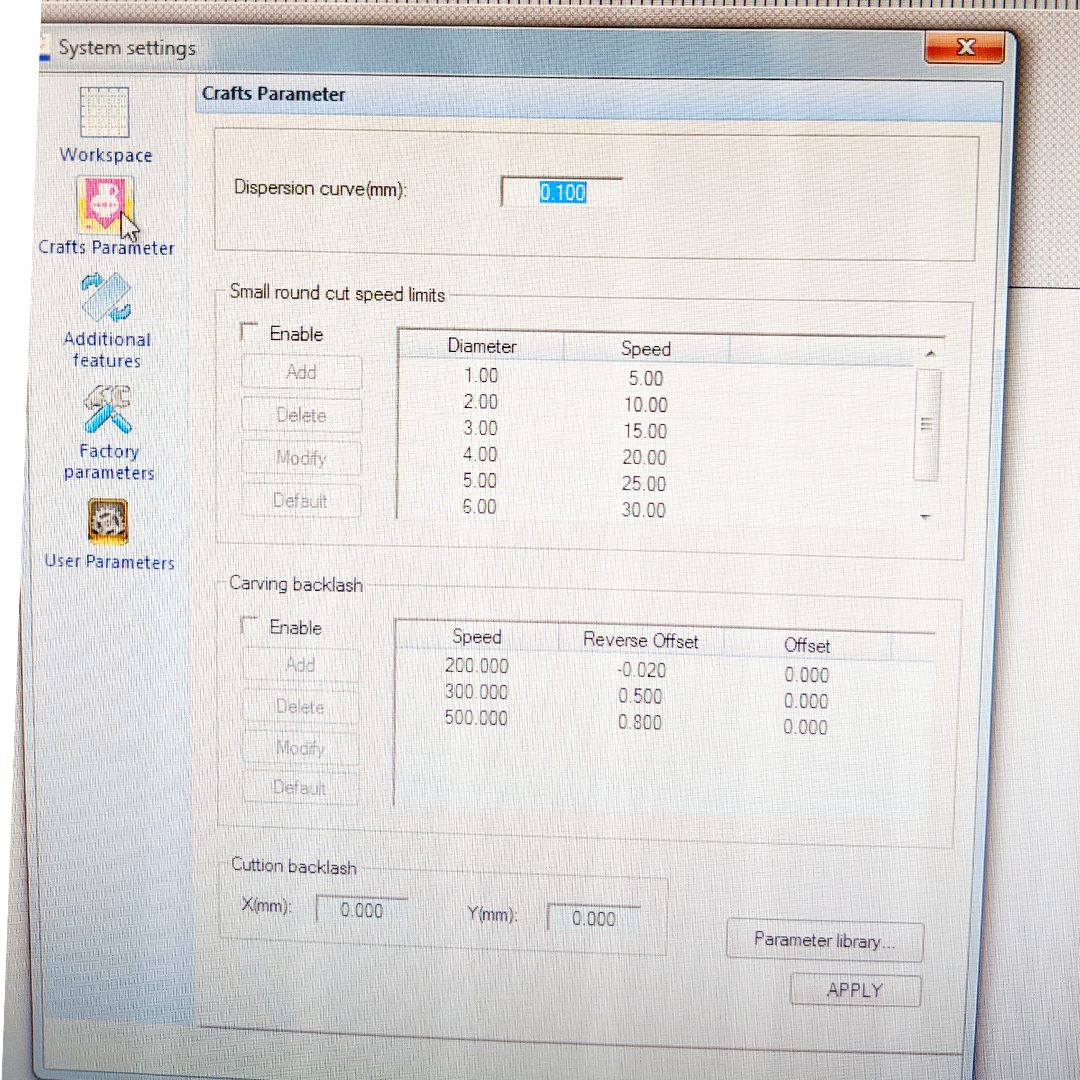
- Check that the parameters are set to default and match the screen shots below
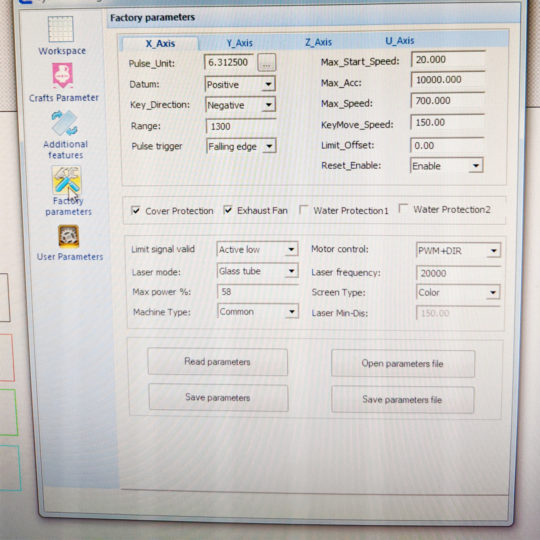
Factory Parameters 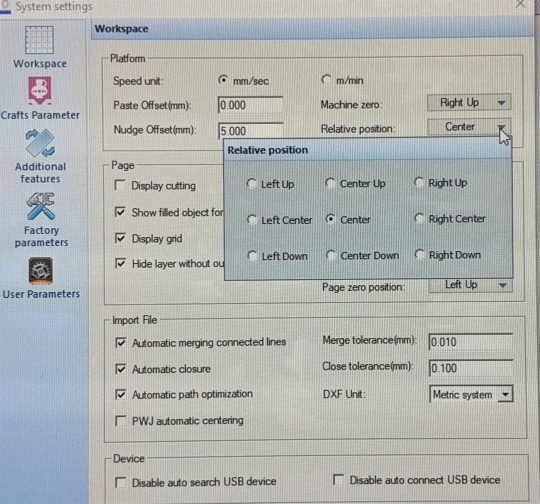
Workspace Parameters with Relative Position set as Center. -
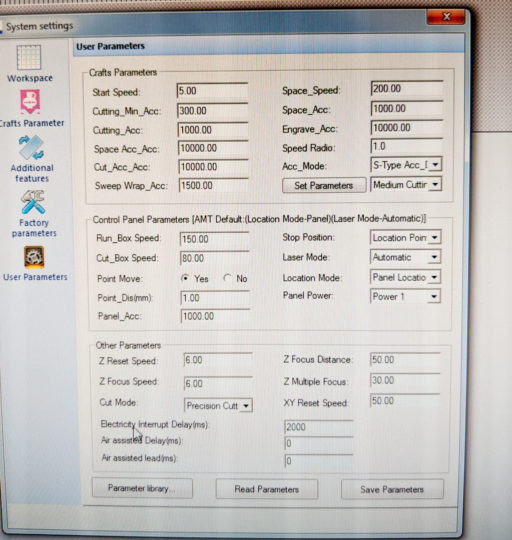
User Parameters 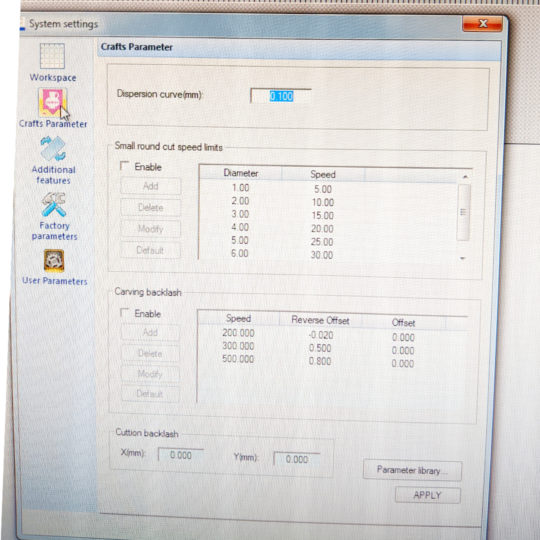
Crafts 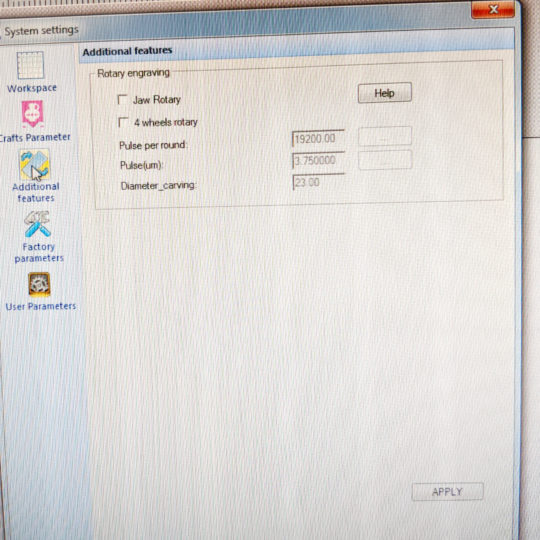
Additional Features
- Check that the parameters are set to default and match the screen shots below
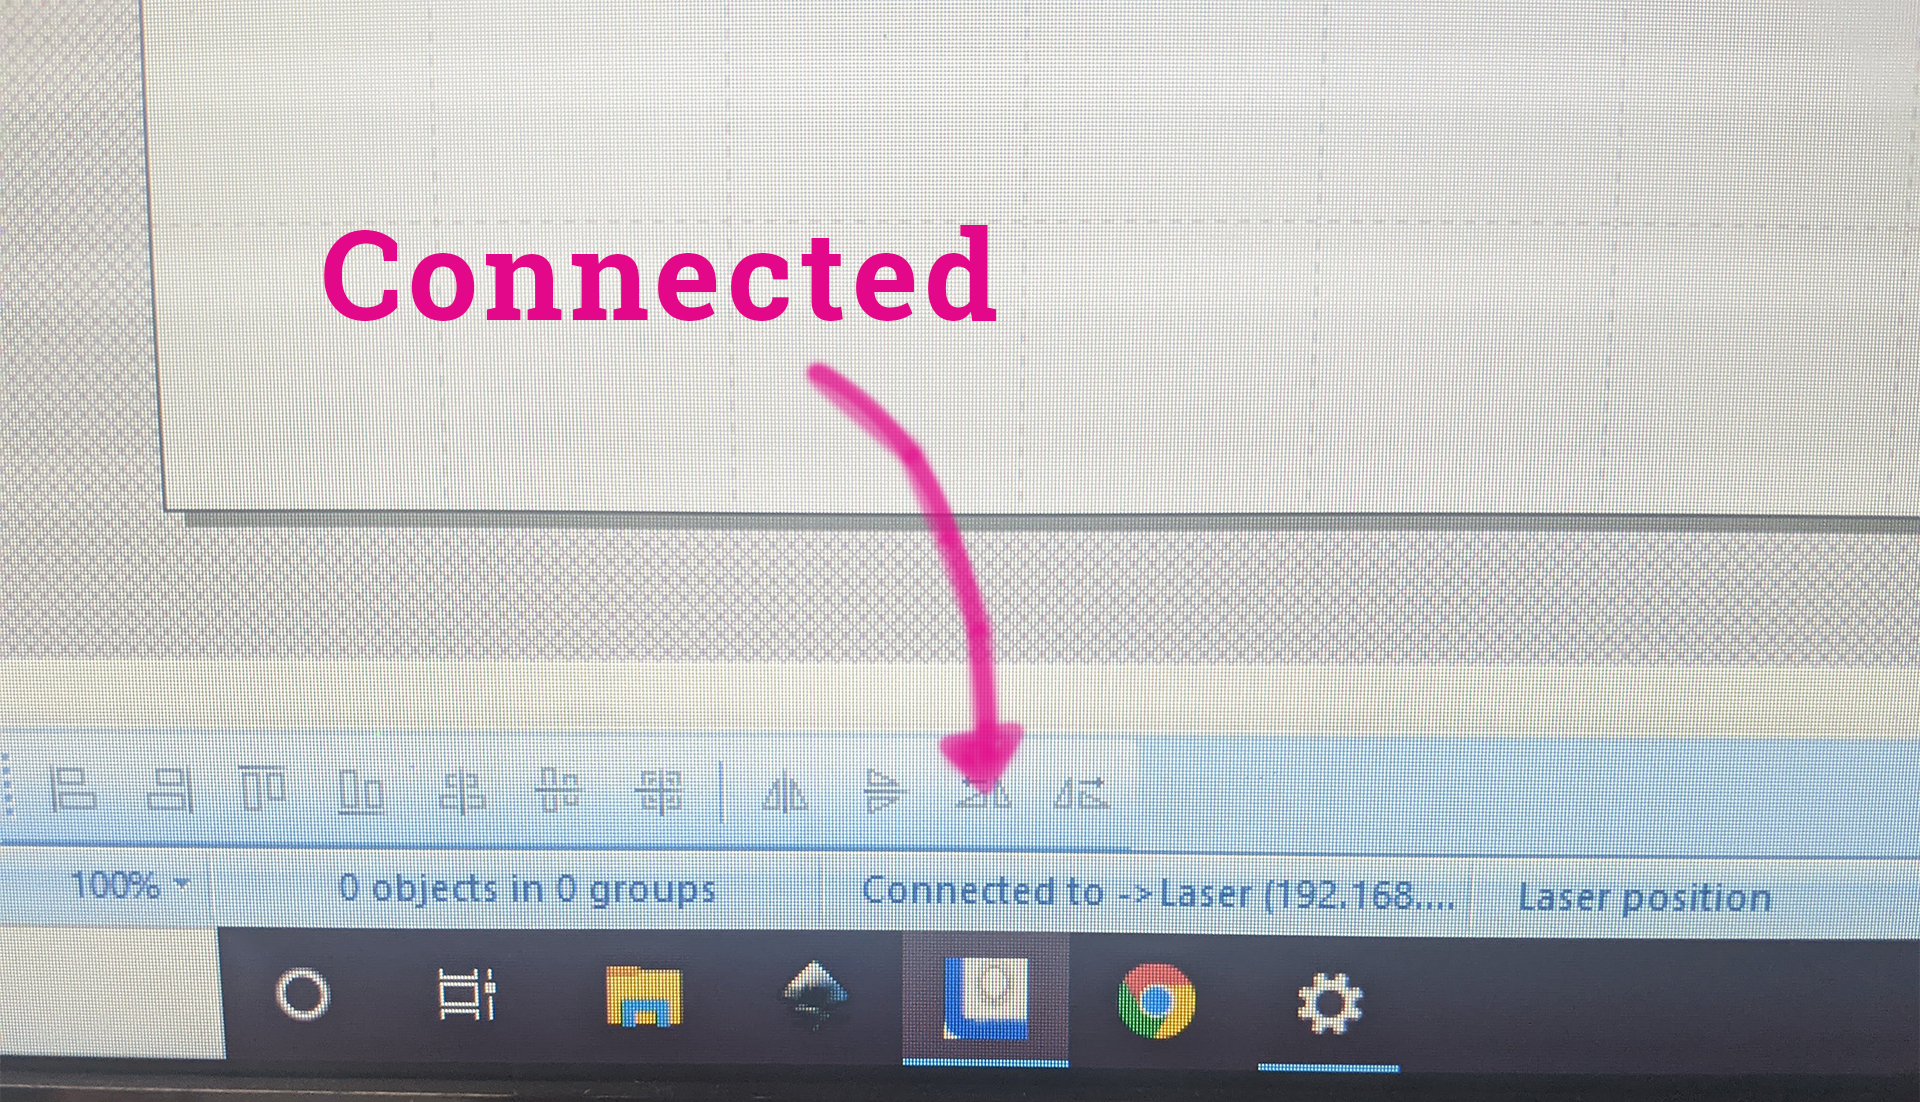
- Check that the computer can see the laser. In the middle of the LaserSoft screen at the bottom, it should say “Connected”. (See this post about troubleshooting the connection)
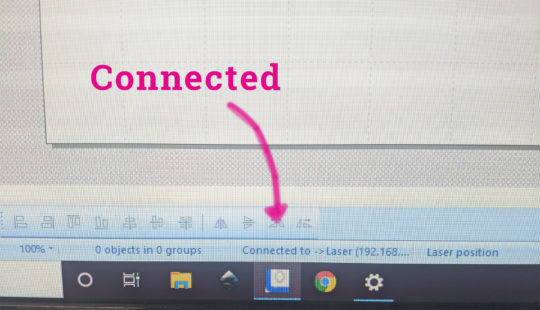
connected message - Import the GP-cork-coaster-designs.dxf bfile into LaserSoft
- Choose Open import with these settings
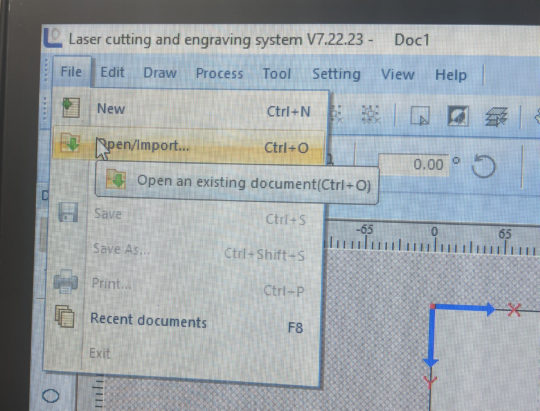
Open/Import 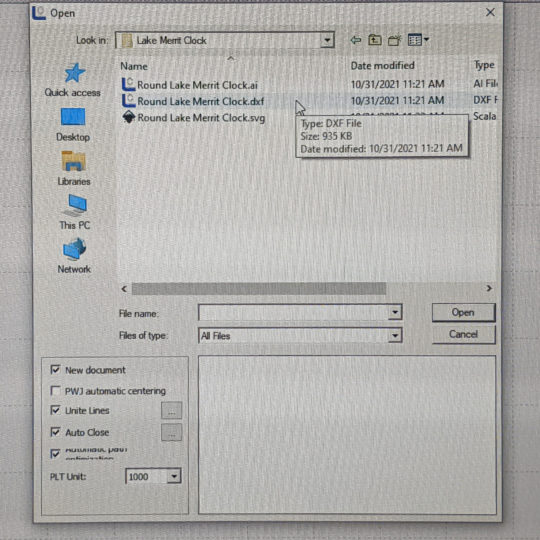
Import Details
- Choose Open import with these settings
- Add the layer settings for cutting and etching
- Double click on one of the rows in the Layer Parameter pallet to bring the layers dialog box up
- Input these settings for the layers
- Logo Etched: (Blue) – [settings]
- Logo parts faux etched (Pink) – [settings]
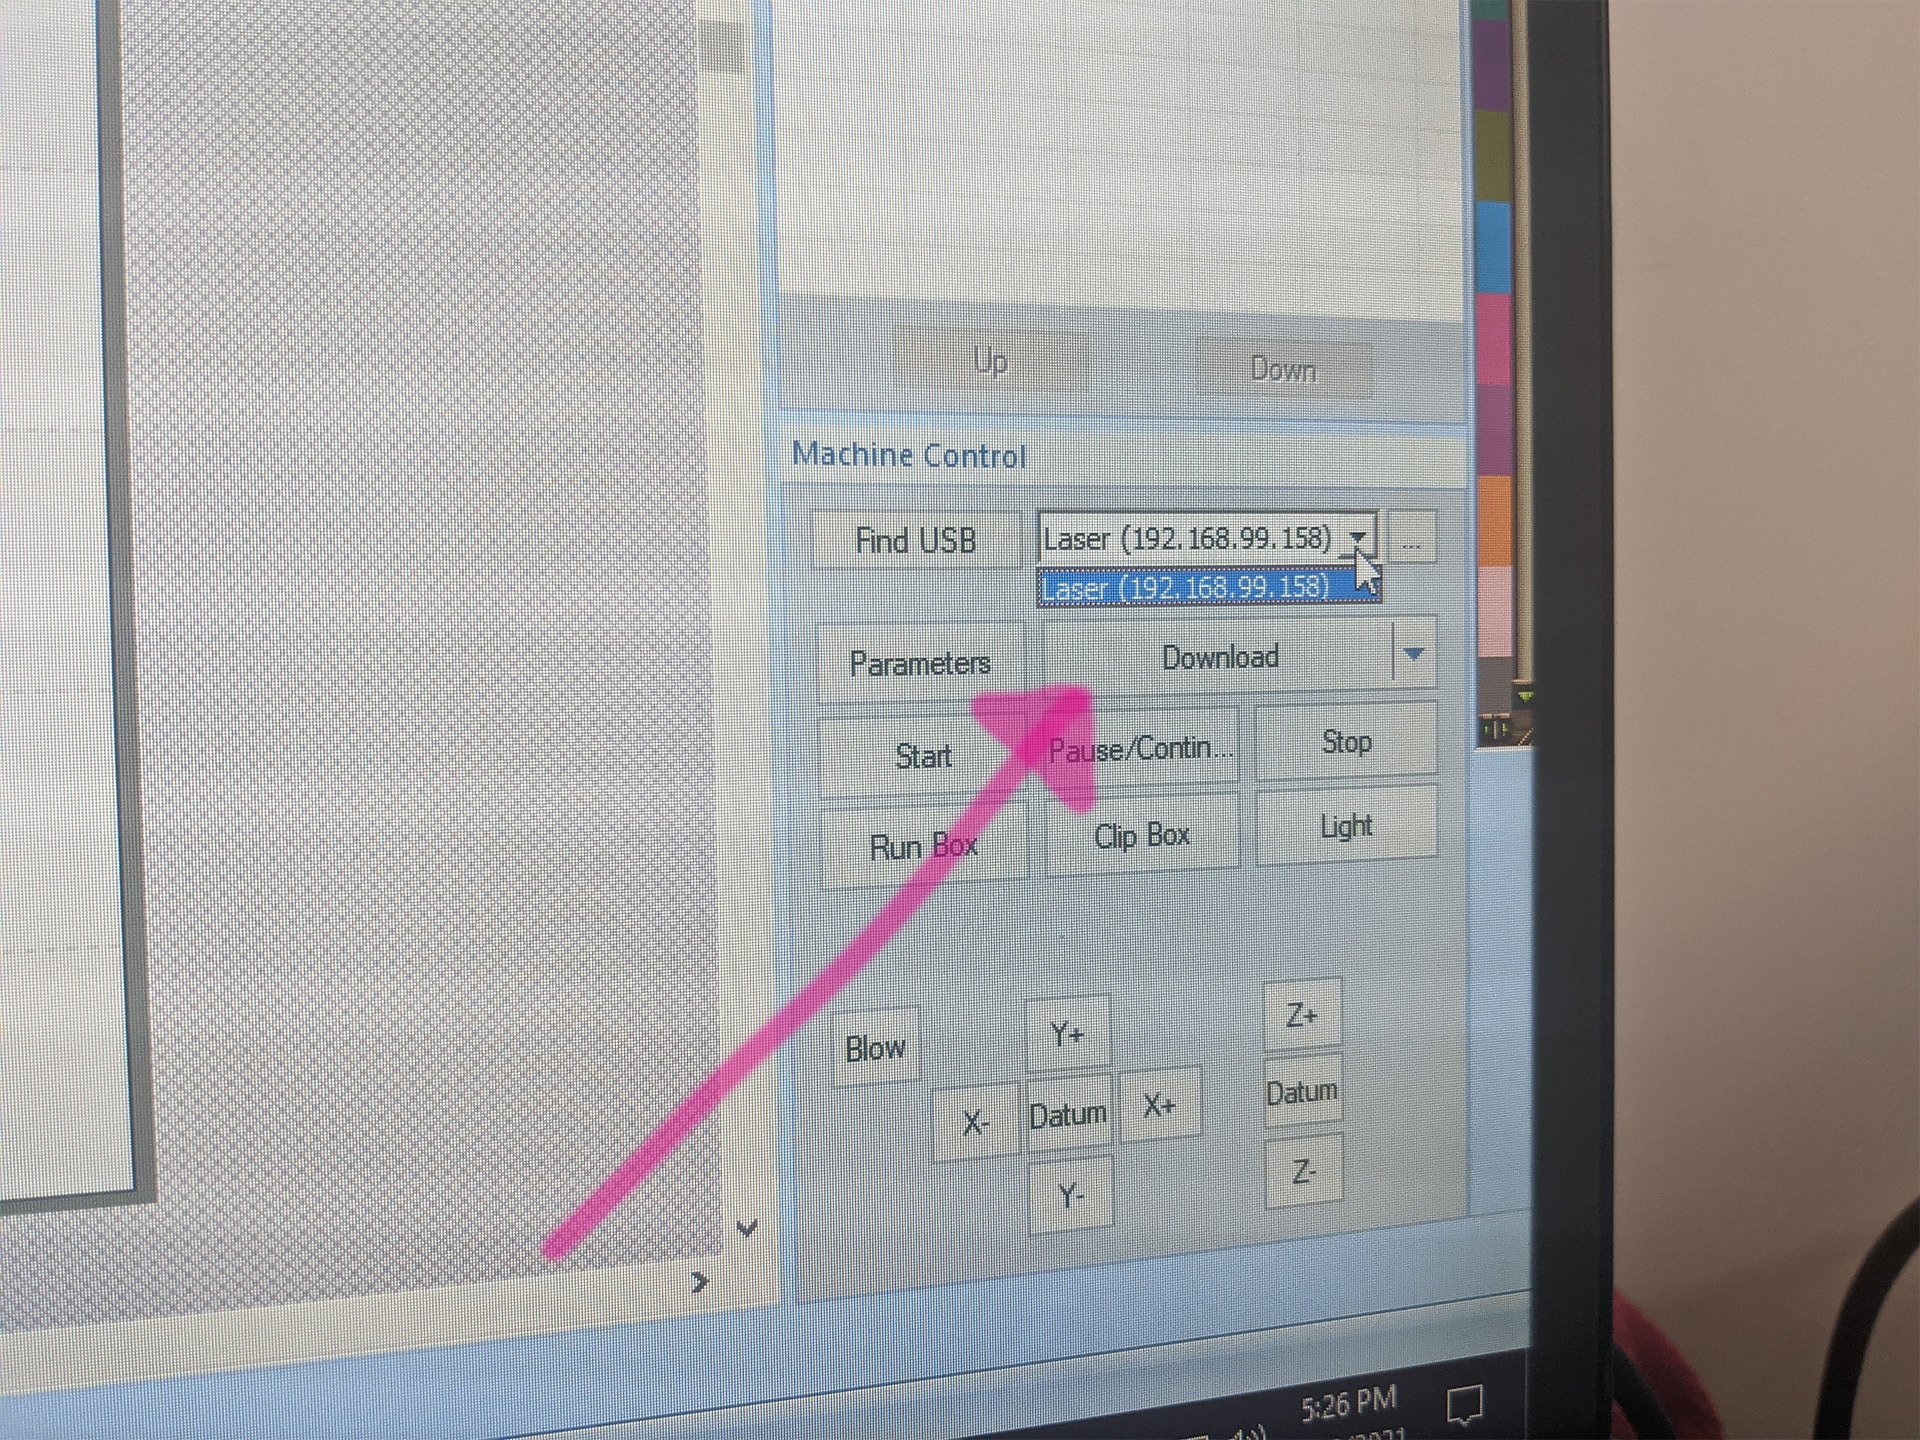
- Download the art to the laser cutter
- Choose Download under the layer menu
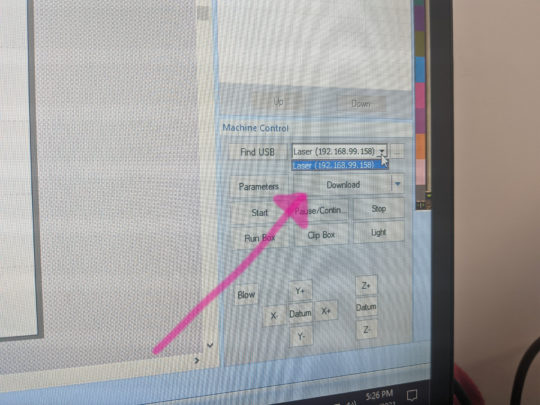
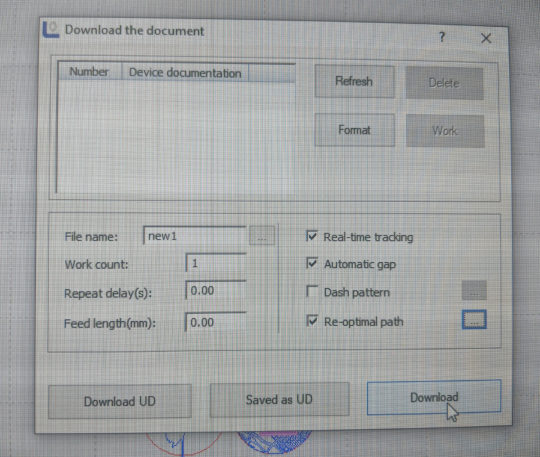
Download button on the main screen - Check the settings. Make sure all the check marks match the screenshot below.
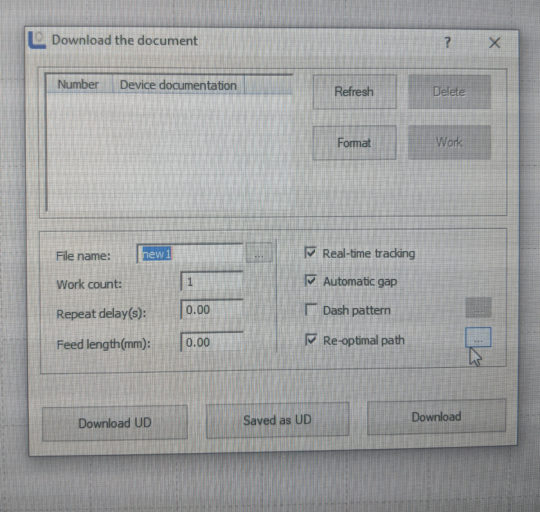
Download dialog box with the correct checkmarks - Check the Re-Optimal Path settings. Click the 3 little dots to open the dialog box. It should look like the screen shot below.
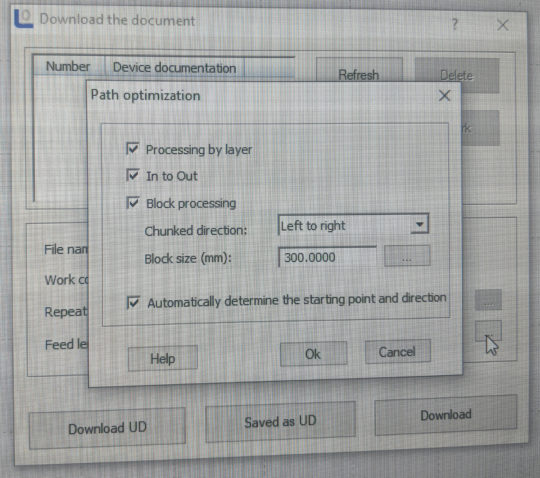
Path Optimization Dialog box - Click download once everything has been checked.
Click on Download
- Choose Download under the layer menu
- You will hear a beep on the laser when it is done downloading
- The screen on the laser confirms the file name, and shows a related graphic
- Note the power settings don’t update until the job is running


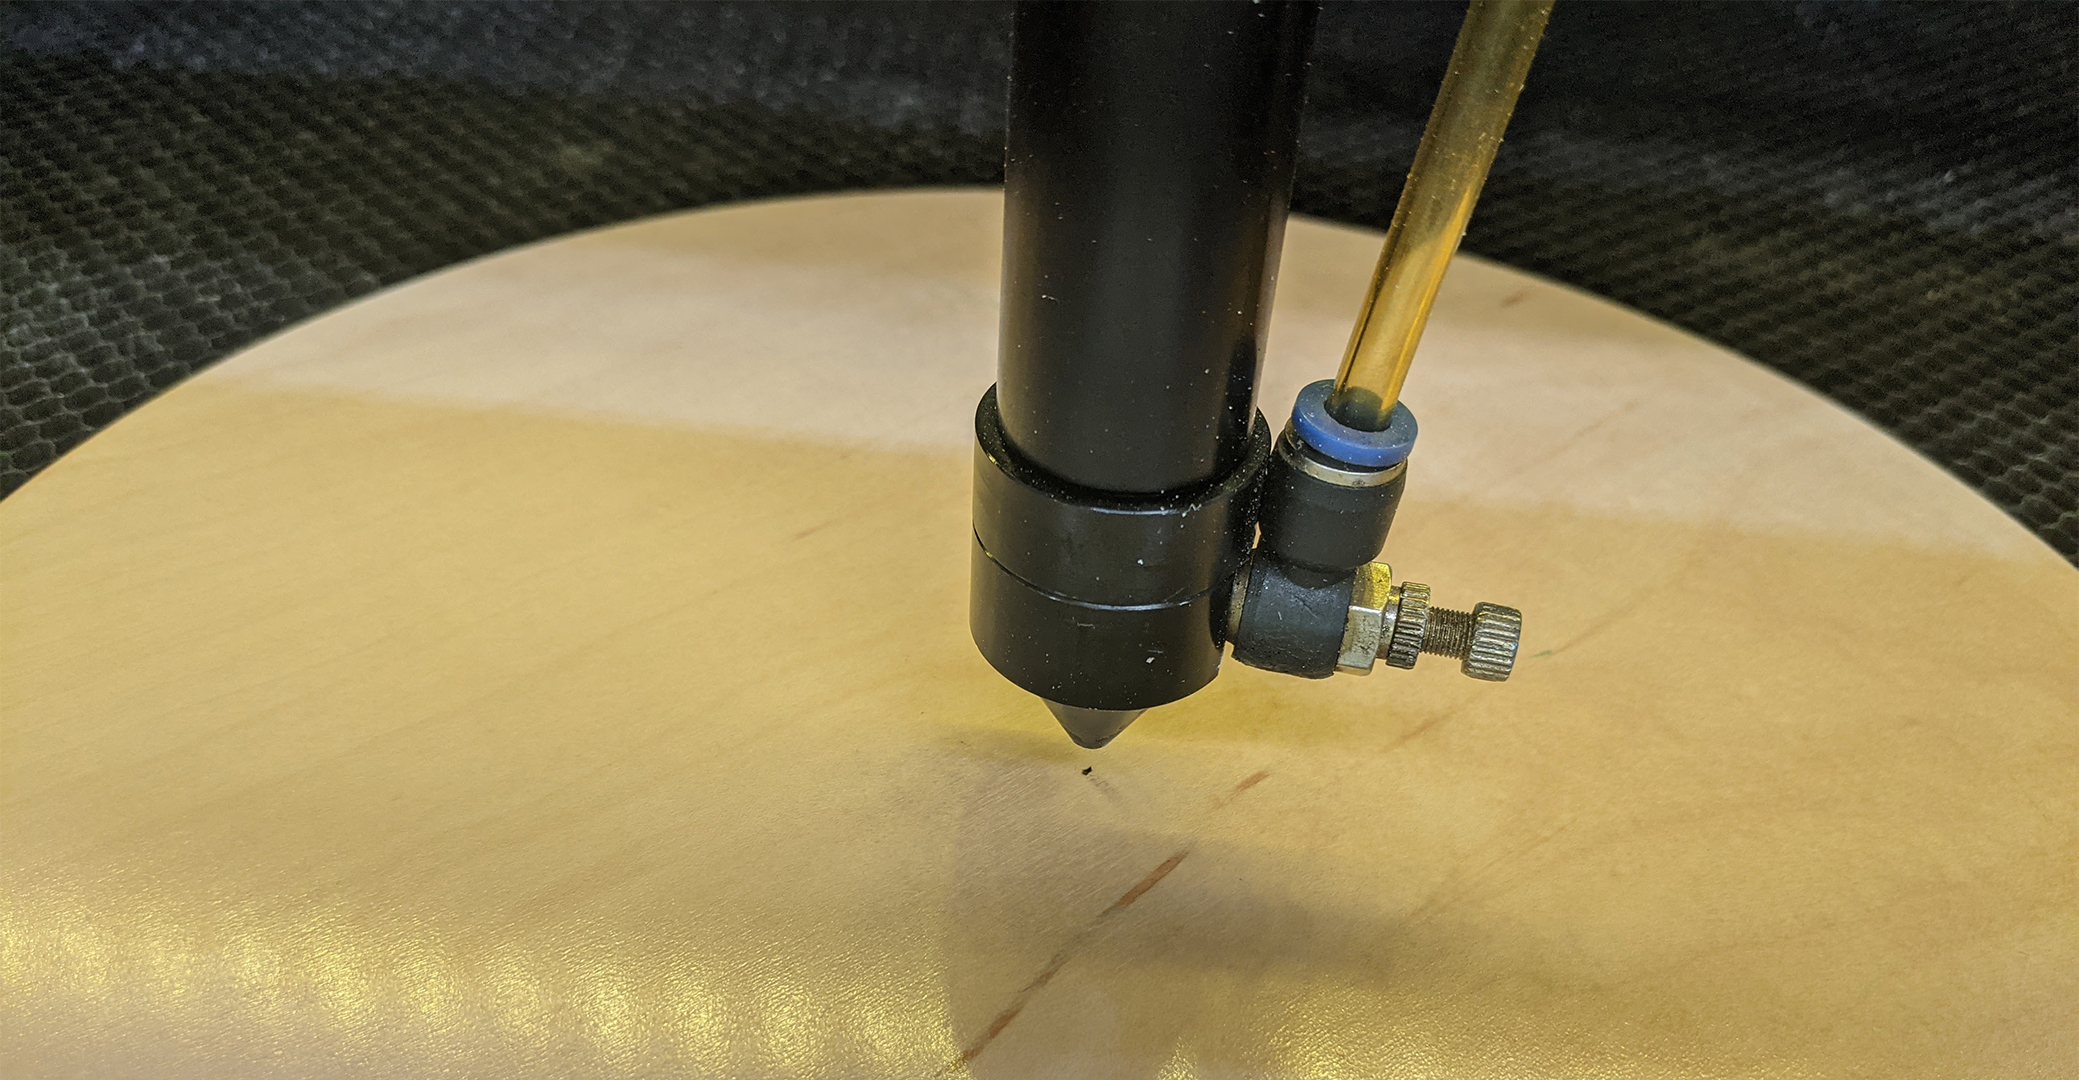
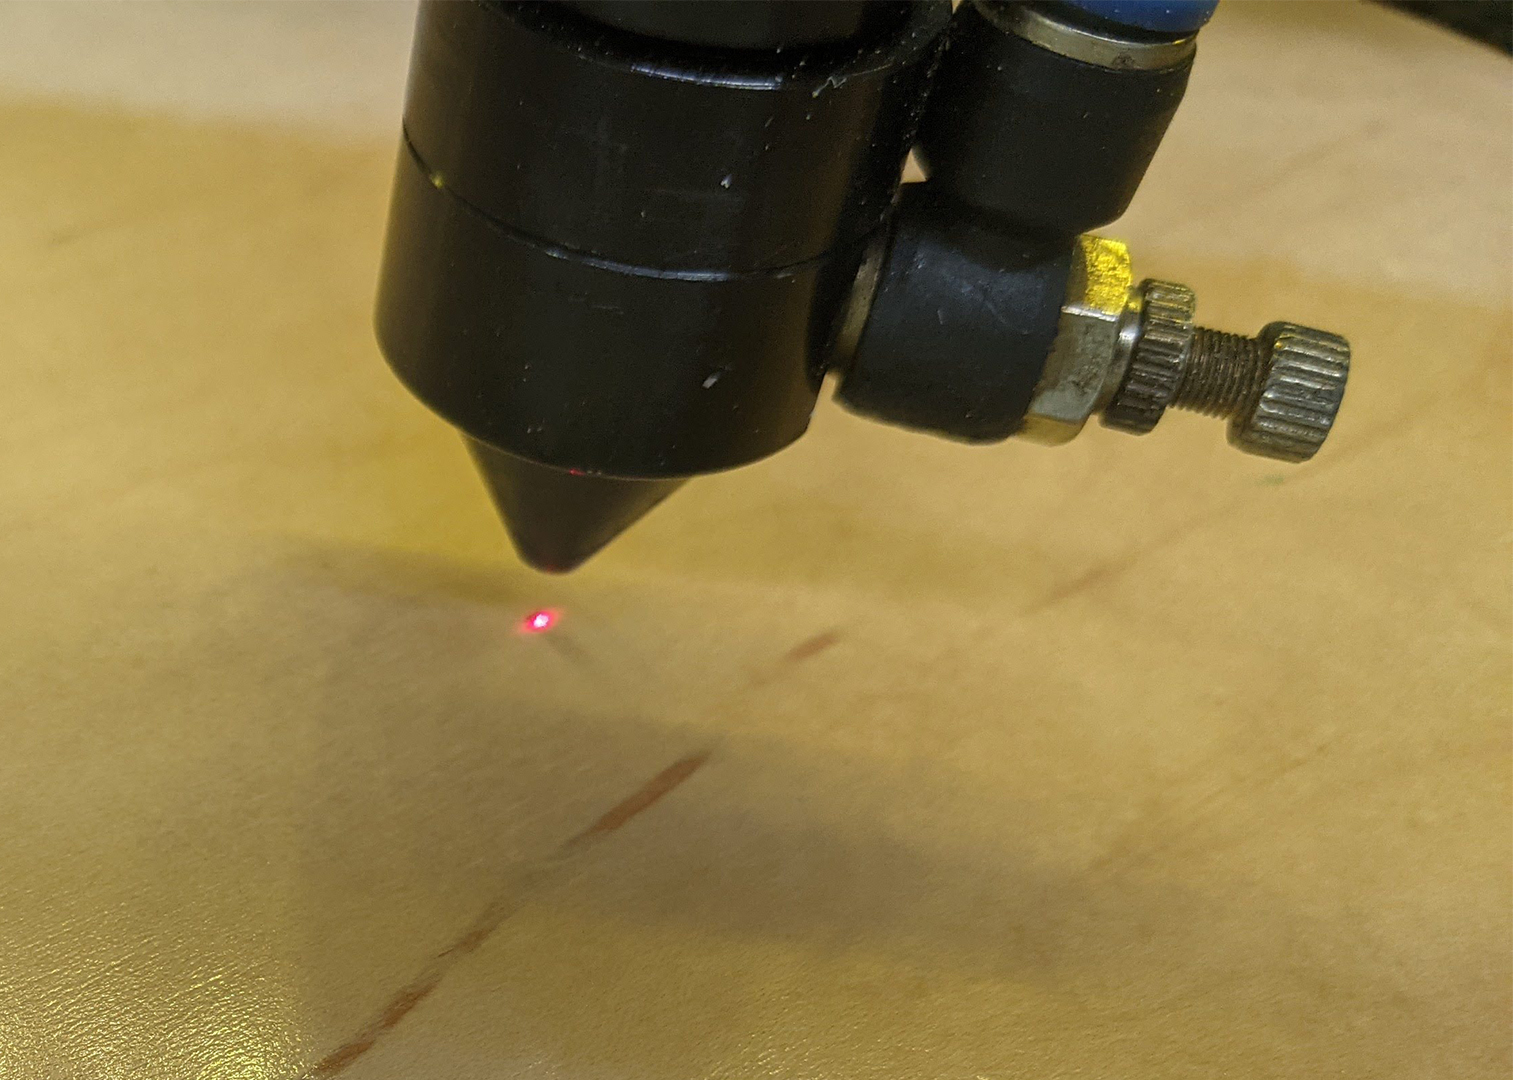
Step 4: Set up the material and focus
-
-
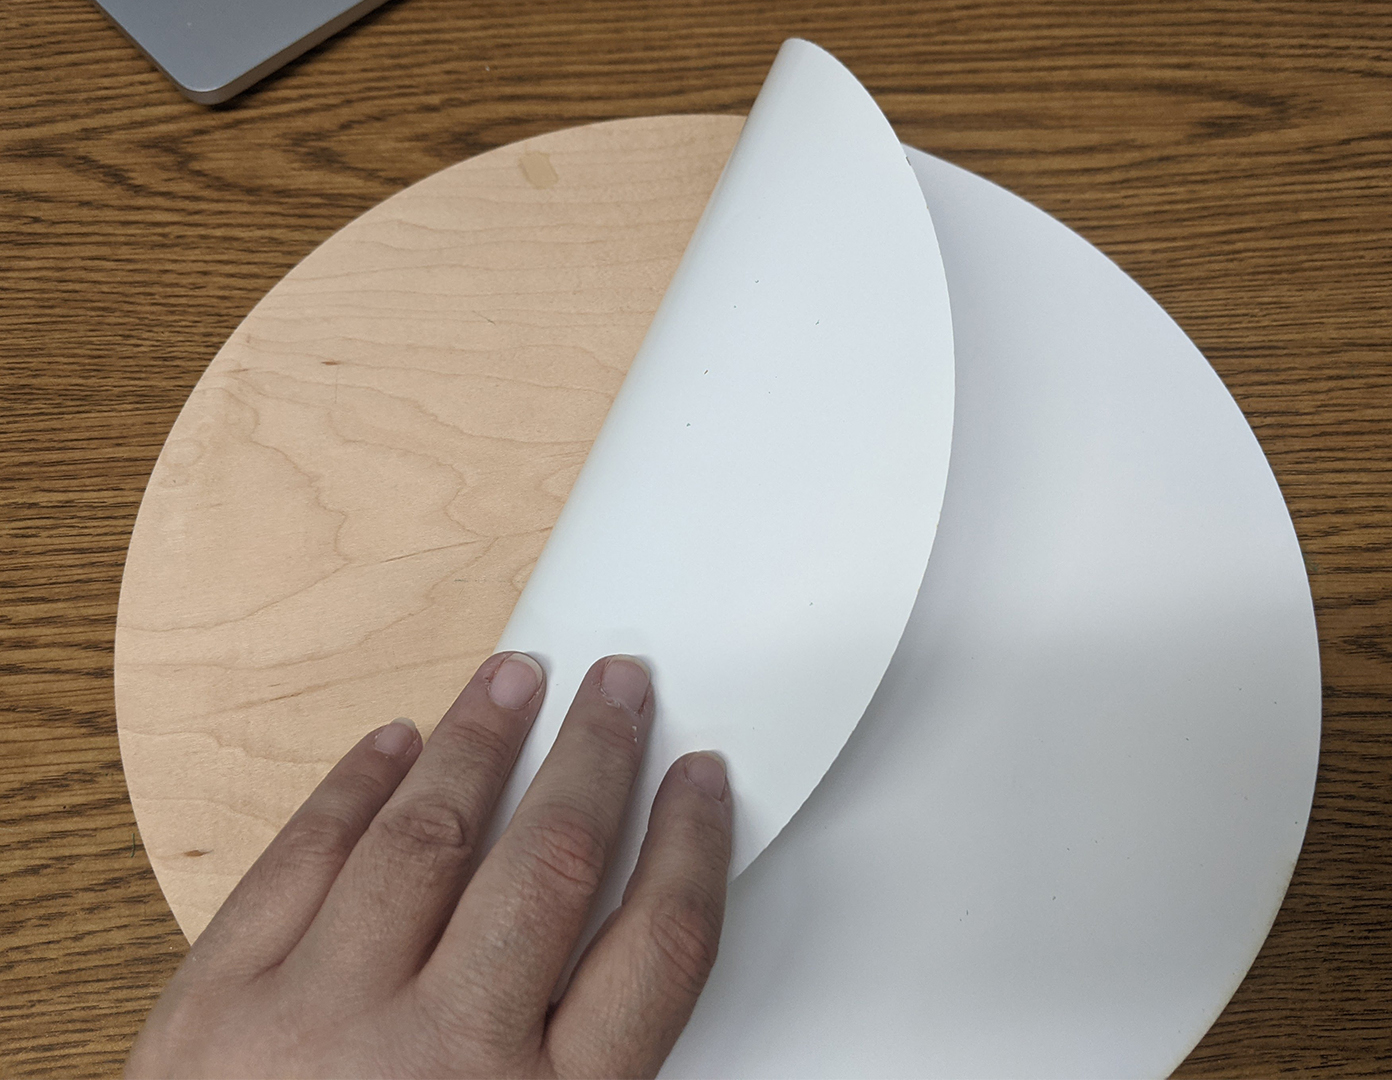
- Use the paper template included to mark the center of the wood round with a small pencil mark. You will use this to set your relative position in a moment.

- Zero the bed – Also know as adjusting the z axis – How to guide
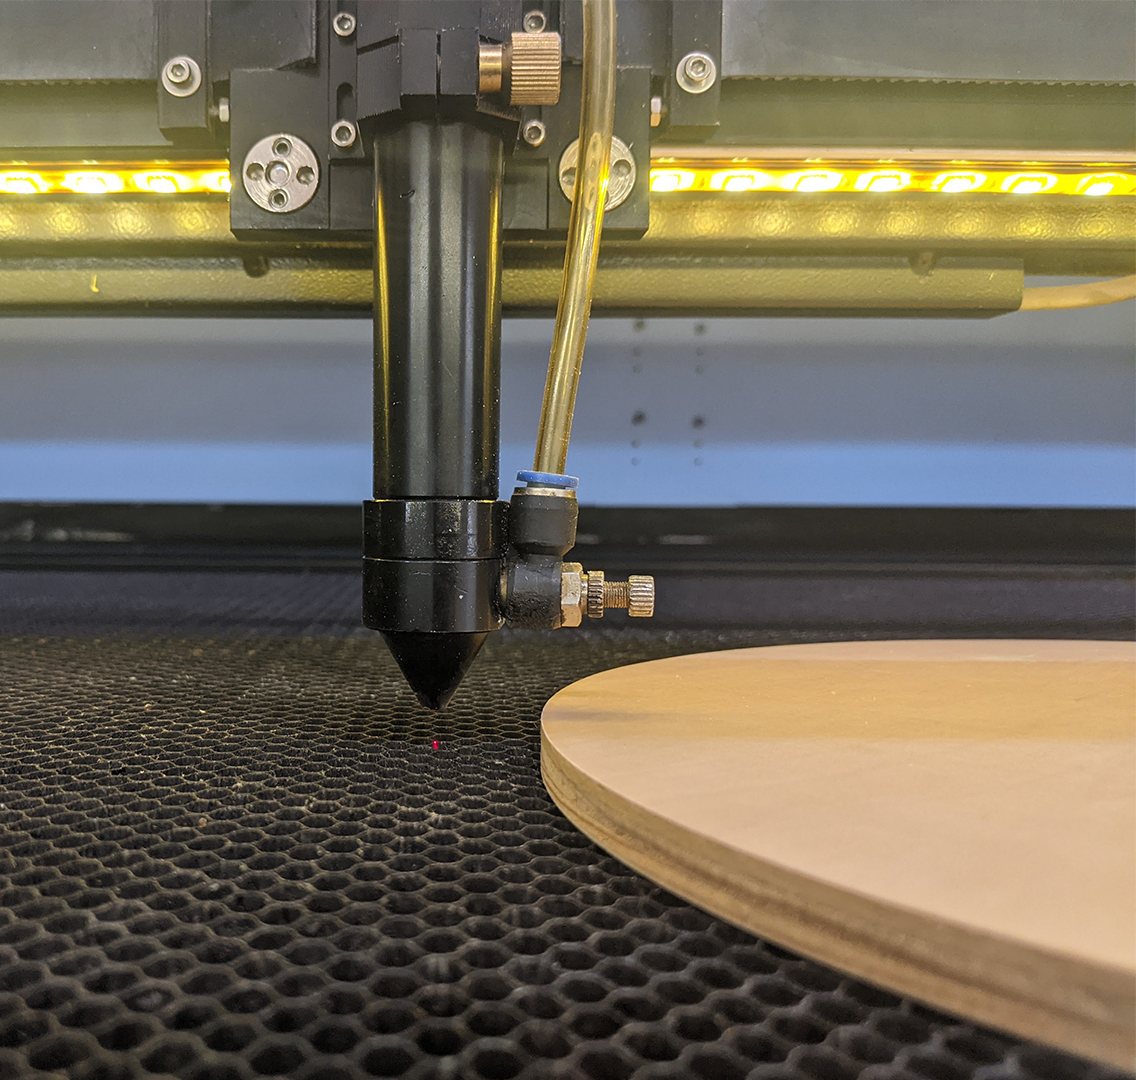
- Position the marked wood round on the bed
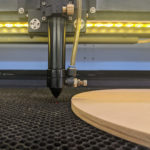
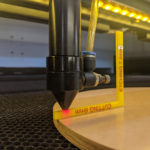
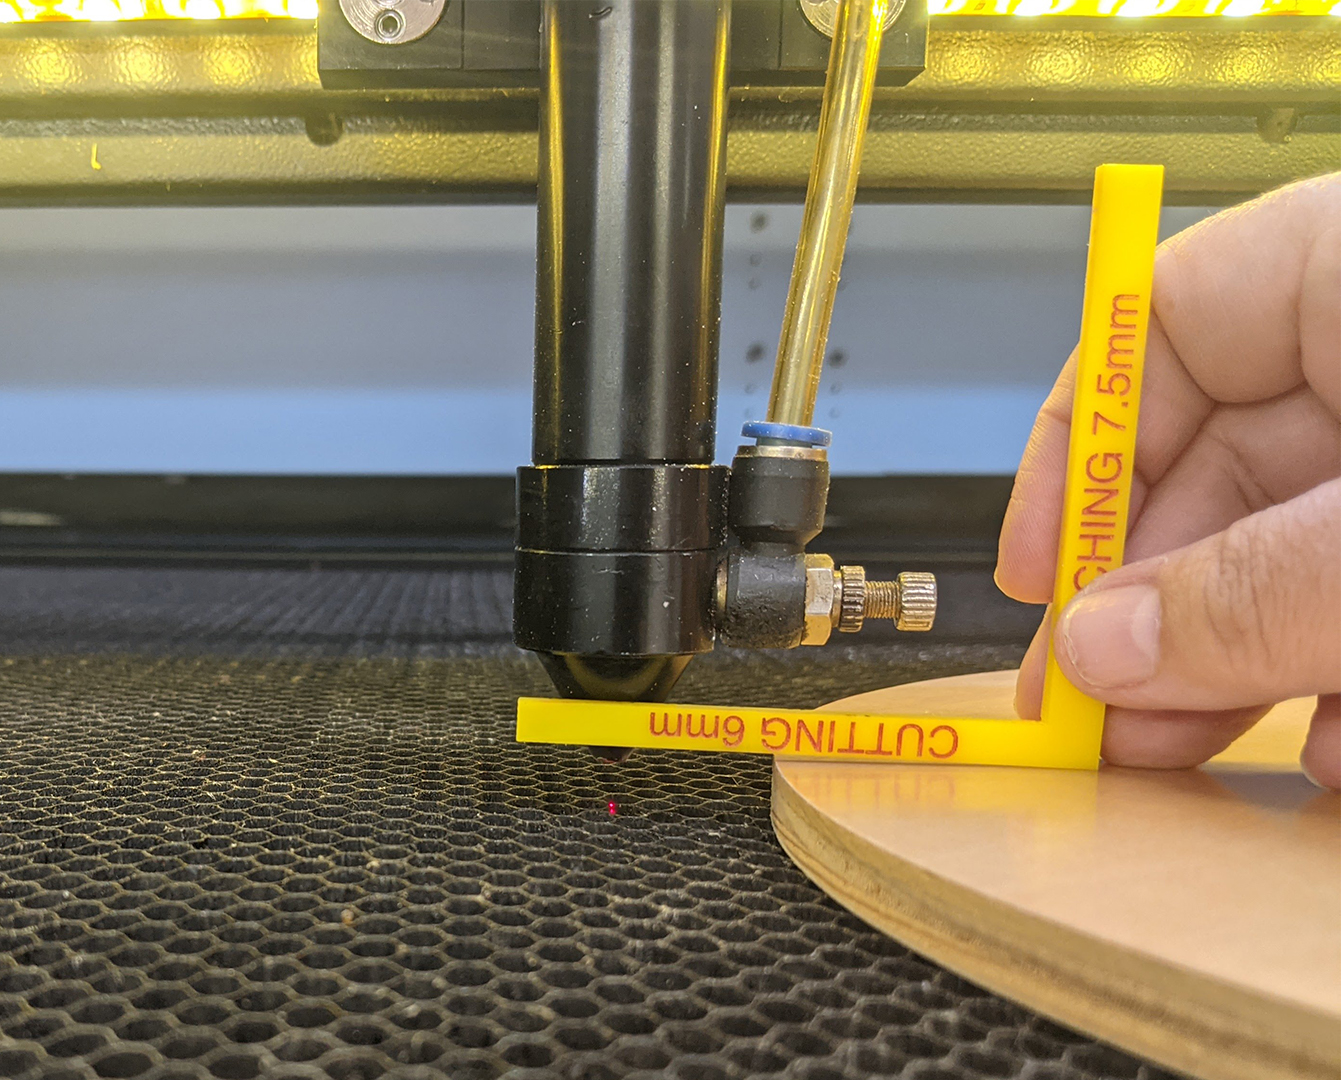
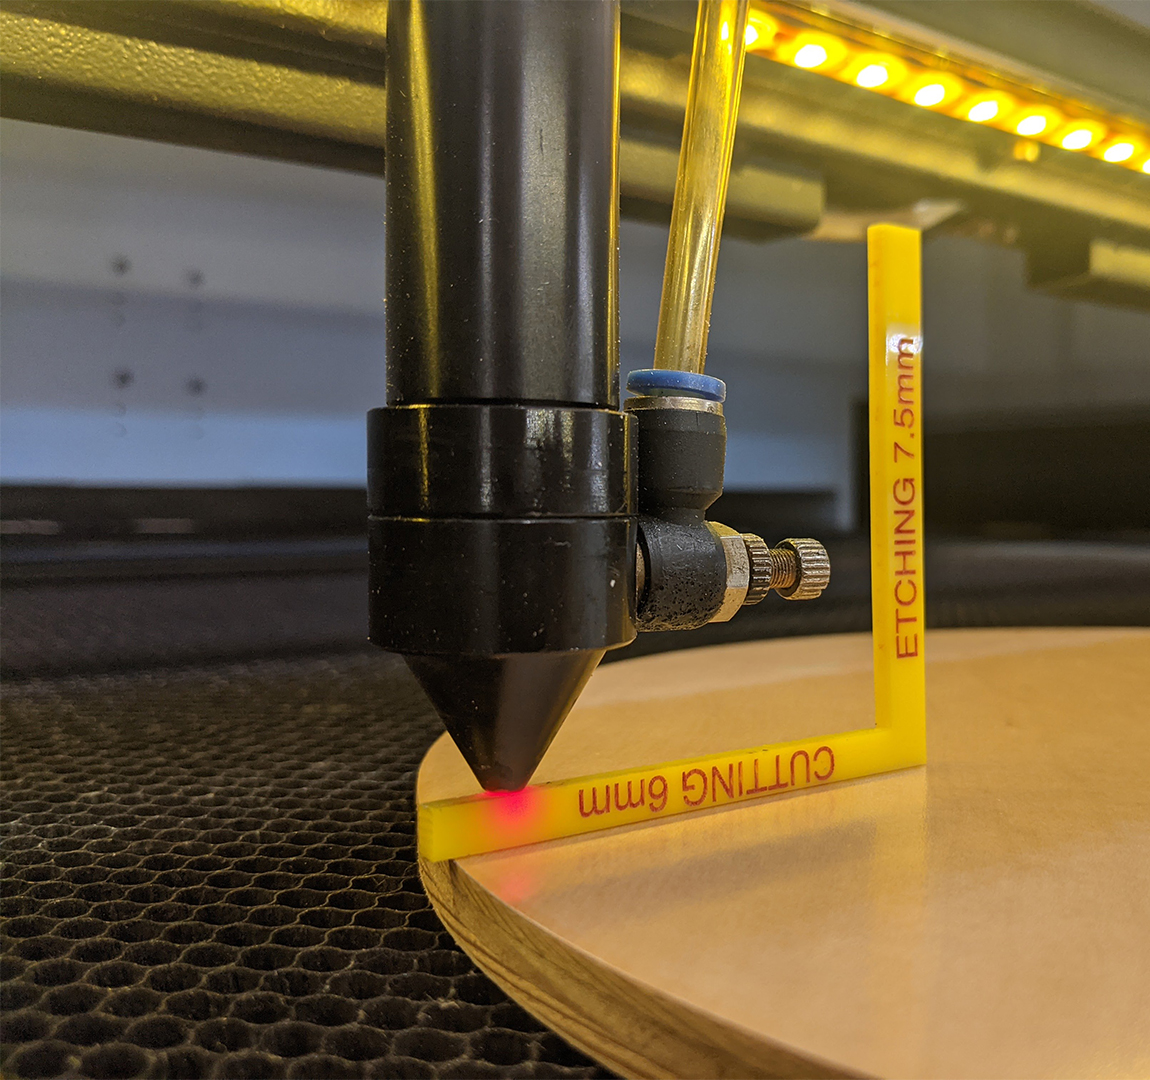
- Using the focus tool on the cut setting, move the head to near but not over the edge of the wood round, close enough that you can use the focus tool
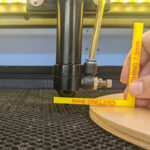
- Press Z- in small bumps until the head is focused on the wood round in the cut setting setting
- Move the head with the red light over the center dot you marted with the paper template.

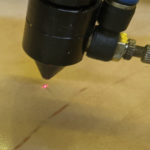
- Press Origin
- Verify positioning by “running the box”
- Use the paper template included to mark the center of the wood round with a small pencil mark. You will use this to set your relative position in a moment.
-


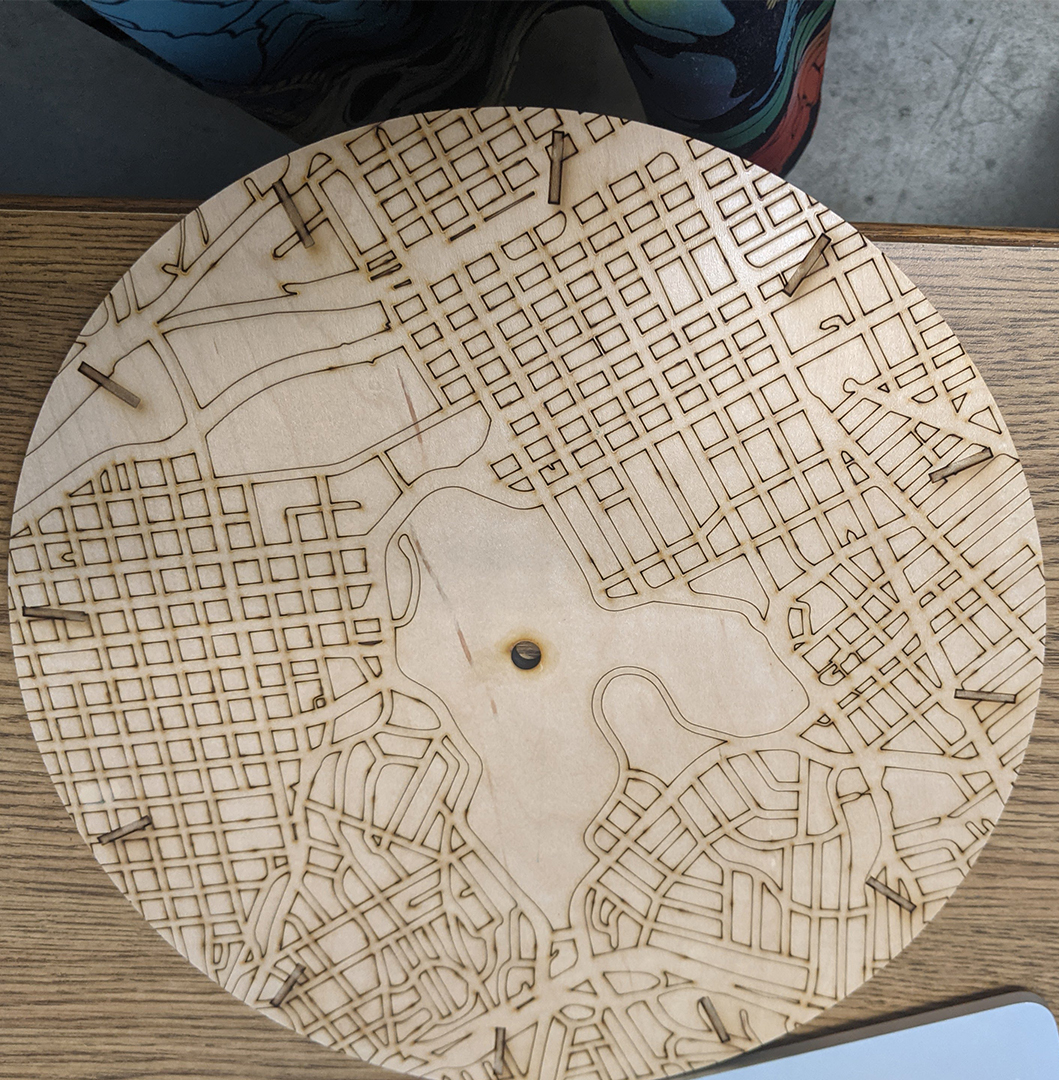
Step 5: Run the Job
Please note the art for the clock is supposed to run over the edges. It was designed with a little bit of “slop” to accommodate a few millimeters of positioning variance.
Troubleshoot as needed (see the binder or the wiki)
Step 7: Optional – Cut inlays for the hour markers
To create small inlays out of contrasting wood or acrylic, or other stable, clean cutting thin material, you can use the original art file. This is how.
- Go to the design file you imported for this job.
- Select the “12 O’Clock” Pink marker and copy it into a new file
- Copy and paste the shape 12 times into an area that fits your inlay material. For example, if you have a 4″ x 4″ piece of material lay then out in that amount of space.
- Look up the cutting settings for your inlay material, and set them in the layer dialog box.
- Cut the inlay pieces
- In most cases, CA glue will allow you to glue them into the etch hour markers. We recommend being sparing with glue.
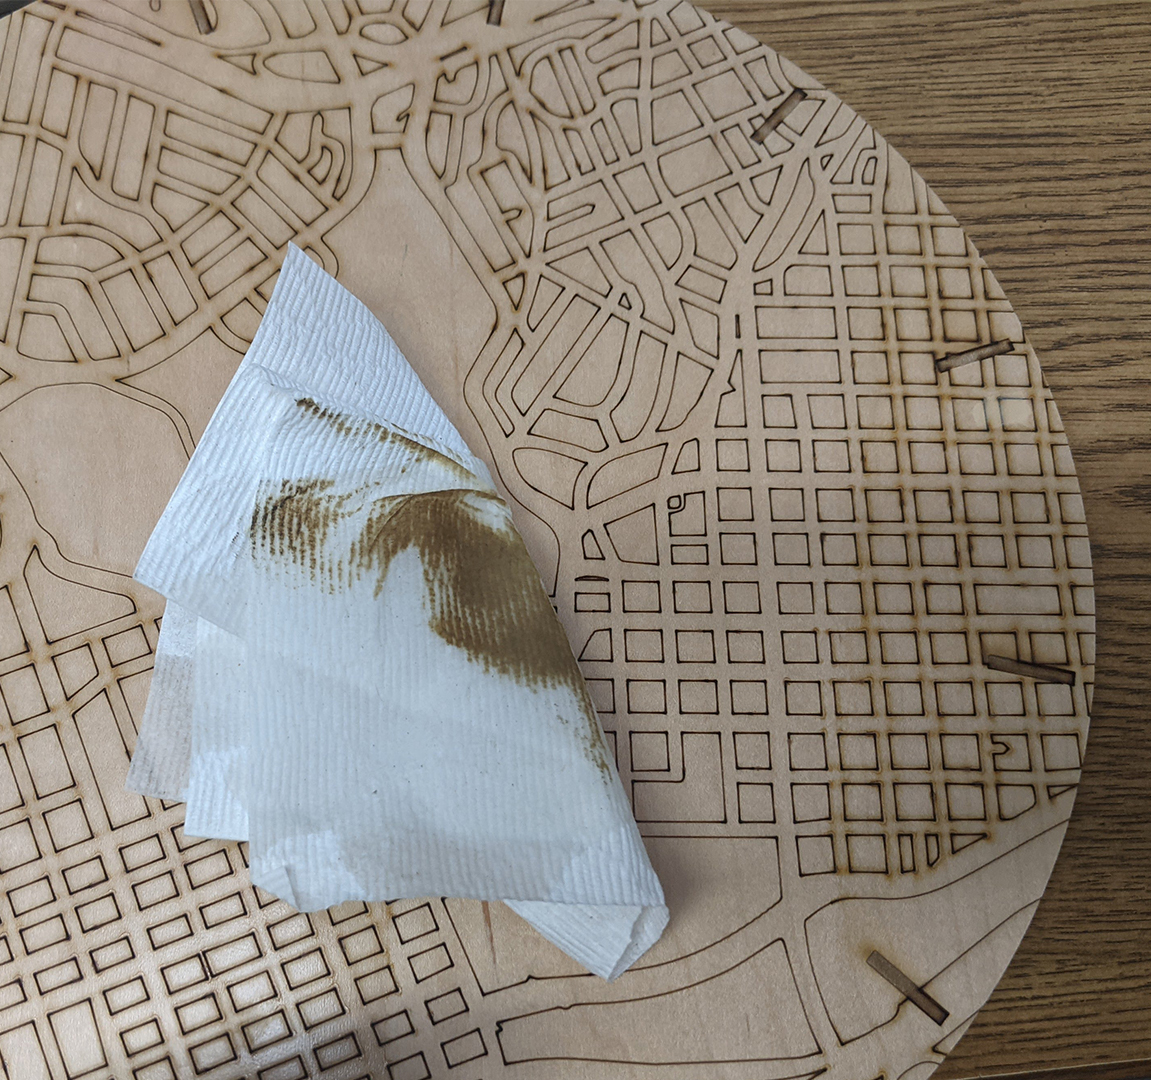
Step 8: Clean up and clockwork installation
To clean the clock face, you will need a few paper towels. You can get it slightly damp or use a small amount of general cleaner. Do not use tons of water.
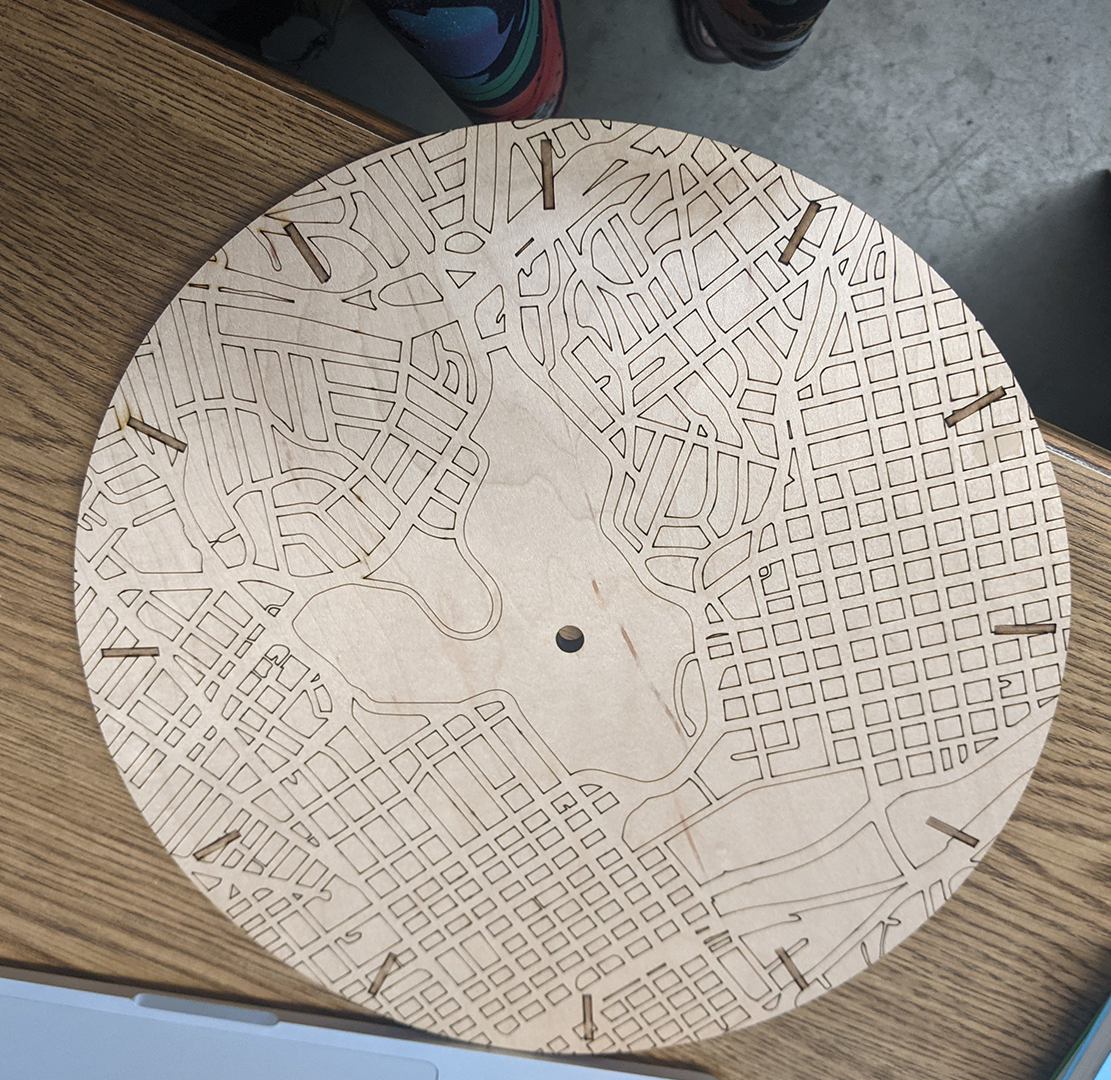
To install the clockworks according to Amazon Instructions.
Step 9: Shut down – See the Shutdown checklist
-
- Break down and bag all your material
- Move the laser head to the very back of the laser
- Fob out of the fob box
- Turn off the laser (both red and green switches)
- Turn off the main switch
- Clean down the laser inside and out
Step 7: Finish up
- If donating the Clock, return to the box it came in and mark “donation” and your name, and leave for the team