Event Tickets must be created on a page or event post. For Ace’s use, we only create tickets on the event posts. Follow the steps below to create tickets. If you don’t you may end up with a corrupt post and have to start all over again.
- Choose “Add Event” from any of the many locations that is possible.
- Add the Event name in the first field
- Update the permalink to end in the Event date. Example: -081023
- Add your Event copy to the second field.
- Choose your Event Category
- Add your event tags (optional)
- In the Event Calendar Panel choose the Date & Time for your event
- Choose the Venue of your Event
- Choose the Organizers of your Event
- Choose the room your Event will be in
- Add a featured image for your event (16:9 Ratio)
- Publish your event!!! It is very important you do this before trying to create tickets
- Next, Choose New Ticket in the Tickets Panel of the event
- Name your ticket for your event and add the date in this format at the end x-x-x
- Add price and capacity information
- Choose the correct field set
- Save the Ticket
- Go to ticket settings and add the ticket image to match the event image
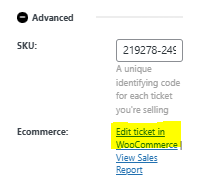
- Update the ticket product. To do this, click the “Advanced” dropdown in the ticket panel and then “Edit ticket in WooCommerce.”
The link is highlight below. It’s recommended to right-click this link so it opens up in a new window, called “Edit Product.”
- Find the product data panel:

- Update the tax status from ‘Taxable’ to ‘None. IMPORTANT: All tickets are automatically set to ‘Taxable’, even if your event is duplicated from a past event. If you duplicate a past event and change the details to a future event, the product data must still be updated to ‘None.’
- Hit Update on the “Edit Product” page.
- Hit Update in the “Edit Event” page.
Go to the Ace events page to double check your event to ensure everything is ship shape. Correct as needed.
IMPORTANT! There is a known glitch that randomly occurs where a ticket product gets “detached” from the event and you cannot make tickets on that event. It happens when you have the event edit screen up in more than one window or another user has it open. Along with a few things we aren’t sure of. The only solution is to delete the event and the ticket products and start over.