Tips for Beginners
This page corresponds to the Ace Maker Space Introduction to Pour Painting Class. There is also an Advanced Pour Painting page with details about the corresponding Ace Maker Space class.
Safety
There are some safety and conservation considerations when using acrylic paints. While all paints used in Ace classes are certified non-toxic and conform to ASTM D 4236, they are nonetheless toxic while wet. Do not eat while painting without carefully washing your hands or removing your gloves.
- Paints are toxic if consumed while wet
- Paints ruin clothes, floors and furniture
- Paints clog drains
- Don’t waste water:
- Wipe palette knives with a paper towel – reuse towel as long as possible
- Clean brushes in a cup of water and reuse for cleaning as long as possible
- Don’t rinse swipe sheets before wiping most of the paint off, or don’t rinse them at all and just wipe them clean
- Don’t Waste Paint:
- Let each mixing cup drip into another “salvage” mixing cup to collect the most paint from the cups
- Scoop up spilled paint from your tray and collect it in the salvage cup
- Don’t mix more paint than will fit in your squirt bottles
- Use paint that has dripped off your painting to cover its edges
- Minimize single-use plastic:
- Buy larger paint containers to minimize packaging
- Don’t use disposable plastic cups for mixing paint
- Don’t use disposable plastic straws or mixing sticks
Mixing Paint
Mixing paint is the process of adding white glue and water to acrylic paint to form a liquid paint with a smooth and even viscosity about like maple syrup. When mixing try to avoid creating bubbles by mixing too vigorously, or by squirting water in a sharp stream into the paint (e.g. with a squirt bottle of water).
- Mixing ratio 1 : 1.5 : 1, which means one part paint, 1.5 parts glue and 1 part water
- Mix paint with glue first. After they are well mixed then add water.
- Don’t use a funnel: use a waxed paper cup or cup with smooth sides you can scrape the paint out of
- Paints can be transparent, semi-opaque, or opaque. The white glue is clear when dry so transparent colors will be more transparent when dry. All colors will be slightly darker because the white glue lightens them while wet
- Some paints are fluorescent
Blending Paint
Blending paint is the process of adding different colors of paint to form a different color. This can be done while mixing paint, or by combining already-mixed colors. It also happens to some degree when different colors touch each other on your painting.
There are some general rules about blending paints:
- To change a dark color you need use only a little of it mixed with a lighter color. 10:1 is common.
- Iridescent paints + other colors = good
- Metallic paints + other colors = good
- fluorescent paints + other colors = bad
- In a 50/50 mix of two colors, the final opacity will be about the same as the most opaque color
- In a 10:1 mix of two colors, the final opacity will be mostly like the 10-part color.
More reading: http://capturedchaosart.com/blog/files/mixing.html
Silicon Oil
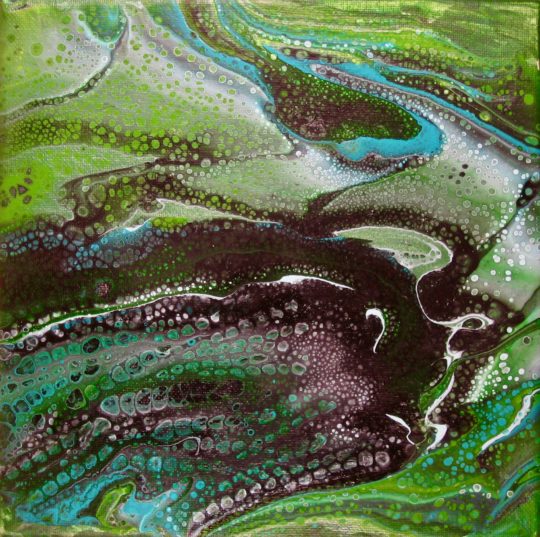
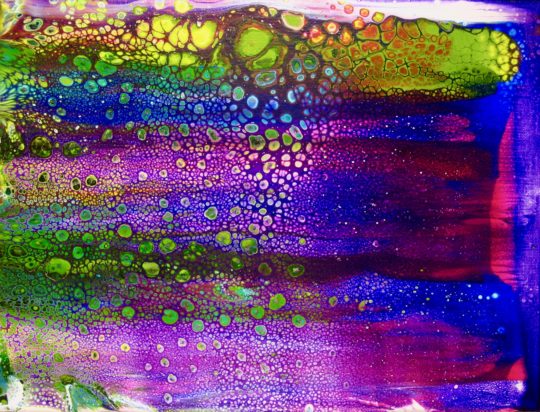
Silicon oil changes the way the paint behaves on the canvas. In general it creates “cells” which are rounded regions where the top layer of paint has pulled back to form a hole, revealing the colors below. The hole gets progressively smaller revealing concentric round edges of the colors below.
You can mix it with paint , add it to a cup you’re preparing for a pour or flip, or apply it to a painting that is already underway. In any case you won’t need very much of it. A drop or two is all you usually need for any purpose.
- Spray on with toothbrush to make tiny cells
- Tap a palette knife in oil and touch painting to make a cell
- Add to paint when mixing to make paint predisposed to create cells after it is poured
- Add to a dirty pour cup when adding colors to make the cup predisposed to create cells after it is poured
Other Useful Tools
There are lots of useful tool and materials you can use for different effects while painting and to improve your experience:
Painting Tools
- A straw for making dutch pours
- A butane torch for popping bubbles
- Air pillows, e.g. sent in packaging when you buy paints and canvases
- Toothbrush for spraying oil
- Palette Knives
- An eye dropper for dripping thinned paint onto a painting
- Marbles
- Magnetic marbles or steel marbles/big ball bearings and magnets
- 1″ wide fan brush for spreading paint on canvases
Other Tools and Materials
- Rubber Gloves
- Pushpins to use as legs for canvases
- Clear packing tape for protecting writing on paint squeeze bottles
- Squeeze bottles (4oz or 8oz) for ready-to-use mixed paint
- Electronic scale which reads to 1/100 oz
- 6oz waxed paper cups if using 4oz squeeze bottles
- 10-12oz waxed paper cups if using 8oz squeeze bottles
- wooden popsicle sticks for mixing paints
- Hobby knife for cutting plastic wrap from canvases
- Scissors
- Rotating tray (aka “lazy susan”, [sic])
- Completely dry and empty garden sprayer
Preparing a Canvas for painting
To prepare a canvas push pushpins into the corners or near the corners. Try to either push them all the way in or at least all the same amount in so the painting sits stably on the pins like the legs of a table and doesn’t wobble. Pins are ideal because you can pick the painting up and put it down easily.
If pushpins don’t work for you you can put four objects that are the same thickness under the corners of your painting. For example you could use four lids from 2-liter soda pop bottles, one under each corner, or 9v batteries, etc.
Some techniques require you to cover the canvas with one or more colors as a base layer. In addition to the artistic effect, it also changes what happens to the paint you pour onto it. Paint glides over paint in a way that it absolutely doesn’t on a dry canvas. Pour paint resists flowing over dry canvas whereas a wet canvas is an invitation to travel with vastly reduced friction.
Tips on reusing canvases
You can reuse canvases if you don’t like the painting on it, whether it is wet or dry.
- While still wet just keep working it until you like it. For example add paint and use a swipe sheet to completely change the nature of a painting.
- When dry clean off any oil on the surface before painting over it
- A dark painting can’t be covered with light colors without an opaque light overcoat that is allowed to dry
- Transparent colors can reveal a little of the original painting
- The texture of the original painting will affect how the new painting flows over the canvas
Tips on covering canvases while painting
- When covering a canvas with a background color, also color all the edges with the same color.
- When covering the edges use paint that has dripped over the edge (onto the edge and also onto your work surface) to cover the edges
- When covering a canvas use a brush or palette knife to spread the paint out, can also be used to move paint to the sides to spill over the edge to help cover the edges
- Transparent colors rarely look good as a background color. Semitransparent colors are iffy.
- Paint beads up on a dry canvas, and also the pattern on top rolls under at the leading edge of the spreading paint; whereas, a wet canvas allows the paint to spread without as much effect on the pattern
- Panning leaves a record of your maneuvers in the surface of your painting – panning too much or too aggressively doesn’t spread a pattern, it makes a new one
- Use a torch (e.g. a small butane torch for cooking) to pop bubbles in paint once it is on the canvas. Move it quickly or it will scorch the paint. Hold the torch a few inches above the wet paint pointing right at bubbles and they’ll pop quickly. As an alternative, you can touch each bubble with a toothpick or edge of a popsicle stick.
Tips on Drying Paintings
Choose a level place that is low humidity and a comfortable temperature. If it is too humid the paint will dry very slowly. If it is too hot the paint will dry too fast.
Paintings continue evolve as they slowly dry over the course of hours. A painting may not look the same after sitting on a shelf for a day. Cells grow and collide. Colors may blend slightly or even a lot wherever they meet. And if the place you dry the paintings isn’t completely level the paintings will pan as part of their evolution. You might really like some details on one side of your painting when you put it on a shelf, but the next day all those details could be on the shelf itself, having rolled off because of a slight slope. The paint moves slowly, but it moves.
The paint gets stickier and stickier like glue as it dries. The viscosity increases over time and that interferes with and eventually halts the painting’s evolution. Obviously when the paint has dried the evolution has stopped, but before then the painting’s evolution is simply slowing down. It goes from full speed to zero but not linearly.
You can check whether your shelf is level with a carpenter’s level, or simply by putting a marble on the shelf and seeing if it rolls in any direction (works best with smooth shelves).
You can always add a spacer under one or more of the pushpins under your painting if you want to exploit gravity to evolve your painting. For example, what if you don’t like some details along one edge? You could put the painting on the shelf with a spacer under the legs on the other edge so that the details fall off the painting over the course of an hour or two, or overnight.
Paintings look wet before they are dried but if you have sprayed oil onto the painting it will look wet even after it is completely dry. Paintings are typically dry in about two days, but if the paint is thicker it can take 3 or even 4 days to finish drying.
Pour Techniques
Dirty Pour
A dirty pour is the name given to the technique of putting different colors of paint into a cup and then pouring the cup onto the canvas.

Essential technique:
- Choose Colors
- Prepare canvas – cover corners or cover entire canvas with a base coat
- Fill cup part way with colors, optionally adding a drop of oil occasionally
- Pour to fill empty space in the middle
- Pan to cover empty canvas and invade corners
Options to explore:
- Press clean side of an air pillow into painting and pull it away, possibly twisting as you do
- Stimulate cells with oil and a palette knife
- Spray oil on painting to make cells
- Place marble on painting and pan to roll it around in the paint Pour
Dutch Pour
A dutch pour is the name given to the technique of blowing the paint around the canvas using air. You can use a straw, a hair dryer (without heat) or a completely empty and dry garden sprayer pumped up for a ready supply of compressed air that requires no electricity nor your lungs.

Essential technique:
- Choose Colors
- Prepare split canvas, entirely covered
- Fill cup part way with colors
- Pour across the seam of background colors
- Use straw to blow dirty pour paint around
- Pan to spread the pattern out over a larger area if desired
Options to explore:
- Press clean side of an air pillow into painting and pull it away, possibly twisting as you do
- Stimulate cells with oil and a palette knife
- Spray oil on painting to make cells
- Place marble on painting and pan to roll it around in the paint
Filled Zone Swipe

A filled zone swipe is the name given to the technique of squirting chaotic, overlapping lines of paint to form zones which you later fill with colors. Finally you perform a swipe over the painting which creates many layers of colors, which look great when exposed by cells.
You can swipe over any collection of paint on a canvas. The advantage of the filled zone technique is that is scales to any sized canvas and it lets you chose the colors. you like on the canvas in locations you like before the swipe ever begins.
Use a piece of a laminated poster cut to be a few inches wider than my painting and about six inches (15 cm) long. A laminated poster is always curling in one direction and that curl helps keep it rigid when using it for swiping.
Essential technique:
- Choose Colors
- Lay out small zones by squirting overlapping curves and lines of one color (usually a dark color)
- Fill small regions with colors
- Put a lot of contrasting paint on one edge
- Swipe using long, smooth, stiff sheet
Options to explore:
- Press clean side of an air pillow into painting and pull it away, possibly twisting as you do
- Stimulate cells with oil and a palette knife
- Spray oil on painting to make cells
- Place marble on painting and pan to roll it around in the paint
More reading: http://capturedchaosart.com/blog/files/zones.html
Flip Cup Pour

A flip cup pour is the name given to the technique of putting different colors of paint into a cup and then quickly inverting the cup and putting it onto the canvas, without letting any paint out in the process. Then the cup is slightly lifted and the paint flows out from under it a little at a time. You move the cup around as the paint spills out until it is all gone and then you remove the cup.
Essential technique:
- Choose Colors
- Prepare canvas, fill corners or the entire canvas
- Fill cup part way with colors
- Invert canvas and place on cup of paint, then invert both leaving cup still on the canvas with paint trapped underneath
- Wait one minute for paint to drip down the inner sides of the cup
- Either:
- 1) Lift cup very slowly and let paint out slowly while moving cup around the empty canvas
- 2) Lift cup and let paint out, possibly while moving cup around the empty canvas
- Pan to spread the pattern out over a larger area to cover canvas
Options to explore:
- Press clean side of an air pillow into painting and pull it away, possibly twisting as you do
- Stimulate cells with oil and a palette knife
- Spray oil on painting to make cells
- Place marble on painting and pan to roll it around in the paint
