
 Loading asset information.
Make/Model: Makita 12 In. Dual-Bevel Sliding Compound Miter Saw, LS1219L
Documentation: Manual
Video Overview of Controls: Video
Overview
- This saw will make 15” crosscuts at 90 degrees.
- It miters 0° to 60° left and right, with positive stops at 0°, 15°, 22.5°, 31.6°, 45° and 60° (left or right).
- The bevel Lock is located in the front of the saw for easy access and Quick adjustments from 0° to 48° (left and right)
- The saw is powered by a 15 amp direct drive motor with soft start.
- Has an electric brake
- Has an electronic speed control maintains constant speed under load.
- See-through blade guard for greater visibility of the blade and line-of-cut.
- Has a built-in laser to indicate the line-of-cut whether the blade is turning or not
- Has dual dust Collection ports for improved dust Collection capability
- Has a large-sized aluminum base that improves the stability of cutting stock for more efficient cutting.
Quick Terms
- Bevel
An angle of the saw other than 90 degrees, tilted to either side, as if you touched your ear to your shoulder. The bevel angle can be read on a scale that is near the back of the saw on the joint that connects the saw to base.
- Miter
An angle of the saw other than 90 degrees, twisted to either side, as if you touched your chin to your shoulder. The large scale on the front of the saw shows you the current miter angle at the small orange arrows.
- Saw / Blade Recess
The area in the Saw’s base where the blade dips into, providing a thru-cut of material
- Preset Release
A button or lever that turns off or on the preset stops, either for the miter or bevel scale. When turned off, all angles are reached without any stops. When turned on the saw stops at preset angles. When preset angles are enabled, you must momentarily activate the Preset Release to move the saw away from any preset angle.
Adjusting the Miter Angle
Beveling / Mitering
All of the necessary controls to adjust bevel and miter angles are at the front of the saw. No more reaching behind!
Beveling
Bevel Left
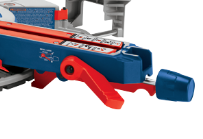
The large lever, on the left side of the base’s blade recess, locks the bevel position into place. The saw will bevel to the left 45 degrees (or less) by default simply by unlocking this lever, and adjusting the saw to the desired angle.
Bevel Right
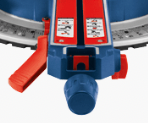
To use angles on the right of the saw, after unlocking the main lever, on the right side of the recess, is a knob which allows the user to adjust the saw to an angle to the right by turning it away from the user.
More Beveling
If a user desires more than 45 degrees of bevel, the same knob can be turned towards the user, providing up to 47 degrees of bevel in either direction.
After adjusting the bevel angle, be sure to relock the saw’s bevel lock-lever
Mitering
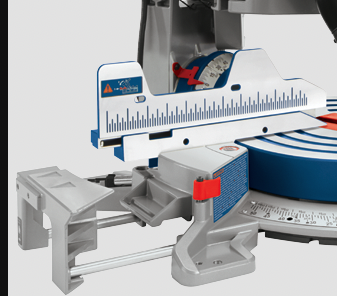
There are two locks for mitering. The quick-angle lock which uses preset grooves in the base to provide quick, common angles. The other is a blue knob which allows the user to lock the saw to any angle they desire. See the pictures above for reference to the blue knob and red trigger.
- To adjust the miter angle twist the blue knob on the front of the saw recess counter-clockwise to release it, if necessary. Do not remove the knob from the base.
- Pull and hold the red trigger below the knob to unlock the quick-angle lock.
- Twist the saw into the desired angle, gently releasing the trigger until it latches or the desired angle is reached.
- If using a preset angle, there is no need to tighten the knob. If using any other angle, twist the blue knob clockwise to engage it and prevent the saw from moving further.
Depth Stop
Setting the depth stop for the saw is on the right of the saw, near the blade’s axel. There is a set screw and small metal tab that must be engaged with the screw.
[picture callout pending]
Slide Stop
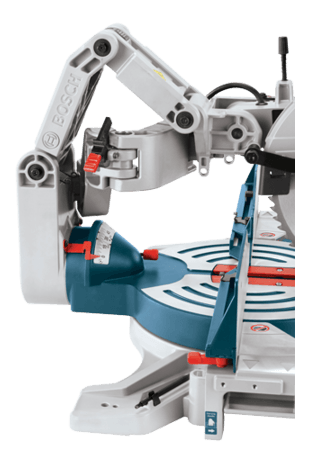
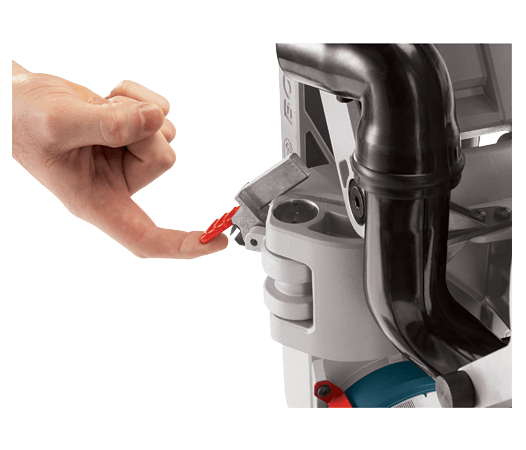
While this saw doesn’t slide on a rail mechanism, but rather an armature, the motion is the same. To stop the saw from sliding, there is a red toggle towards the back of the saw, where the arms meet the base.
Base Extensions
On either side of the saw there is a retractable support for the base. These can be locked / unlocked with their respective red tabs on either side, near the edge of the base.
Maintenance
Annual
Monthly