 Loading asset information.
Make/Model: Delta Model 17-965 Standing Drill Press
Documentation: Manual
Common Safety Rules:
- No loose clothing / nothing dangling / hair tied back / bare arms from elbow to fingers
- No gloves of any kind
- Eye protection is required
Metal Drill Press Specific Safety Rules
While certification is not required, only use the drill press if you are properly trained to do so. Otherwise ask for assistance / training.
Always clamp your work
Always clamp your work.
Always clamp your work.
Always clamp your work.
-
- Clamp your work to the table with a minimum of two clamps or use a vise clamped similarly to the table. If not clamped / only one clamp, the piece will spin and cause serious injury.
- Never try to grab a piece if it does get caught by the drill press. Stop the machine and wait for it to stop.
- This is extremely important compared to wood due to the difference in material strength.
Clear chips that build up near the drill bit
No fingers! Use an aptly named chip brush to do so.
Use oil
If the oil starts to smoke when applied, you may be:
-
- Drilling too fast
- Using a dull bit
- Not continuously using enough oil
- Not clearing chips away from the bit
Strike a centering hole, no matter the drill bit diameter
A drill press has low accuracy versus a mill. Additionally small bits can chatter and break easily, becoming dangerous projectiles
Only use drill bits meant for plunging cuts
For fresh through-holes, be aware and wary when the drill will pass through your material
The drill bit may catch. Reduce your down-force as you approach the moment.
Deburr sharp edges
Use a larger bit, rat-tail file, deburring tool, fine sandpaper, etc.
Quick Tips
- If you use a vise be sure to put sacrificial wood or empty space underneath your stock if you plan to drill all the way through it. Collateral damage is frowned upon.
- The table has a hole in it so that the bit can go through, descending beneath the level of the table, to drill completely through your material. Be sure the bit is aligned.
- For holes larger than 1/4, always start with a tapping-hole.
- A quick way to figure out the size-smaller / pilot bit to start with: the smaller bit will fit in the flute(s) of the larger bit.
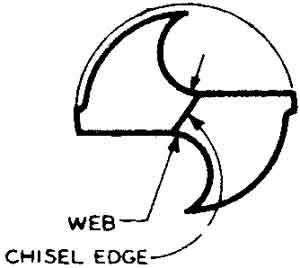
- To be more exact, you want the bit to be close to the diameter of the bit’s web.
- Adjust the height of the table to suit each hole you drill.
- When in doubt, slow everything down.
- For deep holes, periodically back the bit out of the hole to allow chips to escape otherwise heat will build up and hasten the bit dulling.
- Adjust the speed to suit your material by moving the belt to different pulleys. The machine must be off when doing so.
- When in doubt, bring your own drill bits. The shop only has a few on hand and they will dull quickly with heavy use, if not already.
-
- High-speed steel (HSS) bits / general combination wood/metal bits are cheap and will work for small projects
- For larger projects / drilling harder metal like stainless or coarse metal like cast iron, consider investing in better bits like Black-Oxide or Cobalt, etc.
-
ACE Certification Course
A summary of the AMT Certification course for the Metal Shop Drill Press.
Basic Use
This tool can drill holes of various sizes perpendicular to the stock.
It can drill up to a 45 degree angle but requires training and extreme care must be taken when doing so.
Drill Press Adjustments
- The table can be adjusted in both height and angle.
- The chuck holds various sized bits.
- The depth levers control the chuck and move it down toward your work, driving the drill into your work at a pace you control.
- The speed of the bit can be controlled while the machine is off by shifting the belt, housed atop it (see below).
Changing the Drill Press Speed
Refer to this chart for common drill speeds
Here is a video showing how to change the speed on this drill press: changing the speed
Different sized holes, different kinds of materials, different kinds of bits, and different conditions – such as drilling at an angle – all affect your choice of drilling speed and the speed at which you plunge the bit into your work. While you control the latter at your whim throughout the process, the bit speed cannot be changed while the drill press is operating. It must be set before you begin each operation if needed.
In order:
- Unplug the drill press
- Open the top to expose the pulleys and belts
- Starting from the rear, on the outside-right of the housing near the motor, near a metal handle, loosen the belt-position locking-bolt (has a blue head)
- Move the metal belt tensioning lever towards the front of the machine to loosen the belts
- It will likely do so as soon as the locking-bolt is loosened
- Move the belts as necessary, referencing the speed chart in the top of the housing.
- Move the metal belt tensioning lever towards the back of the machine to the tighten the belts as much as possible
- Tighten the belt-position locking-bolt with force, but do not use any tools to do so.
- Close and secure the lid
- Plug in the drill press to use it at the new speed
Common Techniques
Drilling a Perpendicular Hole
To ensure the squareness of your operation, a piece of rod-stock or a large bit can be fitted into the chuck and checked with a machinist’s square.
- While the drill press is off, loosen the chuck to accommodate the bit of your choice, using the key attached to the drill.
- Tighten the chuck with your fingers, then with the key.
- Choose one of the other two key-tightening points on the chuck and tighten it again
- Doing so ensures a balanced force on the drill bit
- Failure to do so is strongly frowned upon, especially for larger bits.
- If you plan to use a drill press vise:
- Clamp it to the table loosely at first and attach your stock with a sacrificial piece of wood underneath it.
- Position the work and the vise so that the bit will drill exactly where you want. You can lower the bit as if you were drilling even when the drill press is off. Do this so you can see precisely where the bit will meet the wood
- If you plan to use a cross vise:
- Attach it to the table approximately where it’s working range would allow you to position your stock for the cut. Due to their nature, you can be looser with your placement.
- Attach your stock with a sacrificial piece of wood underneath it.
- Position your work by using the adjusters on the cross vise. You can lower the bit as if you were drilling even when the drill press is off. Do this so you can see precisely where the bit will meet the wood
- If you plan to clamp your work directly to the table:
- Position your work on the table. You can lower the bit as if you were drilling even when the drill press is off. Do this so you can see precisely where the bit will meet the wood
- Clamp the work to the table at two points if it is large enough to accommodate two clamps.
- Set the height of the table if needed so that the bit can both enter the stock and also reach its desired depth (or go all the way through).
- Set the speed of the drill press to be compatible with the material and bit you are using.
- Set a maximum depth on the drill press so you do not drill farther than you expect
- Turn on the drill press and let it spin-up to it’s full speed
- Slowly lower the bit into your work
- Periodically back the bit out so that chips can escape deeper holes
- Work slowly and don’t force the operation. Let the drill bit do the work.
- When you reach the maximum depth you’ve set slowly back the bit out of the hole
- Turn off the drill press off and wait for it to come to a halt
CAUTION – The drill bit will likely be dangerously hot
- If you are done with that drill bit, remove it from the machine.
- Unclamp your work and remove it
- If you are done working with the drill press, reset it to how you found it and clean up the area around it.
Drilling a Hole at an Angle
For metal, this operation is better suited to a proper mill.
That said, drilling a hole at an angle involves adjusting the angle of the table with the lever underneath it. The common twist bits can do this with skill, while end-mills designed for plunging cuts may provide easier success.
If using a twist bit, a hole / indent should be drilled perpendicular to the material to help provide purchase.
Whichever bit you end up using, proceed slowly and cautiously.
You will have to adjust the height and the angle to work together to bring the bit to the work at the right angle.
- Secure the table at the new angle and follow the procedure above for drilling a hole to perform a test of your setup to be sure it is correct before you put your precious work at risk. Using the same size and kind of wood helps minimize surprises. You should assume that the small scale on the drill press table that reports its angle is inaccurate.
- When you are satisfied that the angle is correct, cut the hole in your work by following the same procedure above.
When you are done, return the drill press to its nominal, horizontal position. There is be a preset for this where the alignment pin will fit into.
To ensure squareness, a piece of rod-stock or a large bit can be fitted into the chuck and checked with a machinist’s square.
Drill Press Safety
All power tools have the potential for harm. The drill press is no exception.
You must always wear eye protection when you use a drill press.
Hearing protection is optional as a drill press is relatively quite, but wearing them to prevent distraction can be useful.
Common Risks
- Your material can break free and spin as fast as the bit. This may break the bit and then send the work spinning in a random direction.
- Always clamp your work with a minimum of 2 clamps.
- The bit or your work can break and send pieces toward someone.
- Anything loose / dangling (hair, jewelry, clothes) can get caught on the bit and drag you into the spinning chuck faster than you can possibly react, which will not end well.
- Bare arms from the elbow down.
Safety Features
- The belts that drive the chuck are concealed.
- The tool can be run at various speeds for safer use in different materials.
- The table has numerous attachment points for different clamping strategies.
- The table can be adjusted in height to suit needs.
- The on button is recessed while the off button is not, so the default of smacking them turns the machine off.
Hand Positioning
- Your hands should be positioned so they are not likely to be injured should the unexpected occur.
- Your right hand remains on the depth lever / wheel during the operation
- Your left hand is near the on / off buttons or away from the piece.
Stock Handling
- Stock handling is how you hold and move your work (aka stock, material) throughout the entire life cycle of the opeartion.
- The stock must be clamped or secured to the drill press table or be held in a vise.
- Go slow – speed reduces the quality of the hole, your safety, and those around you. Small bits are also less likely to break.
Default Configuration
When you are done with the drill press:
- Turn off the drill press off and wait for it to come to a halt
- CAUTION – The drill bit will likely be dangerously hot
- If you are done with that drill bit, remove it from the machine.
- Remove your work
- Any clamps or vice you have used should be put back where they belong.
- If you moved the drill press from its normal, horizontal table alignment so that you could drill a hole at an angle it is your responsibility to put it back to its normal horizontal position when you are done.
To ensure squareness, a piece of rod-stock or a large bit can be fitted into the chuck and checked with a machinist’s square.
Protecting the Drill Press
- Keep the table clean and dry
- Periodically clean the inside and outside of the machine
- Periodically inspect the belt for signs of significant cracks and replace if needed
Maintenance
Logs
Loading asset logs.
Checklist
- Lubricate supporting arm and quill with dry film lube as needed
- Clean chuck + blow out inside
- Clean and protect table
Inspect
Head
- Check belts + motor movement
- Belt condition
- Pulleys should remain taught when locked
- Pulley housing should close securely
- Check run-out (how true the machine’s center is)
- Quill travel should be smooth
- Quill depth stop should hold
- Inspect electrical cord
- Switches should engage / disengage properly
Table
- Note any new holes in the table
- Table should move easily and lock well in all directions
- Inspect chuck and key
- Align chuck and table thru-hole