 Loading asset information.
Serial Number: 12490300297
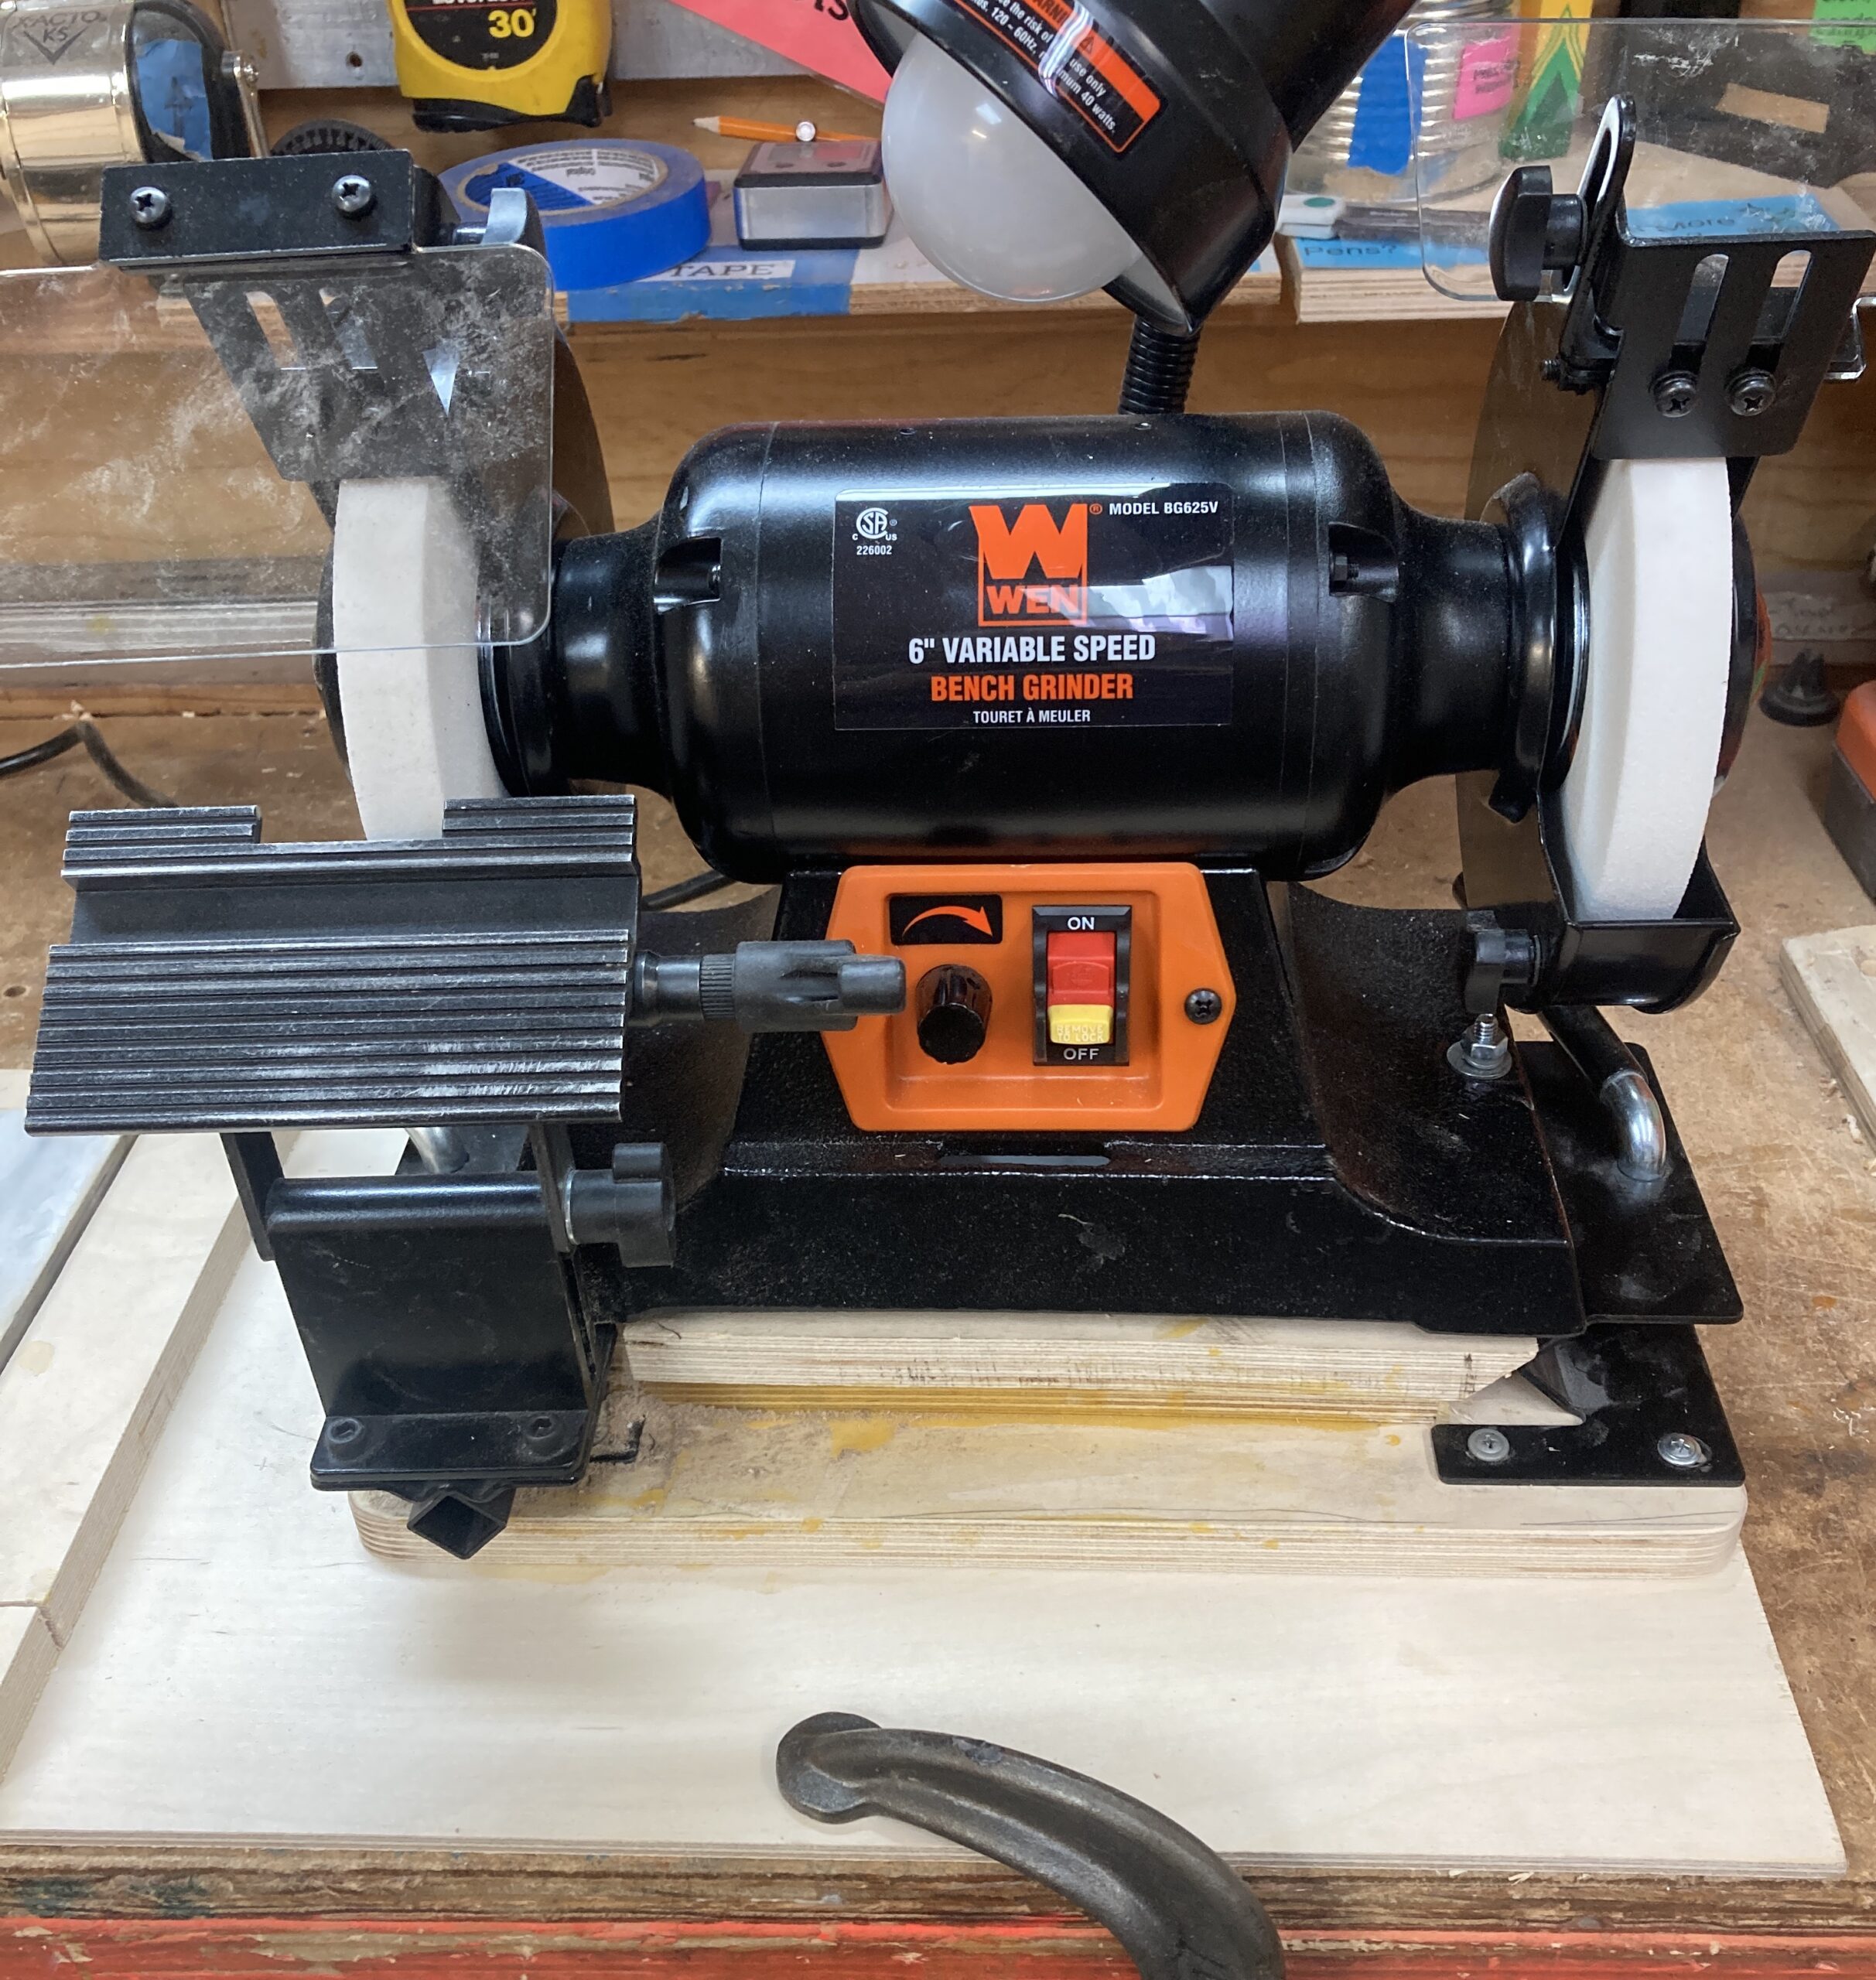
The Wen Variable Speed bench grinder is part of the workshop’s dedicated sharpening station.
- The left wheel is only for hollow grinding flat blades like chisels and planes.
- The right wheel is for sharpening other blades.
- The grinder should always be used at the lowest speed.
Here is a video covering the use of the sharpening station for a chisel:
The Pro-Grind Sharpening System
The Ace Sharpening Station uses the Pro-Grind Sharpening System.
- Online Manual: https://www.ptreeusa.com/PDF/7575_pro_grind_shapening_jig.pdf
- Download manual: 7575_pro_grind_shapening_jig
It provides jigs to make sharpening woodworking tools more reliable and higher quality. It also helps reduce the chances that the tools will be overheated, which causes them to work poorly and not hold a sharp edge.
Sharpening flat blades like chisels and plane blades is straightforward and the video above provides a quick overview.
Sharpening a Hollow Ground Chisel
A hollow grind means the blade is ground on the wheel to form a concave curve at the end of the chisel. The advantage of a hollow grind is that you can sharpen the blade again and again simply by sharpening the leading edge.
The tip on the right is sometimes called the “toe” and the thick part on the left is sometimes called the “heel” because people’s feet also have arches that are a convex curve like the hollow grind. This is a useful metaphor because to sharpen a hollow ground chisel you make sure the heel and the toe are both touching the stone at the same time. Then you make a few passes across the stone while holding the chisel with the heel and toe touching it continuously.
The result is a newly sharpened leading edge. It’s thin, so you don’t need to take off very much metal at all. You can sharpen it this way ten or twelve times before you need to grind it again, unless the leading edge has been damaged.
Setting Up for Hollow Grinding
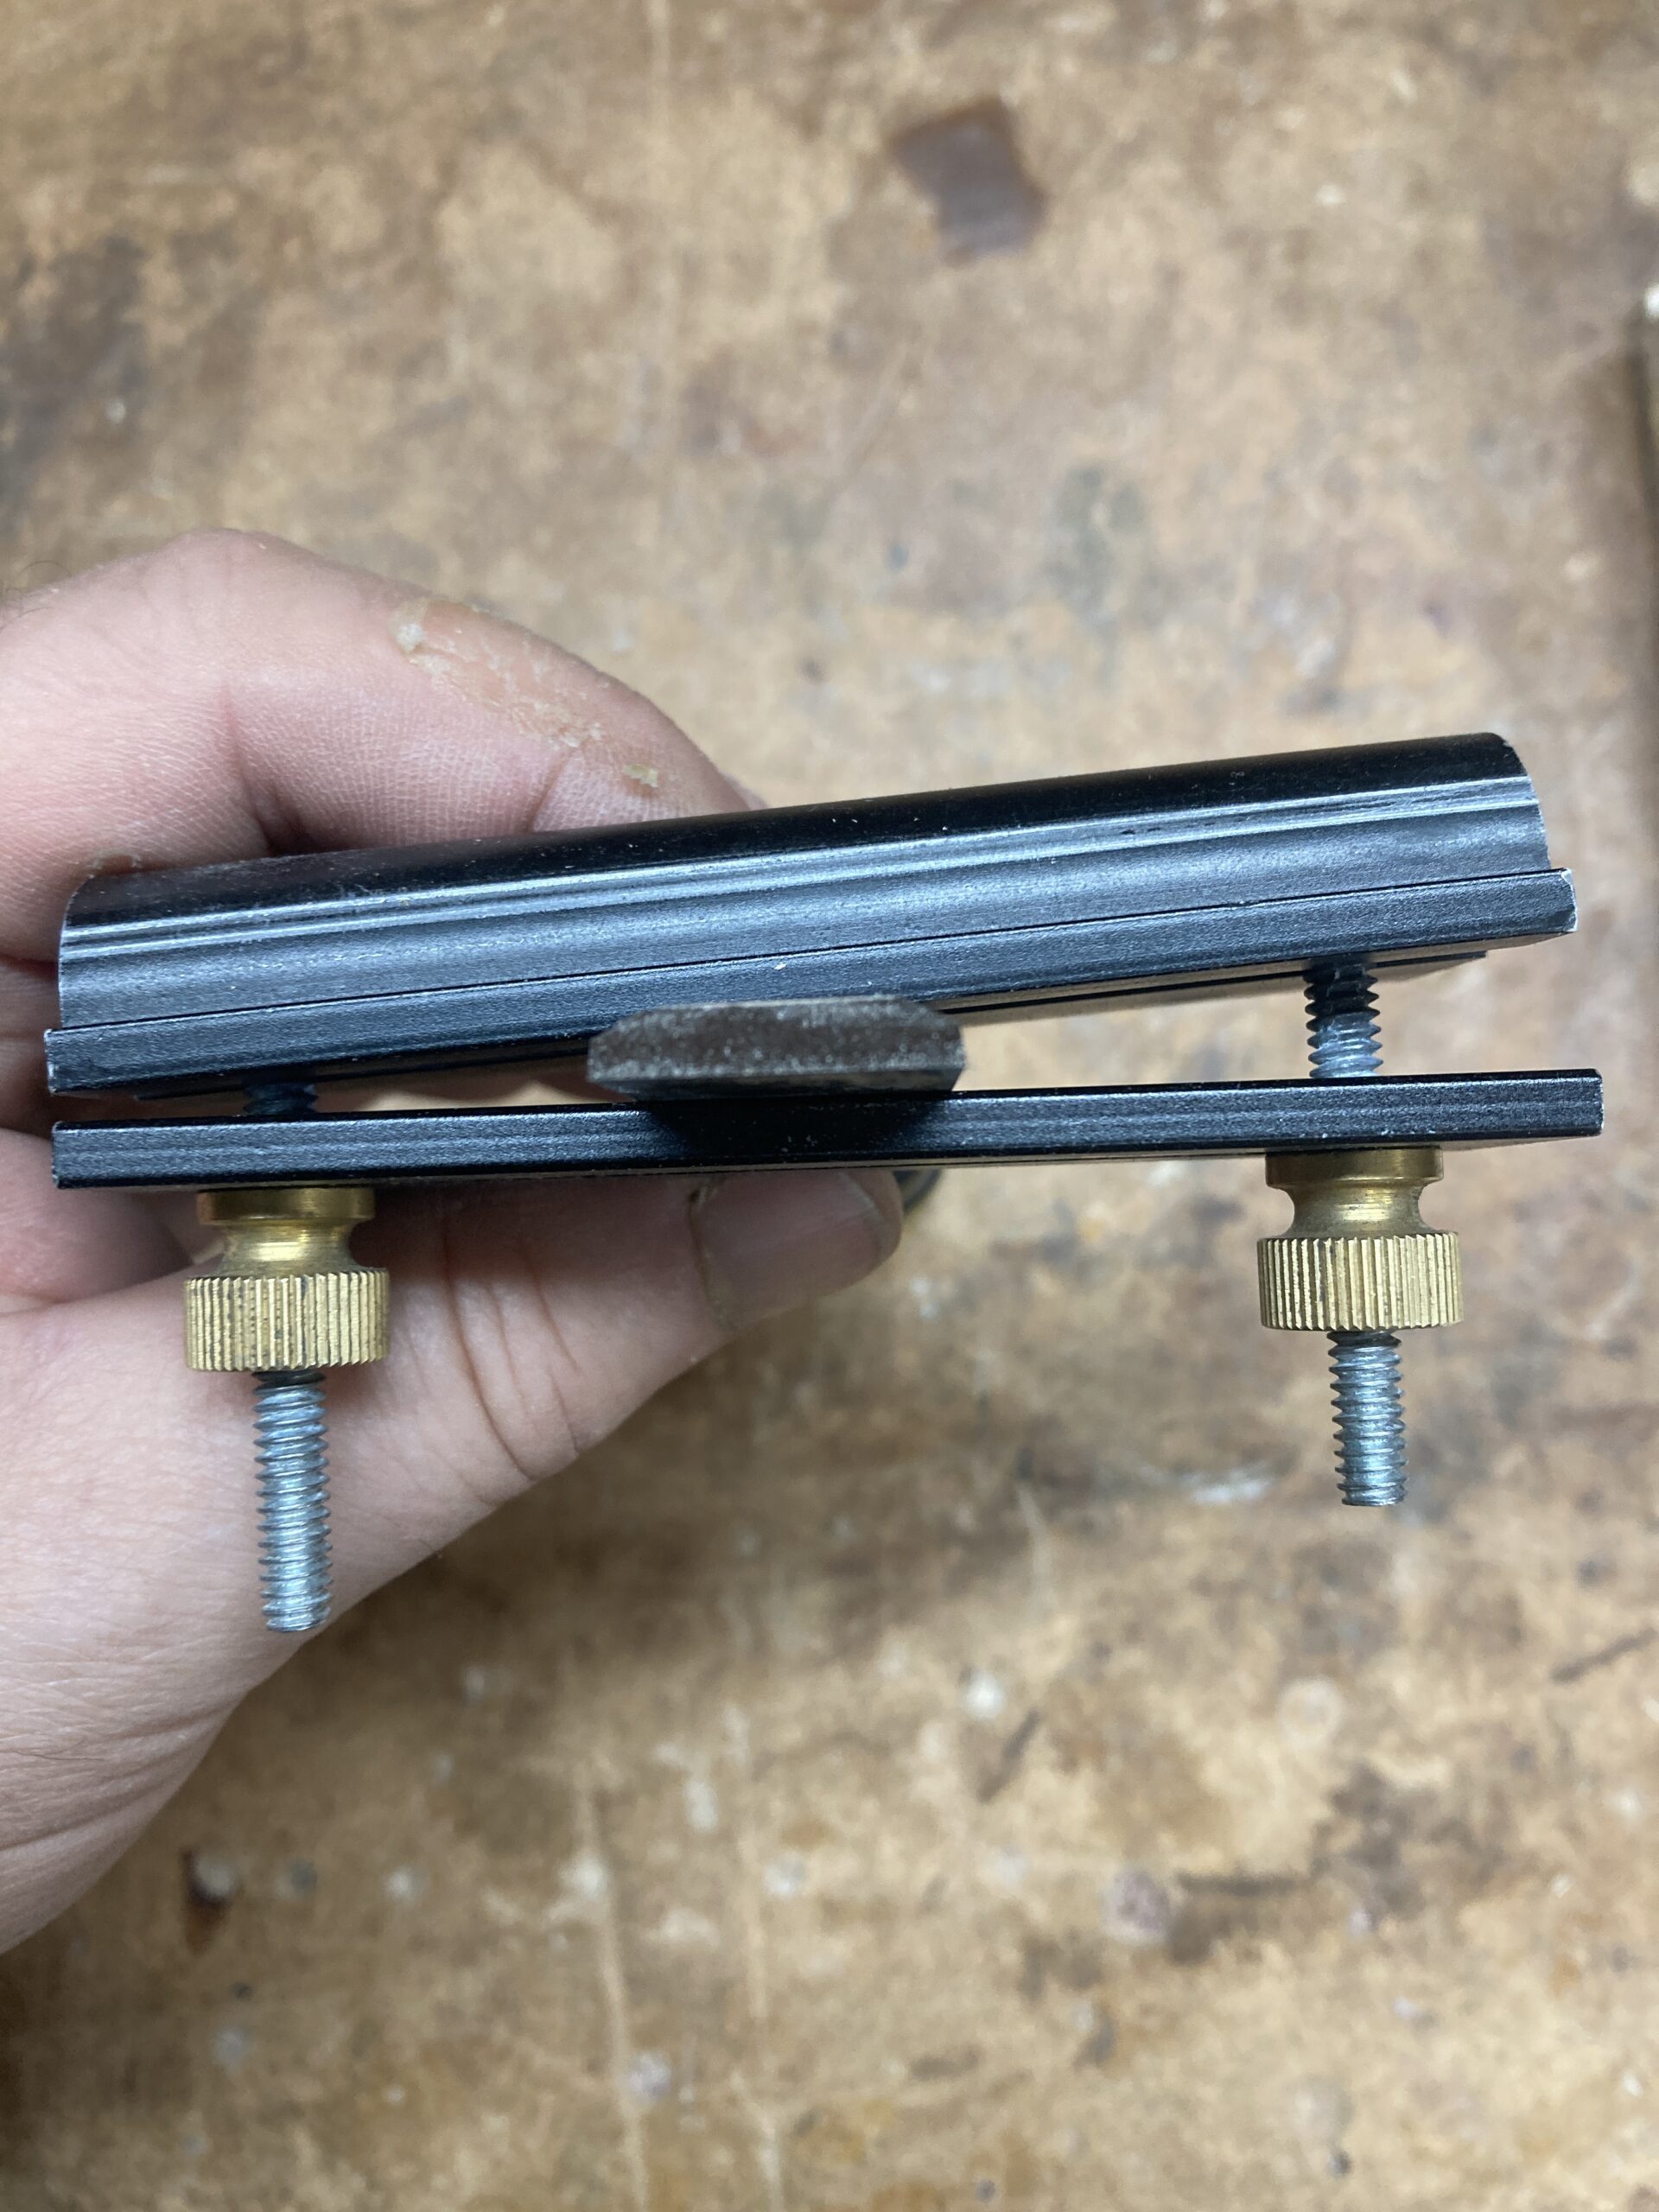
To set up for hollow grinding you need to insert your chisel or plane blade into the sliding clamp.
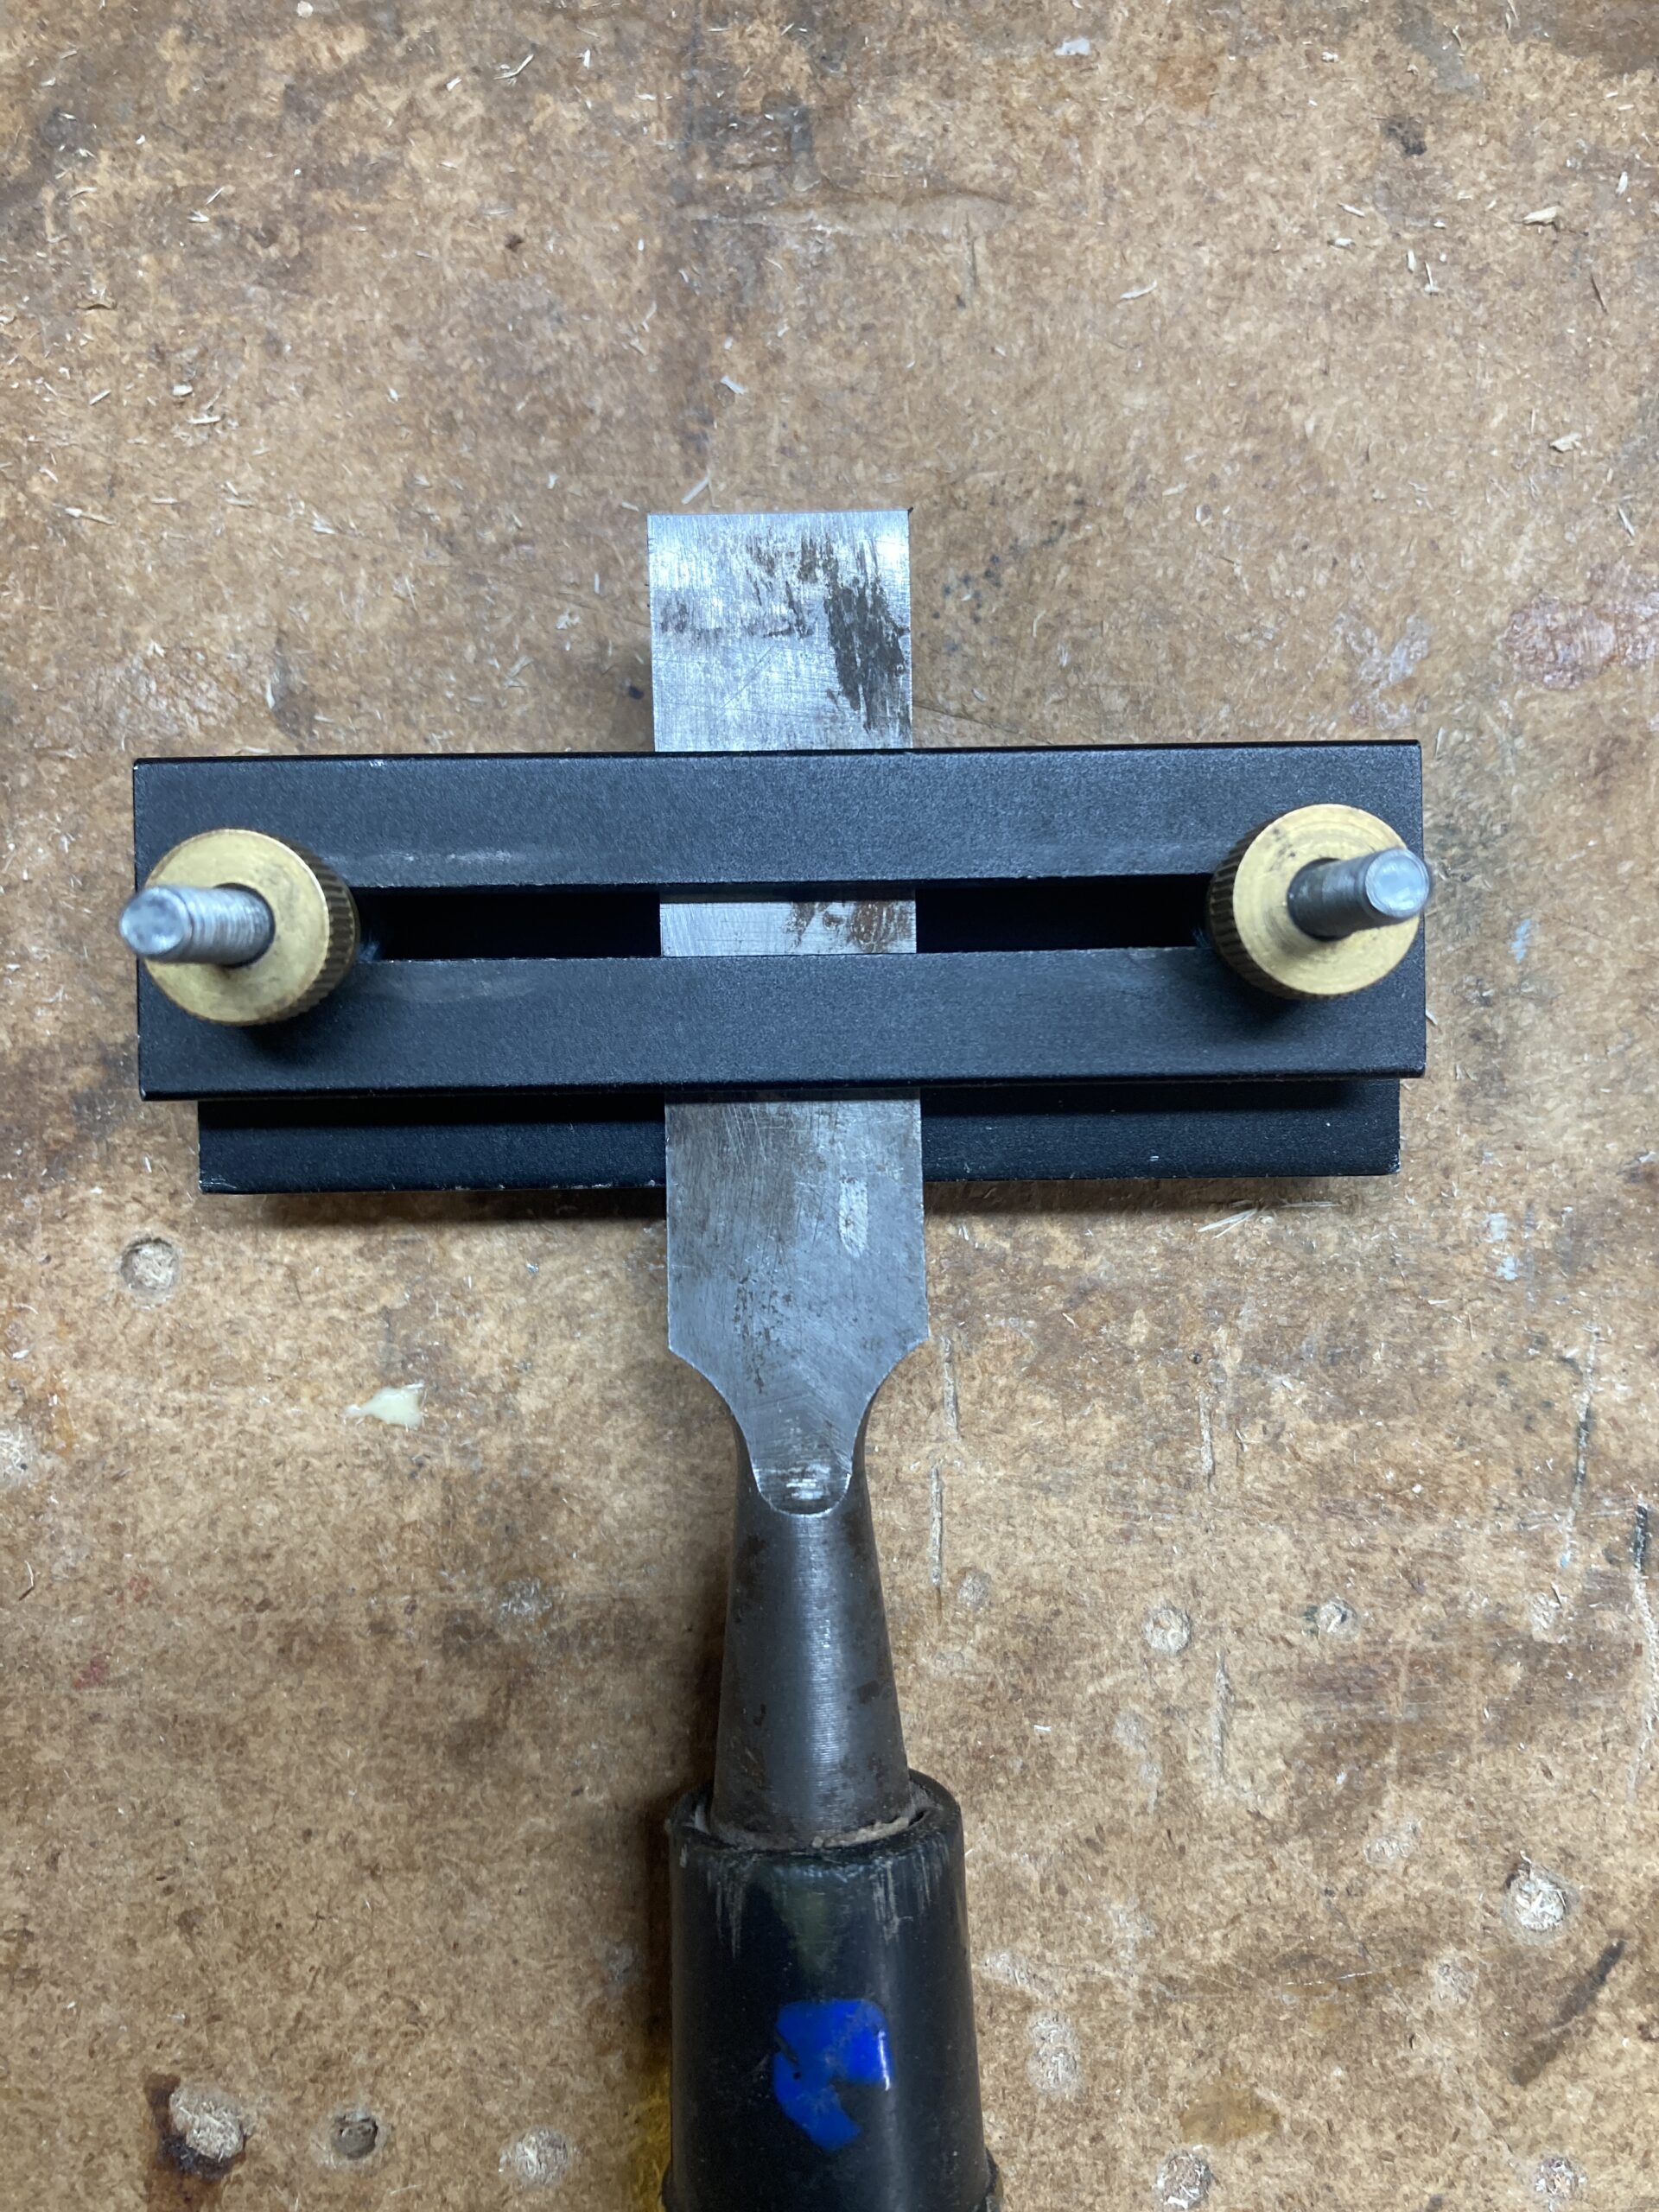
It mustn’t be at an angle and the top and bottom of the sliding clamp must be parallel to each other.

You’ll need to adjust the platform on which the sliding clamp slides so that the blade is at the right angle. And, the blade should not be touching the wheel until you rock it forward to make contact.
You can make several changes to set the correct position of the platform:
- You can raise and lower the platform: there is a locking knob on the right side of the platform.
- You can change the angle of the platform: there is a locking lever on the right side of the platform.
- You can move the platform closer to or farther from the wheel: there is a locking lever on the left side of the grinder. Point it straight back and slide the whole platform forward and backward. Then lock the lever again.
- You can slide the chisel closer to or farther from the wheel: loosen the sliding clamp and reposition the chisel. Chisels get thicker as you clamp closer to the handle, so you will need to loosen or tighten to fit the thickness where you are clamping.
Hollow Grinding
Once your chisel is mounted on the sliding clamp, and the platform is in the right position, turn on the grinder and set it to the lowest speed.
Rock the chisel forward so it contacts the wheel lightly and move the blade side-to-side. Use a very light touch. You are trying to minimize heat buildup. If you are doing it right, the blade will be only slightly warm to the touch – not hot. If you can’t touch it, you are definitely grinding way too hard or too long or at too high of a speed.
Do not let the blade move far enough so its side gets close to the edge of the wheel. It is best to keep the edge of the blade no closer than 1/4″ from the edge of the wheel. The risk is that if only a narrow slice of the blade is in contact with the wheel, the grind will be too aggressive and it can damage the tip in a fraction of a second.
You can coat the blade with ink from a sharpie or a whiteboard pen to see what is being ground away and what remains.
Continue hollow grinding until the entire leading edge is freshly ground and convex curve reaches the heel (the top of the chisel bevel). It might only take a few light passes in total.
Honing The Back of a Hollow Ground Chisel
Whether you have just touched up the leading edge with a stone, or have just finished hollow grinding a chisel, there is always one more step to finish the job: honing the back.
Simply place the bottom of the chisel onto the stone and rub it back and forth across the edge few times (not parallel to the sharp edge).
The result is the bottom of the chisel is completely smooth and the burrs that form when the edge is sharpened are all removed. This is a micro-sharpening step that leaves the finished edge ultra sharp.
A Video About Hollow Grinding
Sharpening Gouges
Sharpening a curved gouge is much more involved than sharpening a straight blade. Our Pro-Grind Sharpening Jig has components you can set up to make sharpening gouges reliable and efficient. There are a few different methods to support different sizes and shapes, and to suit your taste for precision and time-spent on setup.
You can learn all about the different methods and options for grinding different kinds of shapes in the manufacturer’s manual, which you can read online or download if you prefer:
- Online Manual: https://www.ptreeusa.com/PDF/7575_pro_grind_shapening_jig.pdf
- Download manual: 7575_pro_grind_shapening_jig
Sharpening Drill Bits
There is a drill bit grinding jig that came with the bench grinder. You can either spin the bit by hand or put it in a drill. Only sharpen the tip. Note that this removes the yellow titanium nitride coating on bits that come with it. But, if the alternative is to throw the bit away, sharpening it is still usually worth the effort.
Sharpening Other Kinds Blades
The bench grinder came with a standard grinding platform which you can install if you wish for the right side wheel only. The platform prevents what you’re grinding from moving down while you are grinding it. If you do install it, please take it off when you are done.
While it doesn’t work as well as the various jigs, you can sharpen many kinds of steel blades on the grinding wheel if you carefully let the wheel drag across the blade while you hold it in the right position and move the blade across the wheel. Use only the grinding wheel on the right for this. You can dress the wheel (make it flatter) if needed. The wheel dresser is in the sharpening station box with the other accessories.
Work Safely!
The wheel should drag down across the blade so that it cannot get caught and pushed violently down. It should ride across the front of the wheel. If you weren’t pushing lightly against the steel it would lightly bounce over the spinning wheel under it.
This setup is still likely to be too aggressive for thin knives unless you have an extraordinarily light touch. You will find diamond hones in the sharpening drawer of the steel cabinets under the bench near the planer. Those are much easier to use for small knives and they work very well and quite quickly.
Sharpening Carbide Tools
Our sharpening station cannot be used for carbide tools.
Here is a video describing how to sharpen them using a diamond plate:
You can sharpen carbide blades with a diamond plate. Use a 600 to 1000 grit diamond plate and a little water as a lubricant. Wipe the diamond plate dry when you’re done. It doesn’t need to be big: just enough to move the blade around in little circles.
You should not attempt to sharpen carbide blades on a stone – it will damage both the blade and the stone.
Sharpen only the back of the carbide blade: not the bevel (which might be curved or angled or complex.) For example, lathe tool tips can be removed and their flat “tops”smoothed on a diamond plate and then they can be reinstalled, sharper than before unless they were brand new. Sharpening them won’t remove nicks or chips – it only sharpens the undamaged parts of the edges. Sharpening them won’t make them quite as sharp as new, but it will be close enough that it is still worth doing if the blades are undamaged.
Router bits can be sharpened with handheld diamond hones, but it requires precision and we don’t usually bother as they tend to get damaged before they get dull.
The planer and jointer both use standard square carbide cutters, which have four fresh sides and can then be replaced individually. We don’t usually sharpen these either, but they could be sharpened if they are not chipped or nicked.
Logs
Loading asset logs.