What: This article explains the steps for recording invoices so that vendors can get paid in a timely manner.
Who: Treasurer, MonsterCorps, Officers
Why: We need to ensure billing records are stored properly for at least three years and we want to avoid paying vendors late.
Pre-Steps
- Most often, bills are approved by the Executive Director and then sent to the Treasurer via e-mail. If that has occurred, proceed to step 1 below.
- If the Executive Director did not approve an invoice, contact them to ensure the bill is valid.
Paying One Vendor at a Time
Exceptions: Wise, Aaron Baaraza (see below)
- Zapier will ping the accounts-payable channel in Slack when a new bill image has been stored in the Vendors folder. If a bill image is not included in the e-mail, save the entire e-mail thread as a pdf.
- Search the vendor profile in Quickbooks and/or the W9 folder to ensure we have a completed W9 for this vendor. If not, create a task in Asana for the Treasurer to request a W9 from the vendor
- Create the bill in Quickbooks by clicking the New button in the upper-left corner and then selecting Bill under the Vendors column.

- Once you reach this screen, complete the following fields as follows:
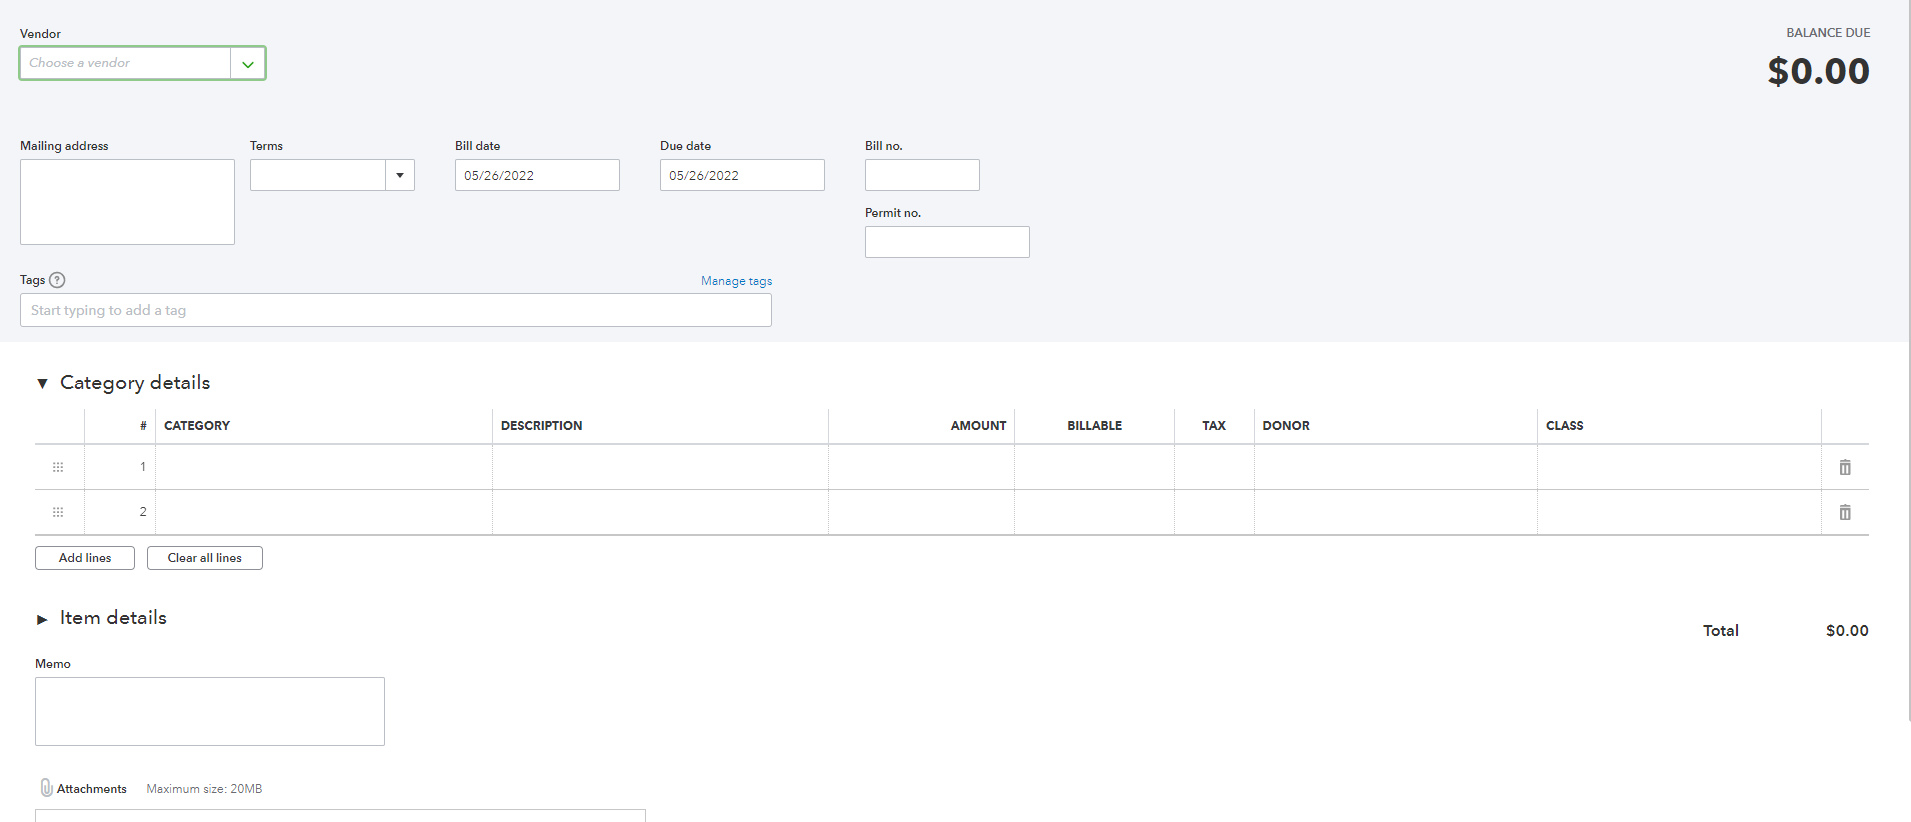
- Vendor – record Vendor name here
- Mailing Address – it’s not necessary to add anything here
- Terms – set at Net 30
- Bill Date – use the date on the bill image or service date. If they are conflicting, choose the earliest.
- Due Date – this field should be automatically updated
- Bill No – use the number or reference ID provided by the vendor. If none, leave this field blank.
- Permit No – leave this field blank
- Tags – leave this field blank
- Category – use guidance from the vendor’s payment and sources or the treasurer’s email to select the correct account code
- Description – use the description from the invoice
- Amount – record the total bill amount
- Billable- leave this field blank
- Tax- leave this field blank
- Donor- leave this field blank
- Class – if the category code begins with a 5, select Program. Otherwise, select Administrative
- Memo – copy the description from the Description above
- Attachment – add the invoice image here
- Save and close. Repeat this until all invoices have been recorded.
Paying Two Parties
When paying vendors outside the U.S., we use a service called Wise. This processes the payment into the required currency and charges us a fee.
- Download the bill image and the Wise receipt and store them in the Vendors folder.
- If a Vendor’s name is not present, create a new folder
- If a bill image is not included in the e-mail, save the entire e-mail thread as a pdf.
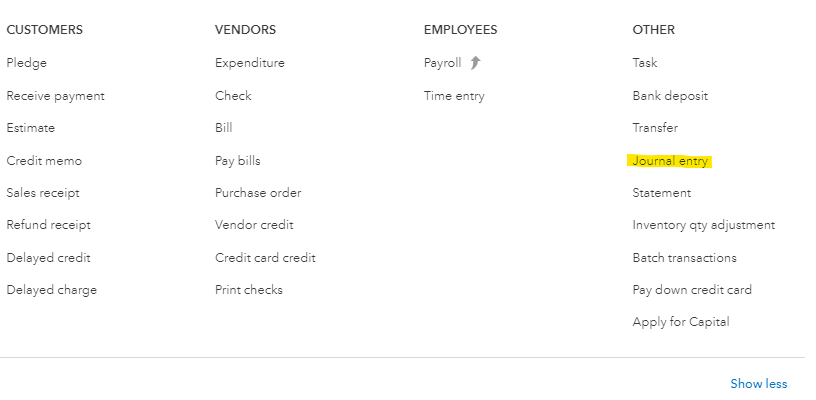
- Create the Journal Entry in Quickbooks by clicking the New button in the upper-left corner and selecting Journal Entry under the Other column.
- Once you reach this screen, complete the following fields as follows:

-
- Journal Date- use the date on the bill image or service date. If they are conflicting, choose the earliest.
- Journal no. – journal date in YYYY-MM-DD format followed by the word “Invoice”
- Account (first line) – use guidance from the treasurer’s email to select the correct account code
- Debit Column – record the total bill amount
- Description – use the description from the invoice for the largest line item
- Name – type “Aa” until you can select “AARON ENRIQUE BARRAZA SANCHEZ”
- Class – select Administrative
- Memo – copy the description from the Description above
- Account (next line) – select account 6003 Bank Charges
- Debit Column – record the total fee amount
- Description – “Transfer fees”
- Name – type “Tra” until you can select “Transferwise”
- Class – select Administrative
- Account (last line) – select account 1.07 BoA Checking
- Credit Column – record the total of the transfer fee and Aaron’s fees
- Description – copy from Journal no. (step 2)
- Name – leave blank
- Class – leave blank
- Attachment – add the invoice images here for Aaron and Wise.
- Save and close.