Also see Laser FAQ
| Issue | Possible solutions |
|---|---|
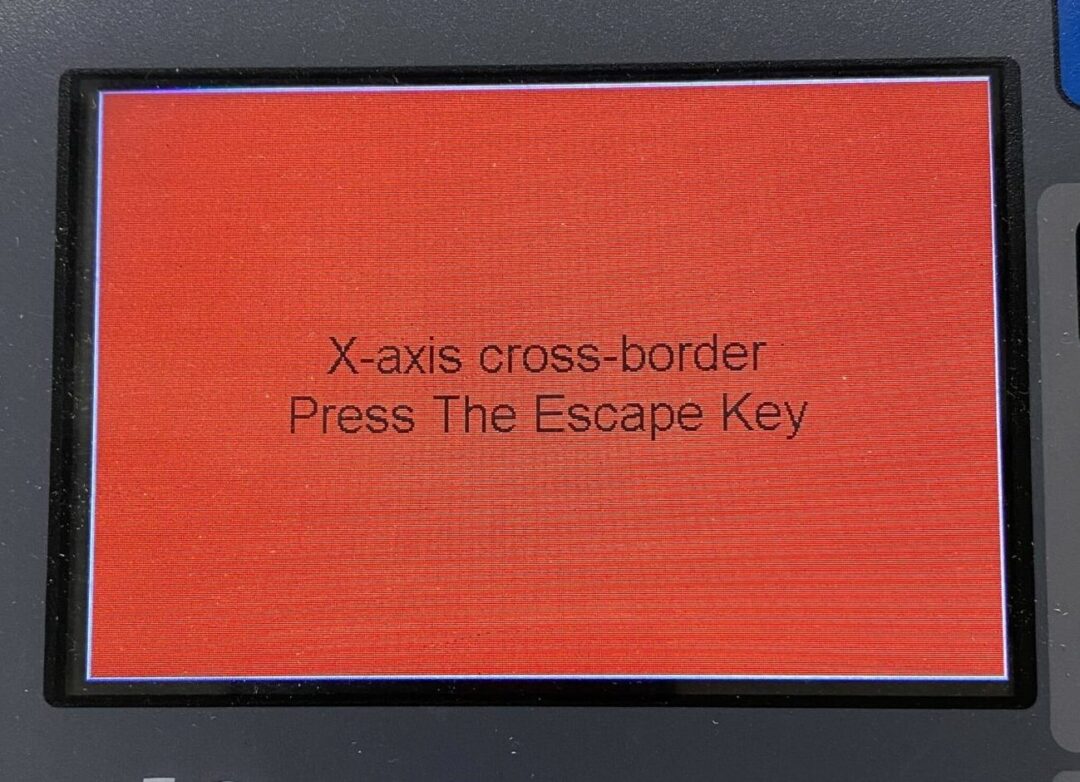
| Laser controller shows “X-axis cross-border” error
|
It means that running your art it would take the head off the allowable work area. Usually, this means that you have not set your origin. Follow best practice steps for running a job:
|
| The “run box” did not work as expected— it fired the laser while running creating an etched rectangle | There is a setting under the menu of the controller on the laser called ‘bor mode’ that sounds like it got changed. You can pulse each corner, run the box or move the gantry without firing. Turn bor mode off. |
| Laser is not plotting my data as expected. | Once you have double-checked that your file is set up correctly the first step to try is to re-downloaded the config. This rewrites all the machine settings from LaserSoft to the controller on the laser. |
| Optimize your art and run a simulation if the issue is just things being out of order. | |
| Try cutting a circle and make sure it’s circular and the start and endpoint match. Use digital calipers to make sure it’s within around ~.01mm of the dimensions specified in LaserCut. | |
| Shapes seem distorted | Cut a perfect square using low and slow settings and measure it… if it is truly distorted then there is an issue with the laser and it is down. If not it is your settings and you might be getting backlash from going too fast.
Try cutting a Kraken. You can find one in Crafty’s directory on the file server. This is a good example to detect if there is backlash, over/under-tightening of belts or misalignment of the rails. |
| The laser doesn’t move on the y axis but just keeps firing on the same area of the X axis. | Users sometimes fiddle with settings. Make sure you are not in rotary mode. (the green button on the inside right-hand side of the laser bed) |
| laser grinding and make foul noises and totally screwing up your cut | Somebody may have fiddled with the acceleration settings. Contact the steward to learn how to put them back. |
| Laser not firing | Check that the chiller is on
Check that the high voltage power is on (red button) Make sure your settings are correct in LaserSoft |
| “Door Protect” Error | Check that you are fobbed in. If you are not or your account is not in good standing it will give you this error.
The door is open. Close it. |
| Not cutting all the way through even though the test cut worked | Your material is possibly bowed, uneven or the design has too many fluctuations for your settings.
|
| The cut is burning away too much material / the kerf is too wide | Adjust the focus or drop the power |
| My details are burning away | Speed up or reduce power
Widen the design to account for how the material burns |
| Small things in my design are too burned up or burned out | Put the small cuts on another layer and use less power |
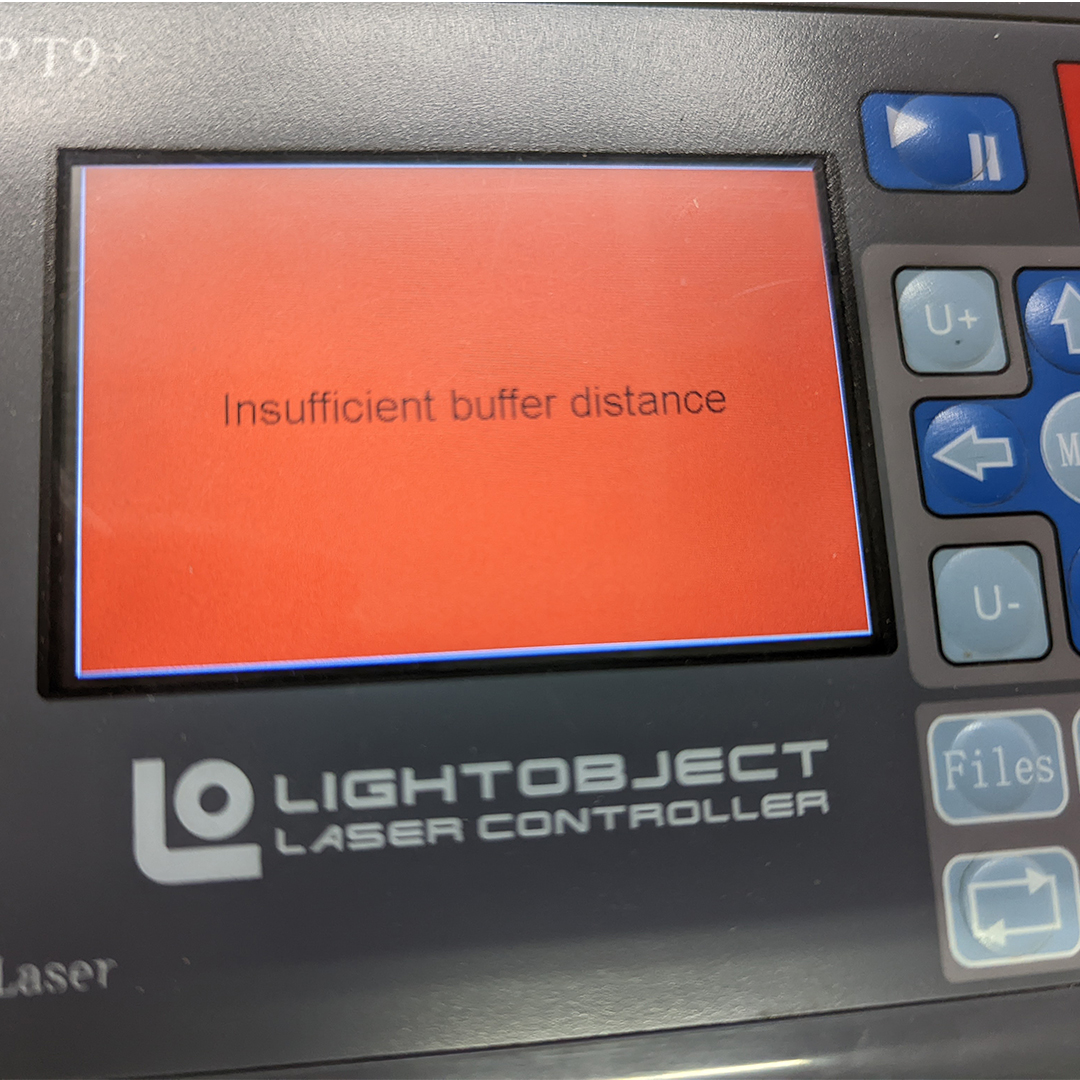
| “Insufficient Buffer Distance” | If you try to etch too close to the outer “live” area edge the laser will give this error. The bummer part is it will not always give the error when you run the box. sometimes it will start your job and then throw the error once you get to the part of the art that needs the buffer zone to etch. There is no easy way to recover for that area.
Hack: doing your etching in the middle of the bed whenever possible. Long term solution. Map the live area of the bed for etching. It will be less than 1300mm x 900mm
|
| LaserSoft interface is unintelligible | Sometimes LaserSoft manages to reset its language to Simplified Chines, which our English version of Windows can’t deal with. To fix, use the Help menu (the last menu on the right) and select English as shown here: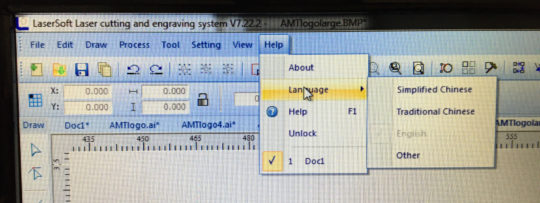 |
| The laser is not firing | If in Cut Mode: Check that you have a value specified in the Corner Power setting. If you do not specify a power it will not etc. In Etch Mode: Ensure you have a power of 10 or 11 or more. The beam generated under the 11 power setting is extremely faint and doesn’t burn some materials. Mechanical fail: Check the buttons on the right side of the laser near the front. There are two buttons for both high voltage and normal power. If the lower button is not glowing red, there is no power going to the laser tube and it cannot fire. |
| Material is flaming | Flame-up can be caused by either very flammable material not suited for laser cutting OR by the Air Assist being turned off or taken out of default mechanical parameters. One of the ways the Air Assist can be turned off is in the Layer Parameters under the “Blow” checkbox. Go to the Layer Parameters dialog box (this is where you add power and speed settings):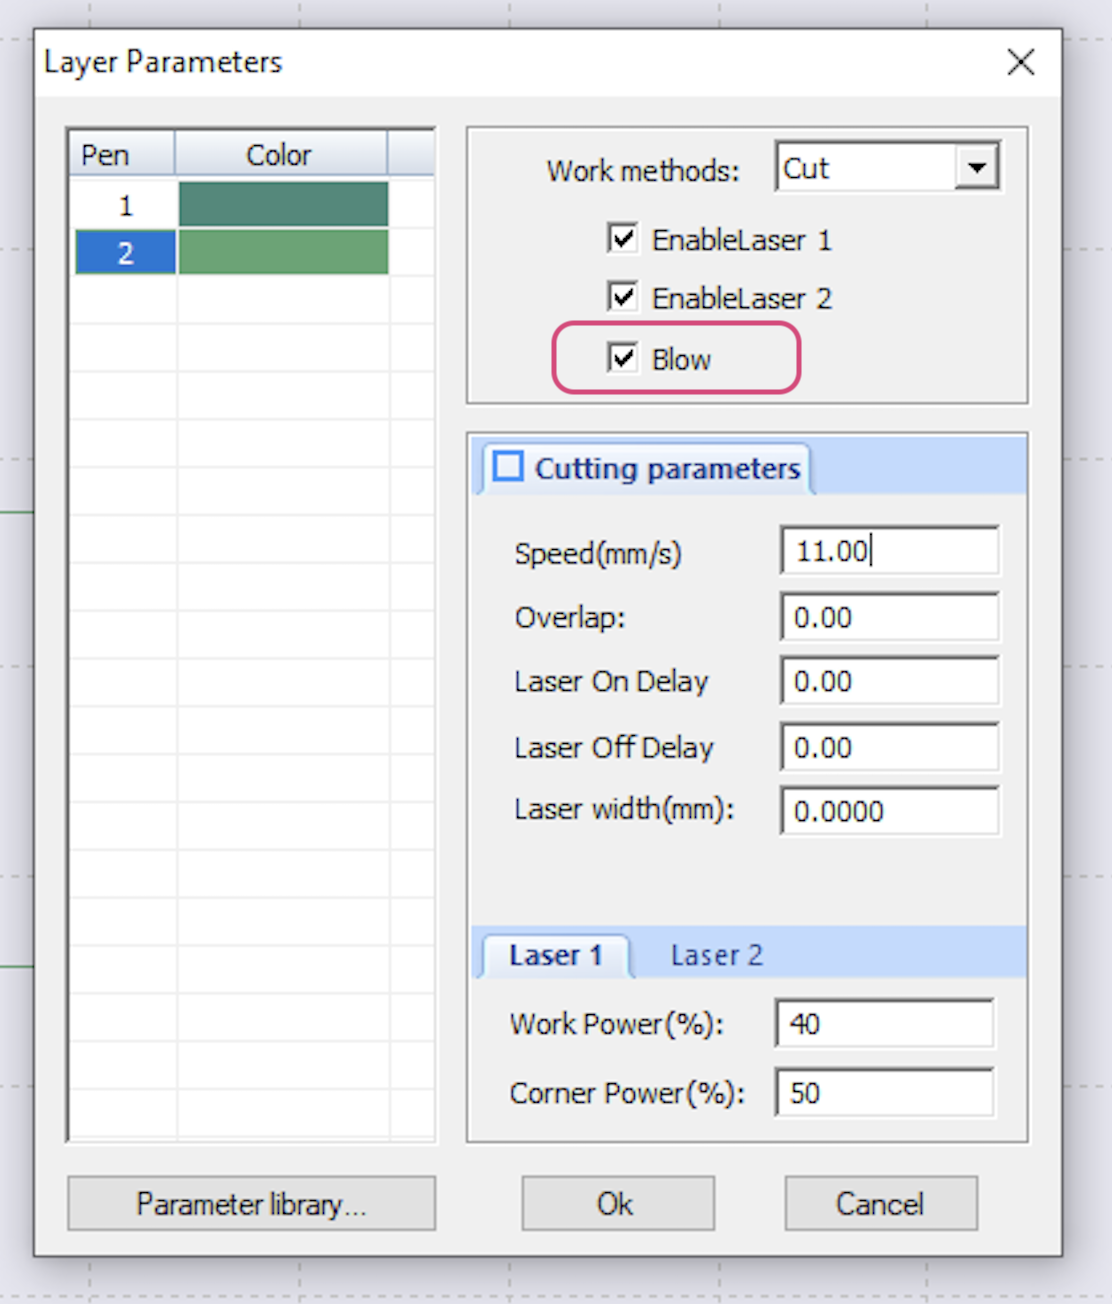 |